Riddleyo's 1986 GTS 20V

User avatar
riddleyo
Club4AG Enthusiast
Posts: 106
Joined: Sun Mar 24, 2013 4:48 pm
Location: Ohio

Riddleyo's 1986 GTS 20V

Postby riddleyo » Wed Jan 08, 2014 6:47 pm

Car: 1986 Toyota Corolla GT-S
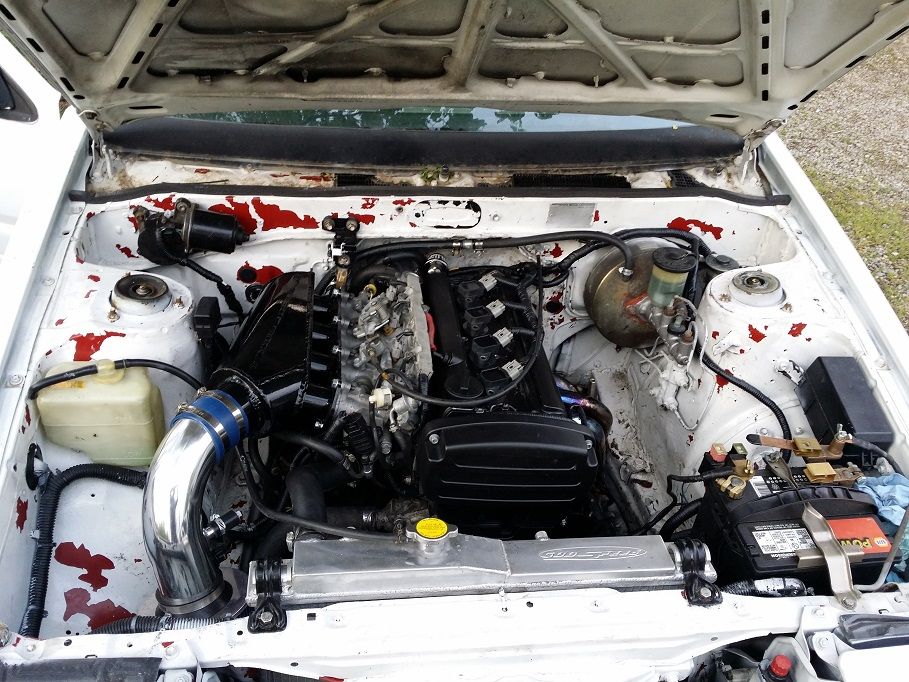
Engine: 4A-GE 20V Blacktop
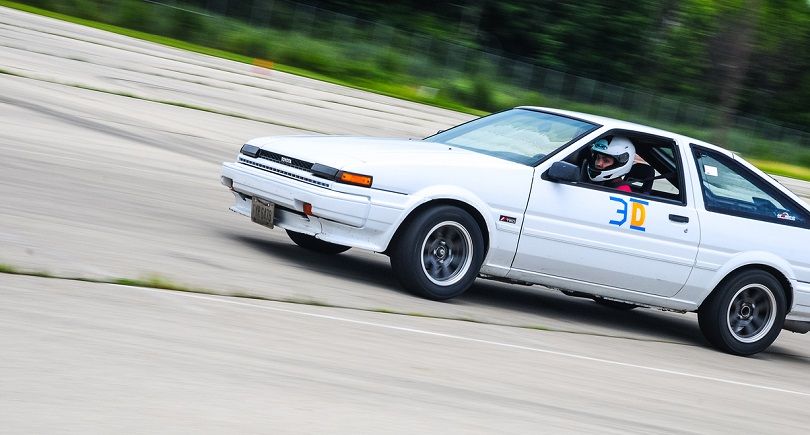
Purpose: Street + Autocross

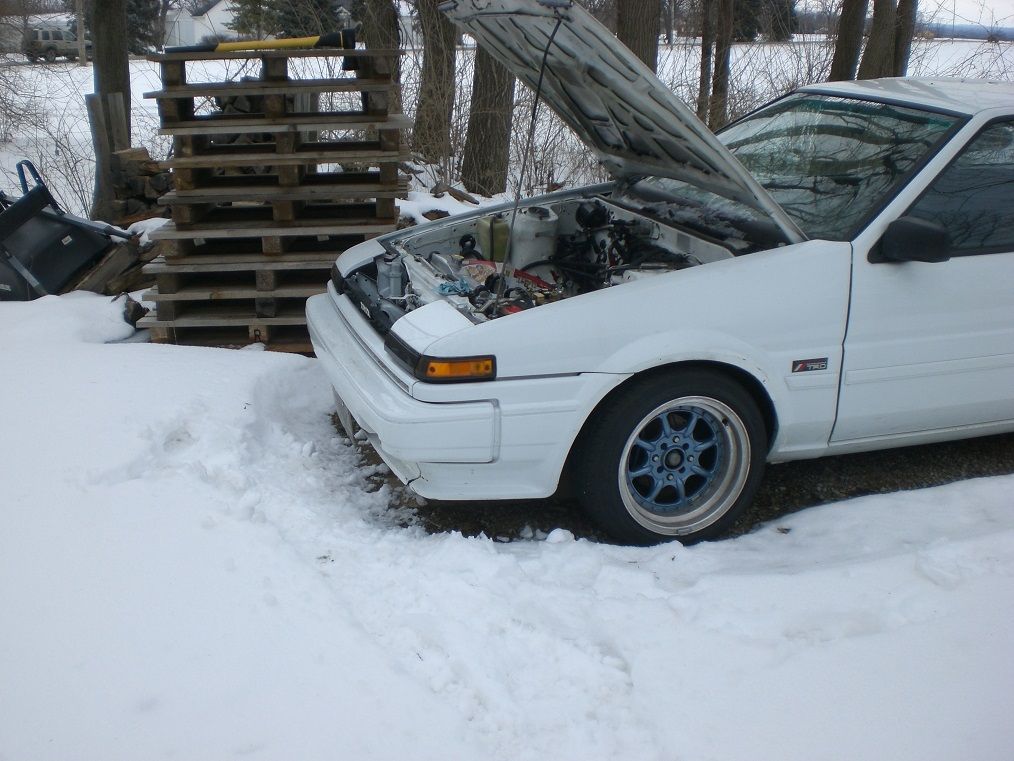
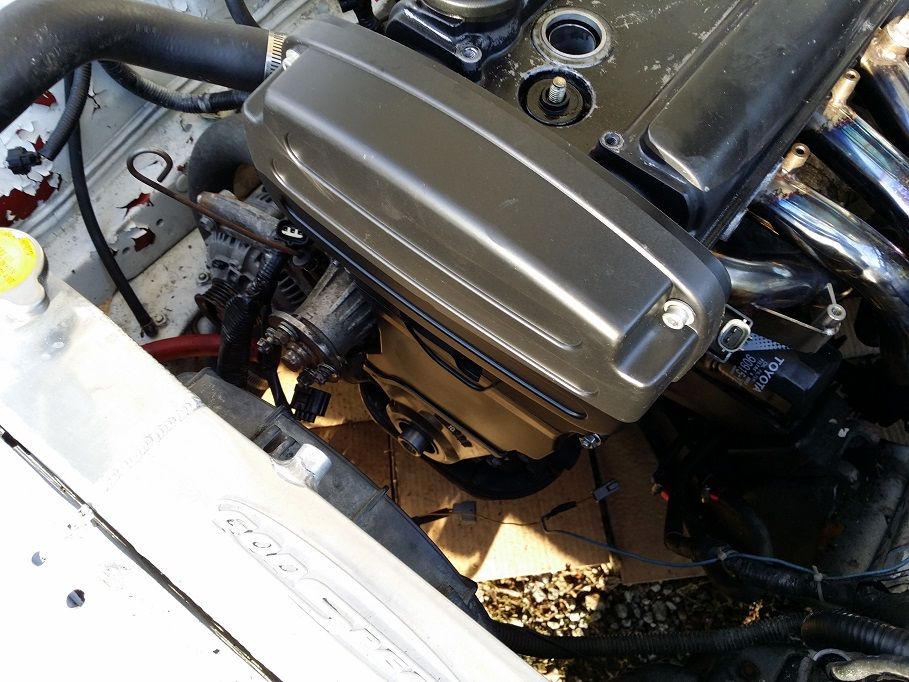
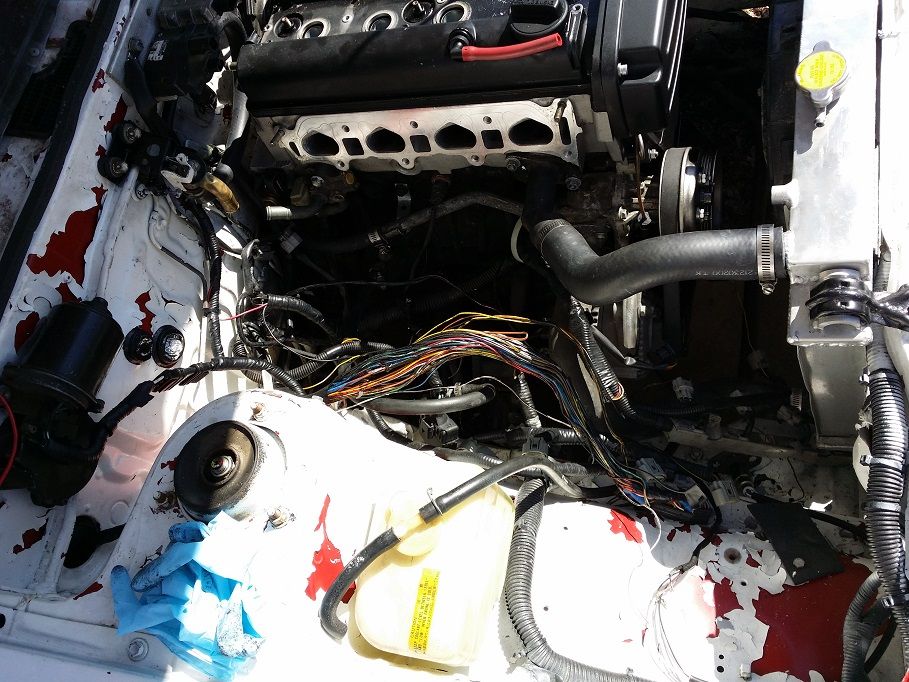
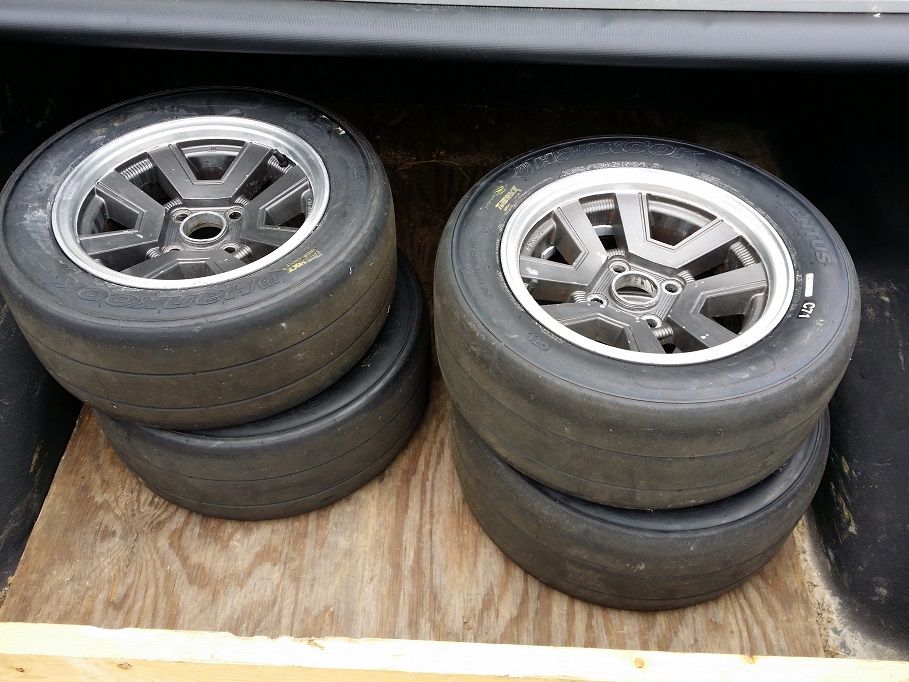
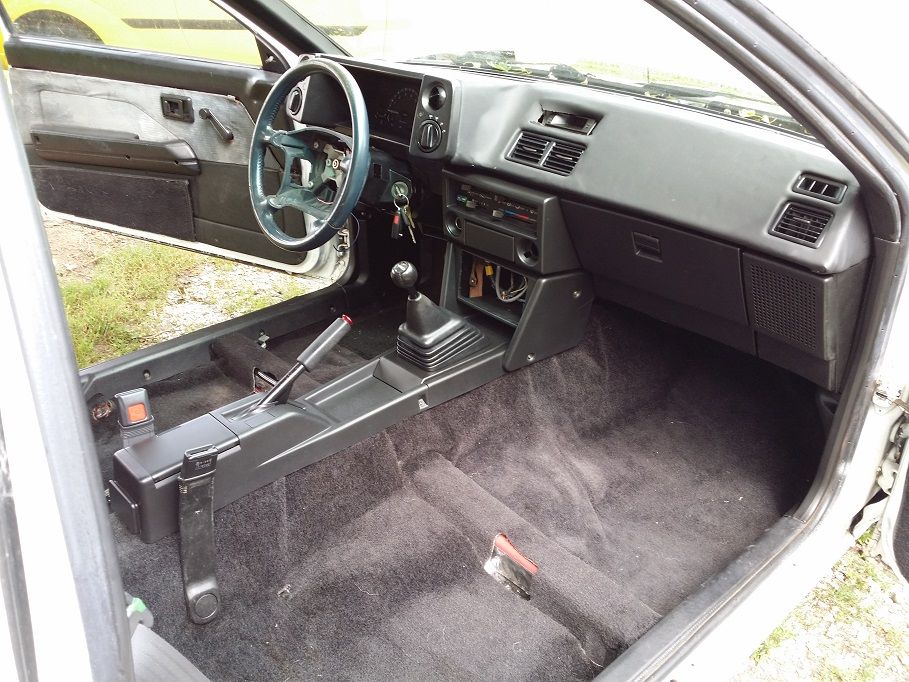
Pictures of the day I bought it:
Image
Image

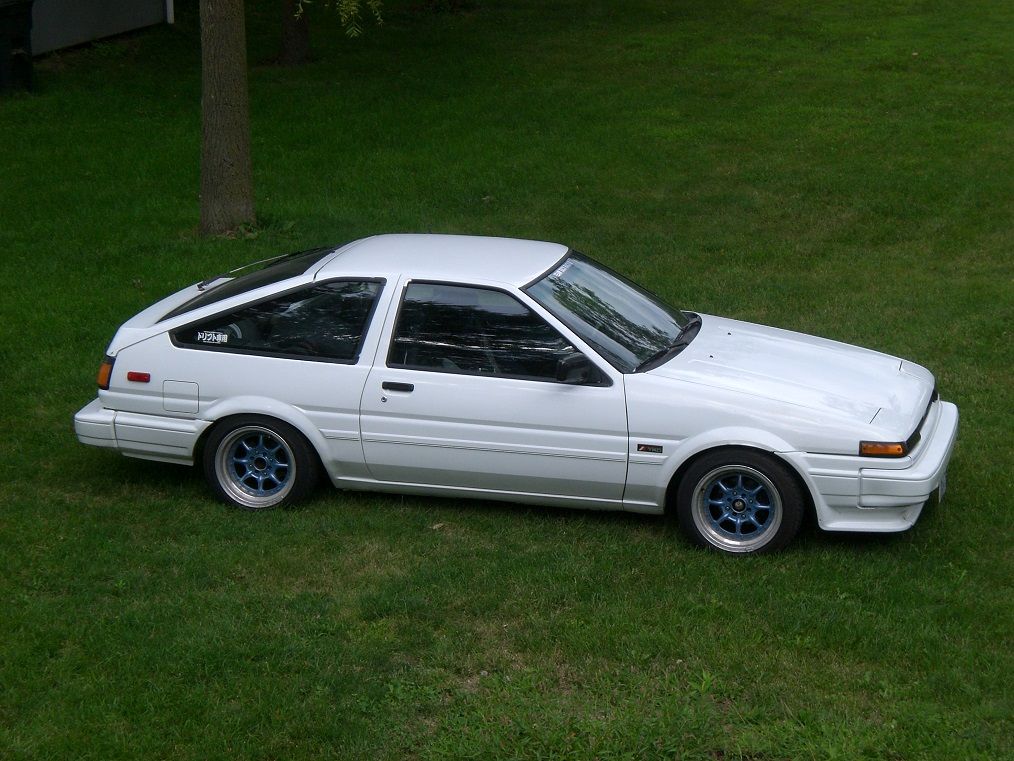
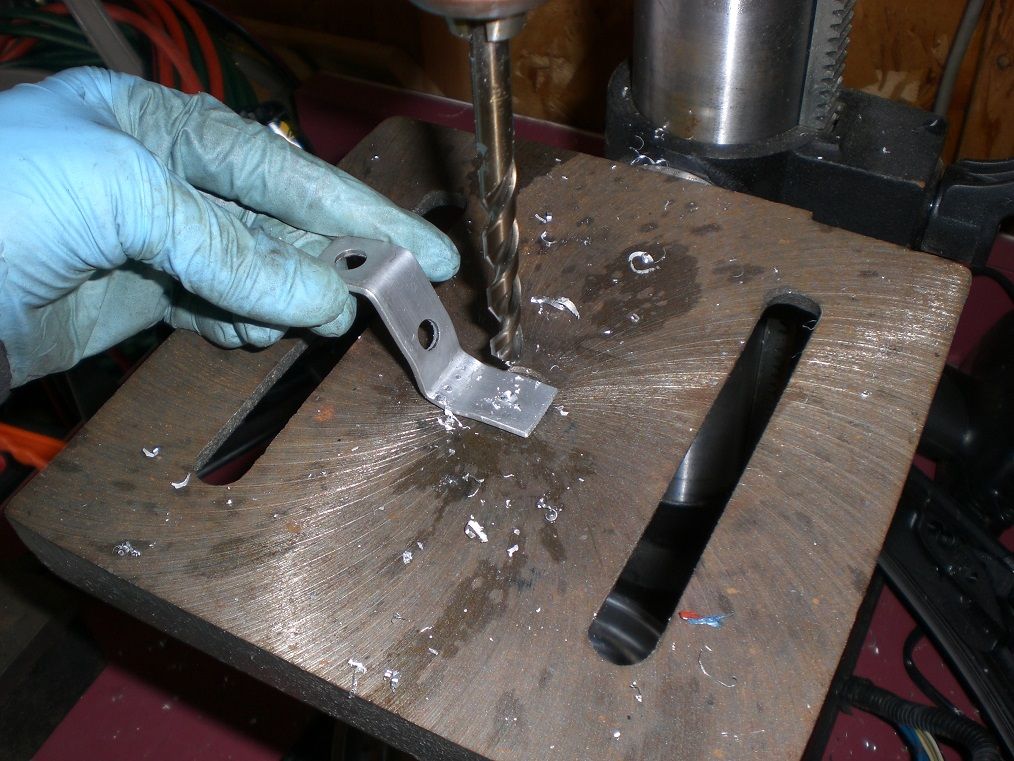
This is my 5th Toyota project - I got tired of the cramped workspace of MR2s and the FWD of the celicas, so now it is time for a beloved FR. I bought this AE86 with a 20V swap already complete in late 2013. However, the car had a few issues and the car needed some TLC.

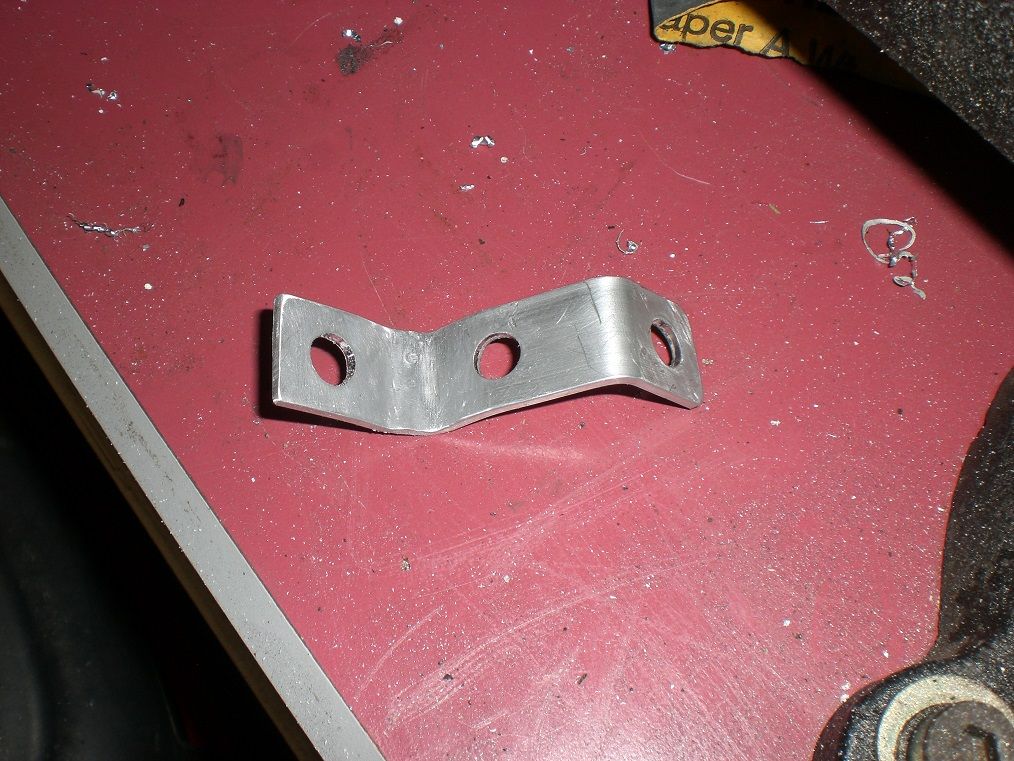
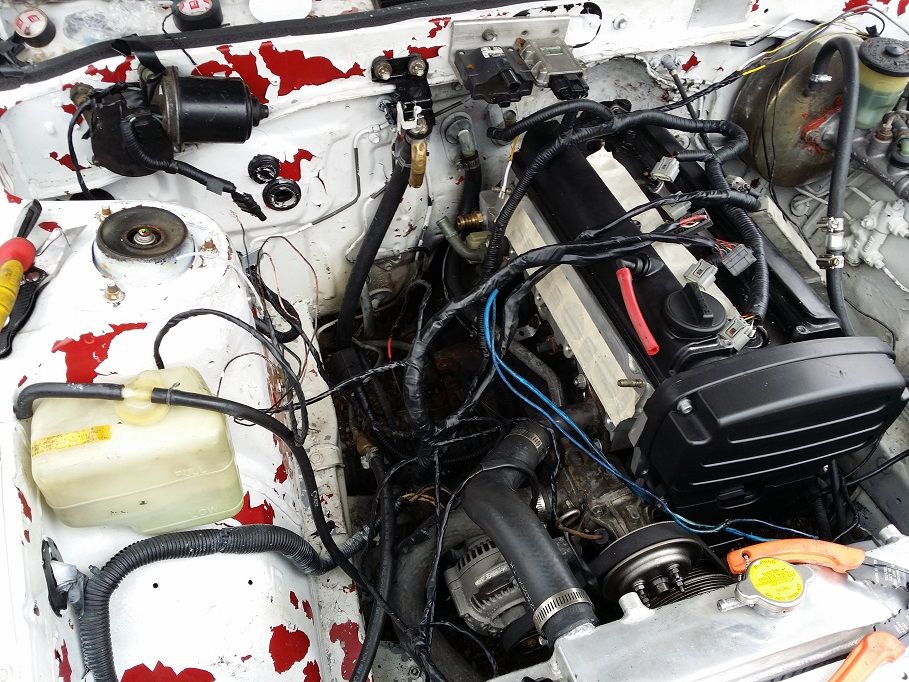
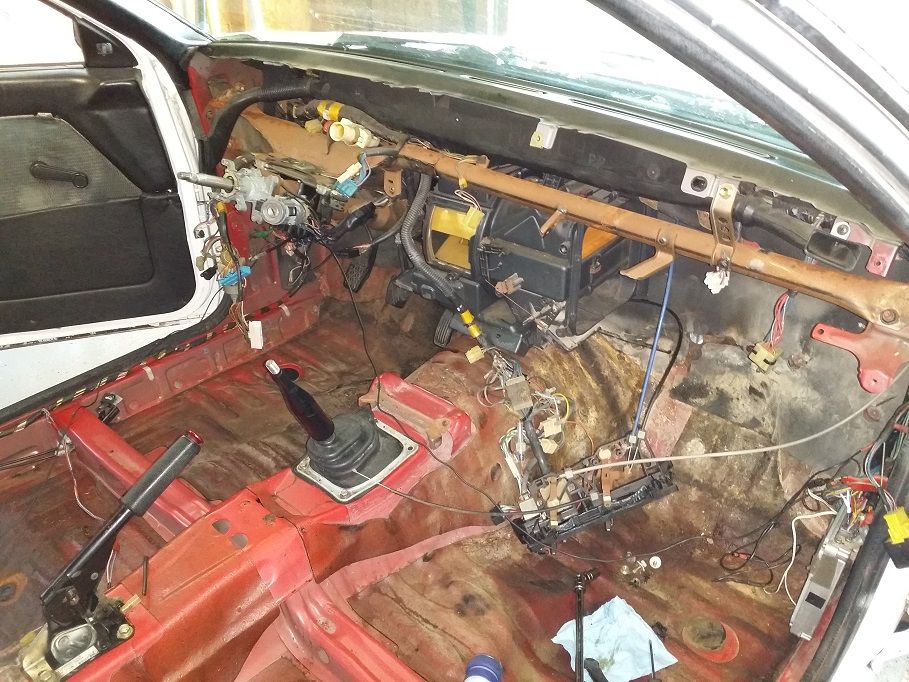
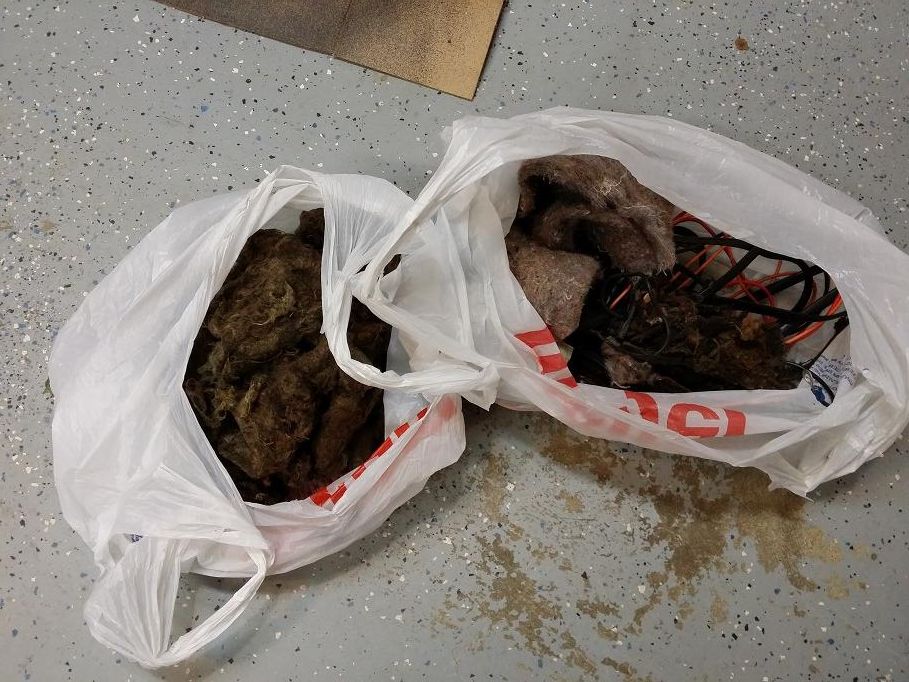
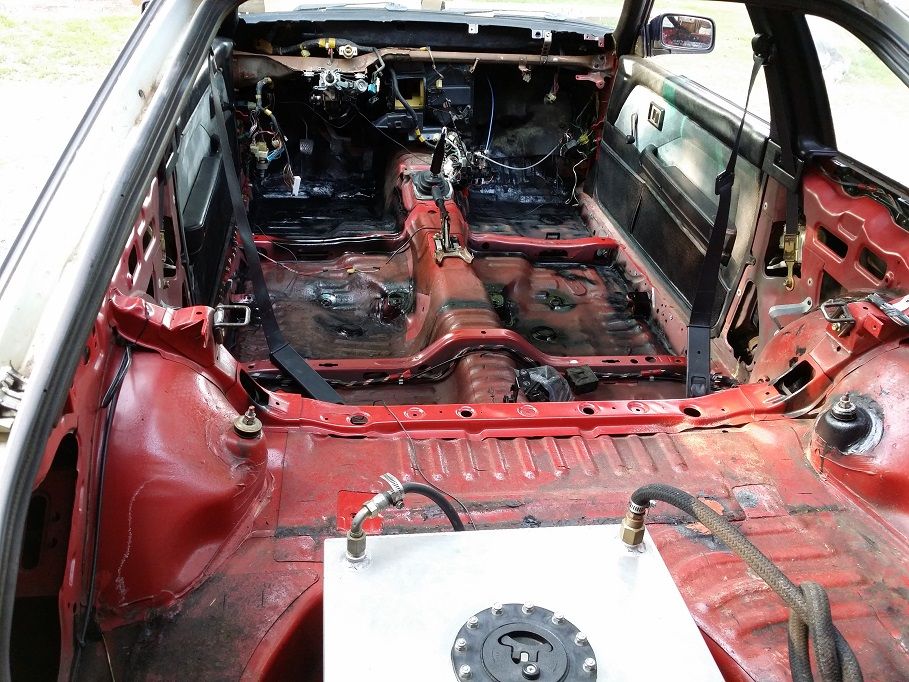
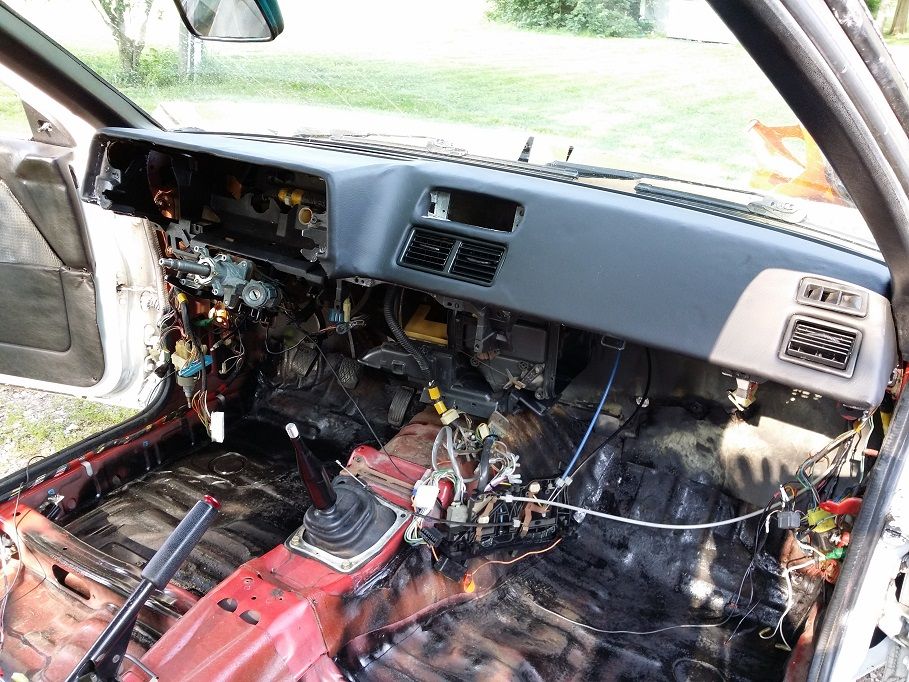
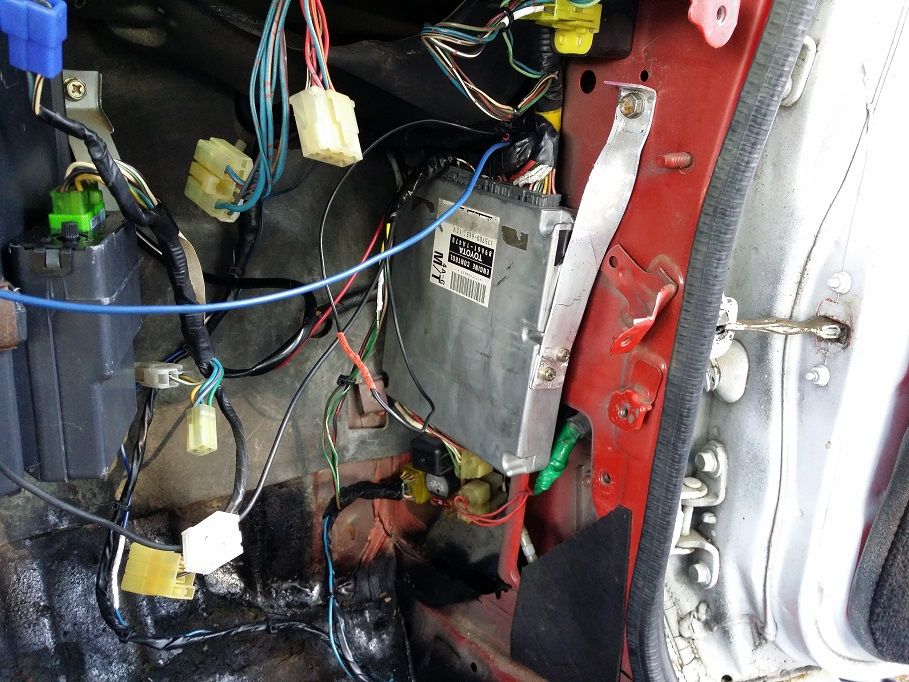
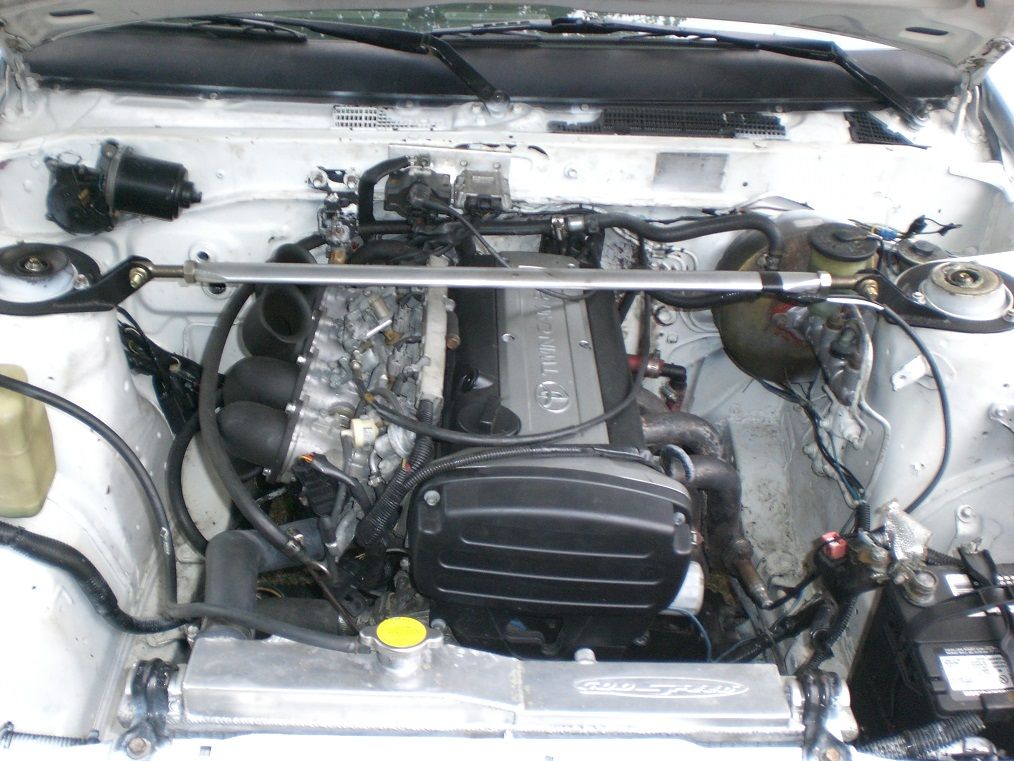
  • Unfortunately the firewall had been bashed and the wiring loom was hacked up. Started soldering and heatshrinking all connections
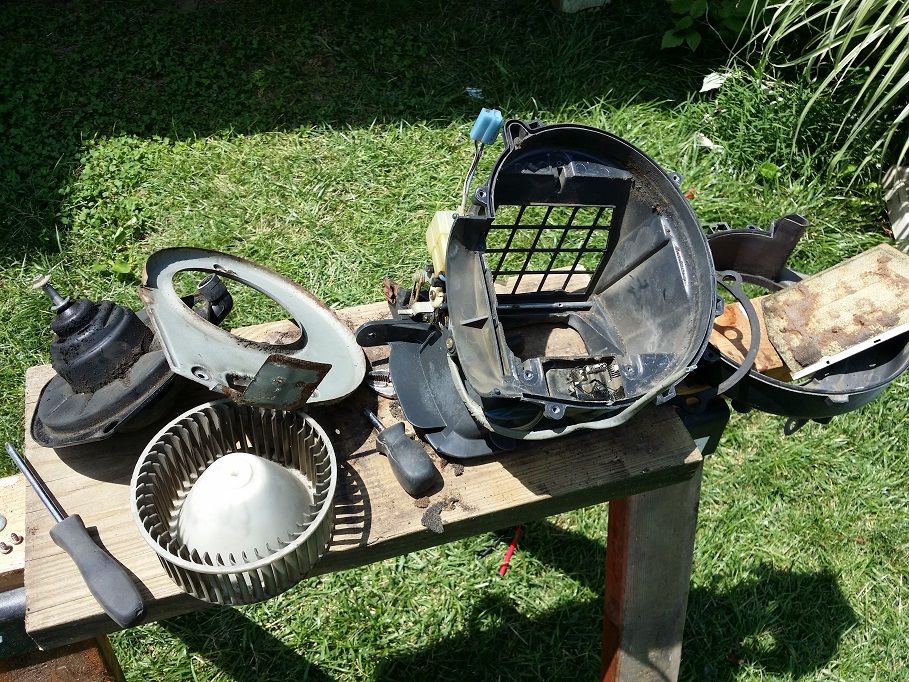
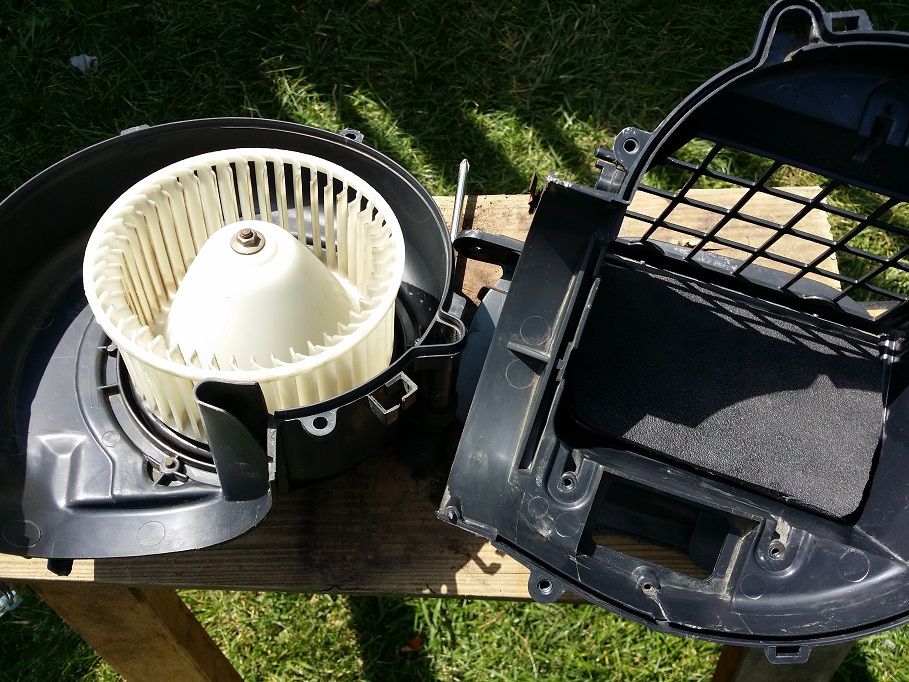
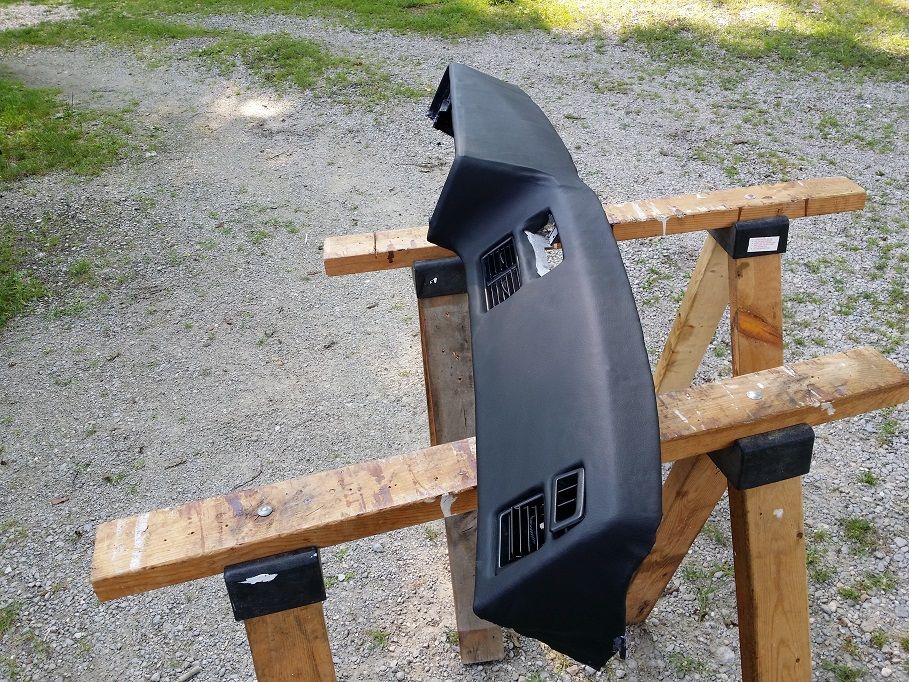
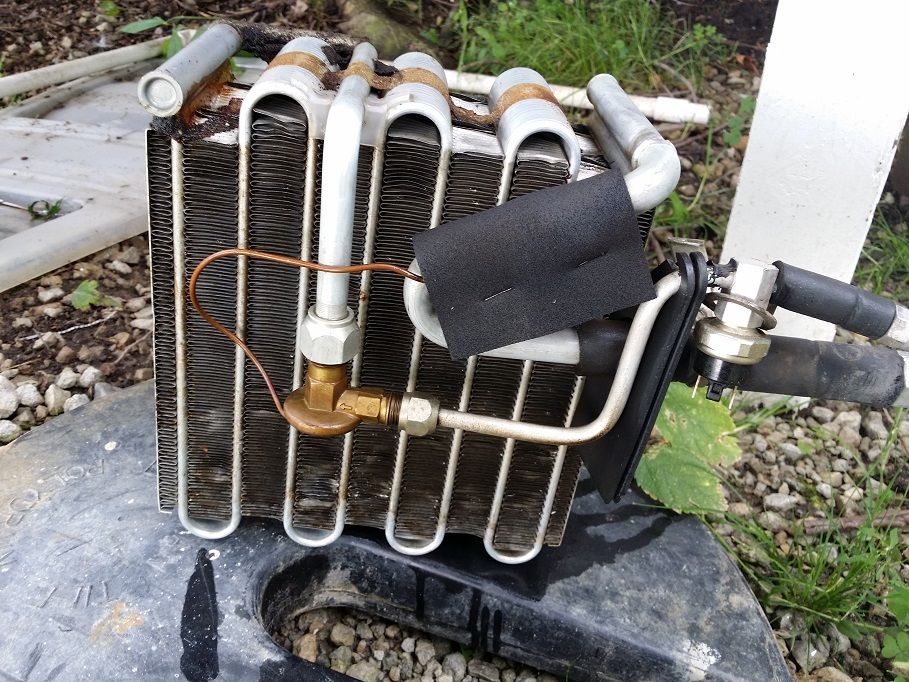
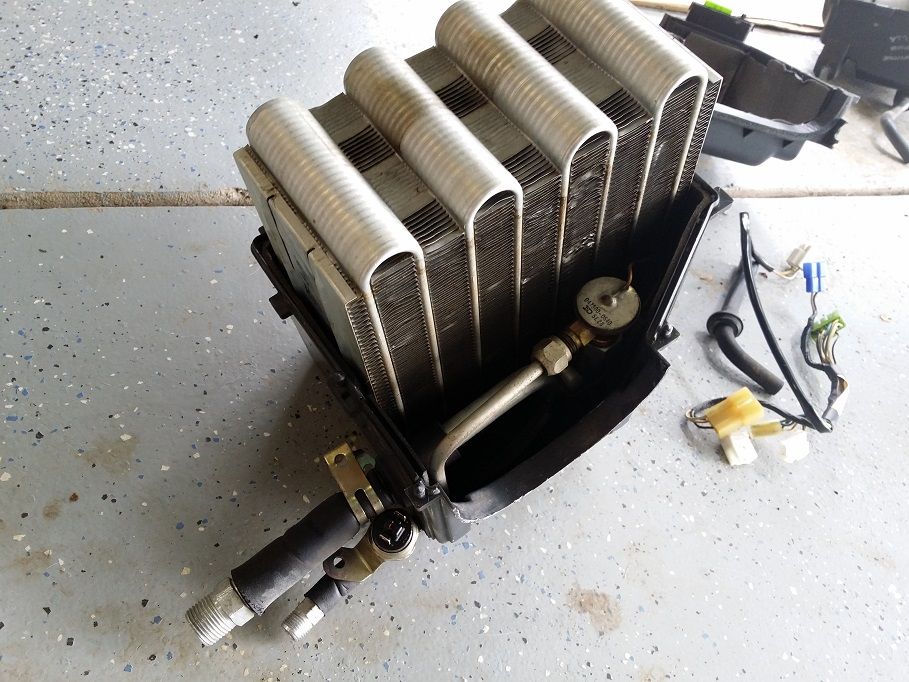
  • No heat, no blower, no windshield wipers - got to wire trace these at some point
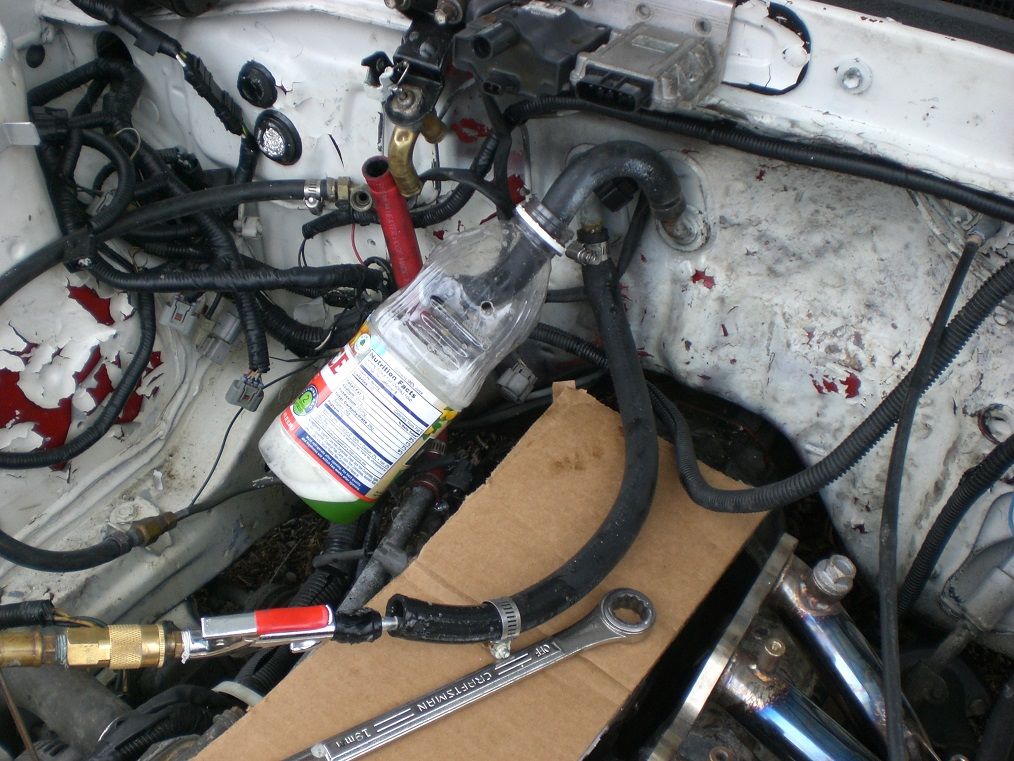
  • Coolant lines incorrectly routed with brittle plastic barbs
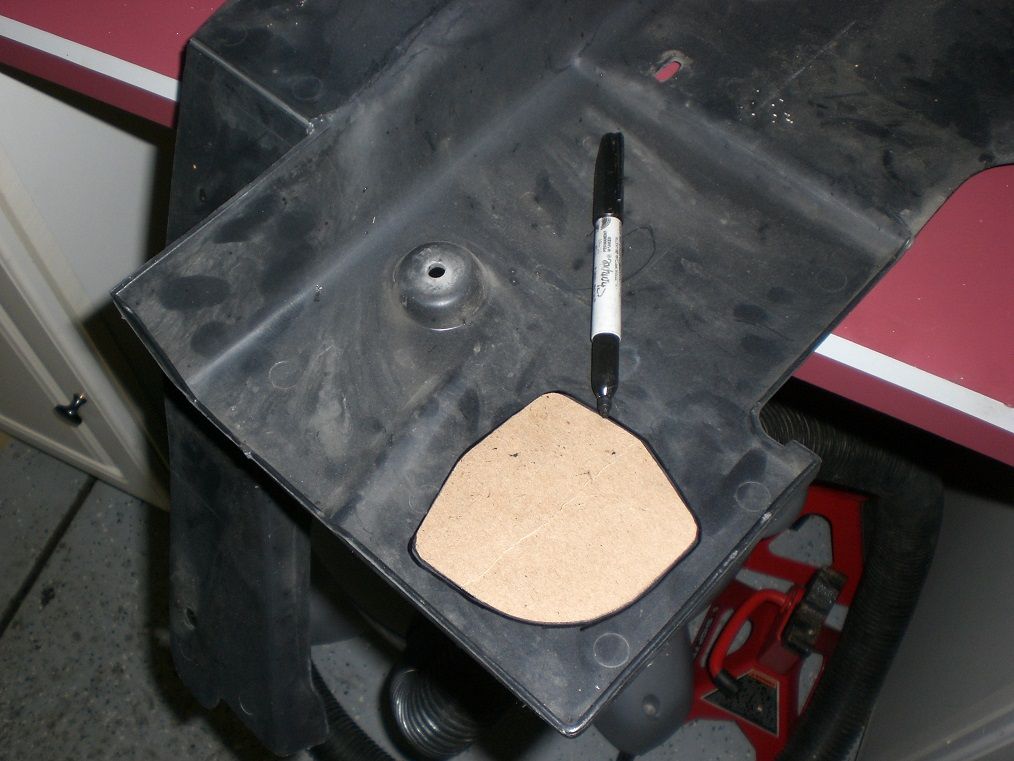
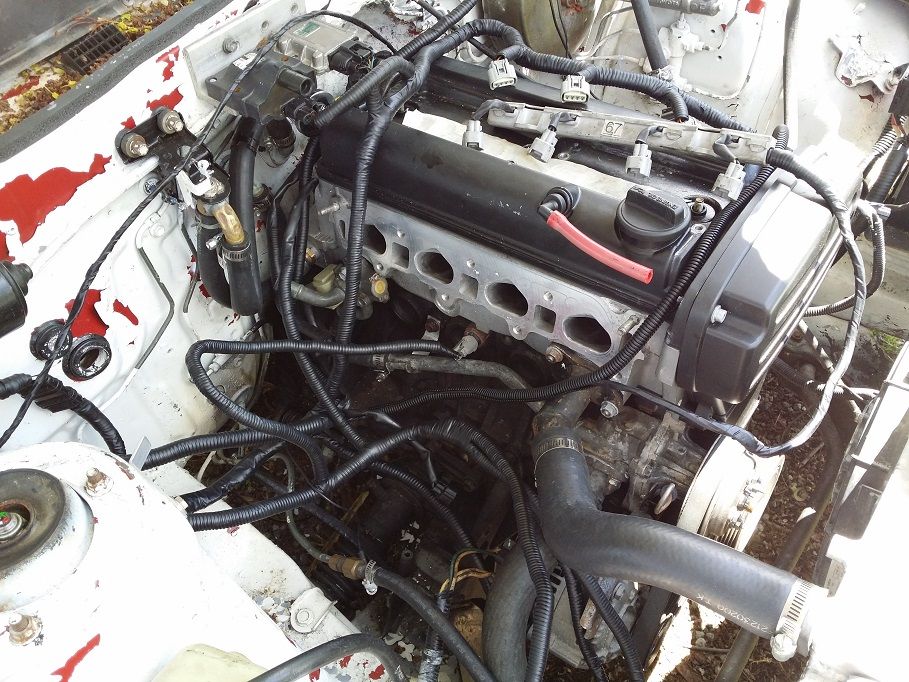
  • Added a plenum for air filtration
  • Replaced windshield wiper motor
  • Fixed vacuum, PCV, IACV leaks and filtration
  • Redline MT-90 Transmission fluid
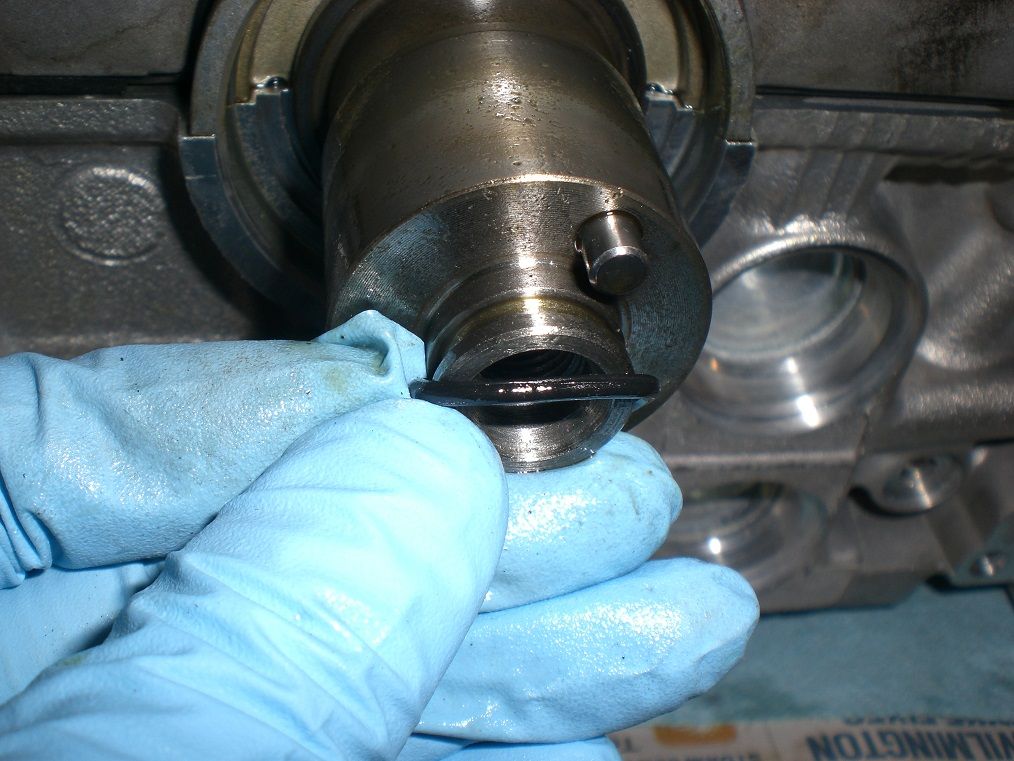
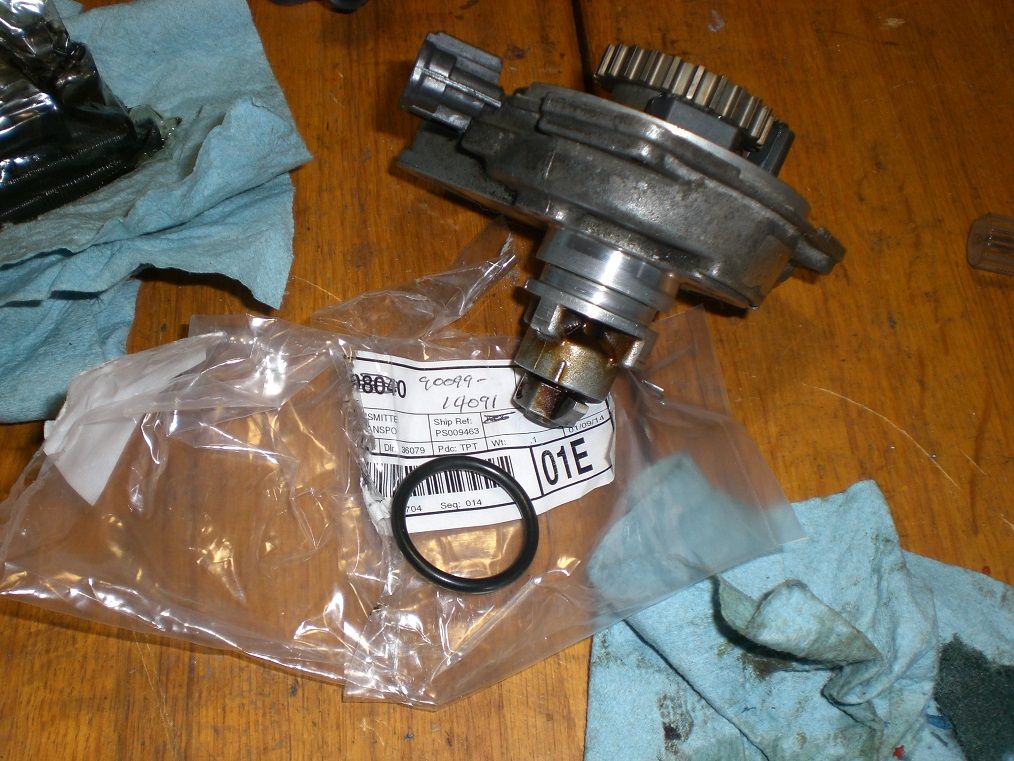
  • Common rear transmission seal leak fix
  • Mobil 1 5w30 + Magnetic Oil Drain Plug + OEM Toyota Oil Filter
  • Window regulator replacement (stripped crank gear)
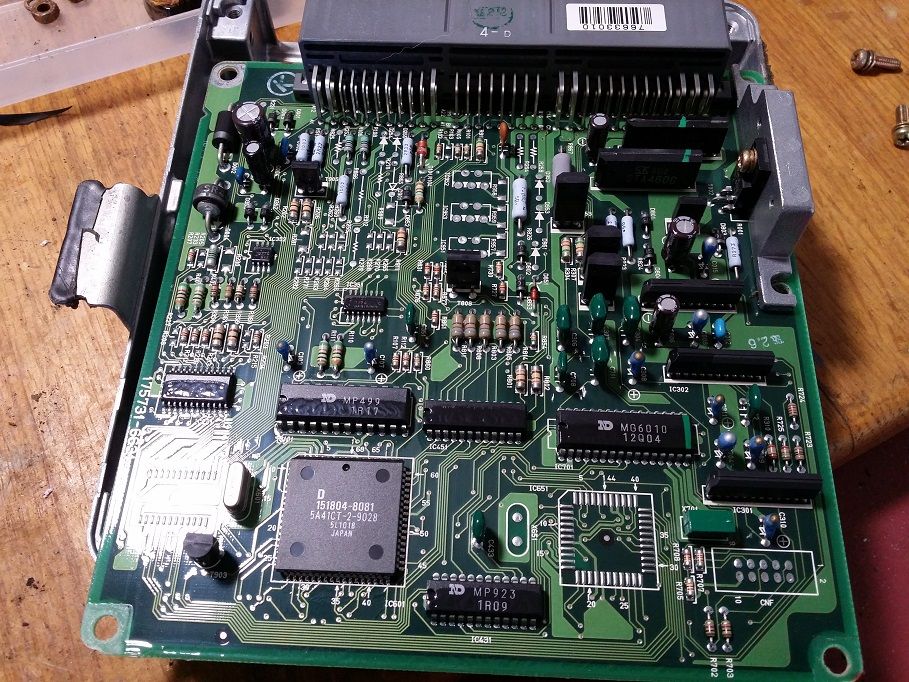
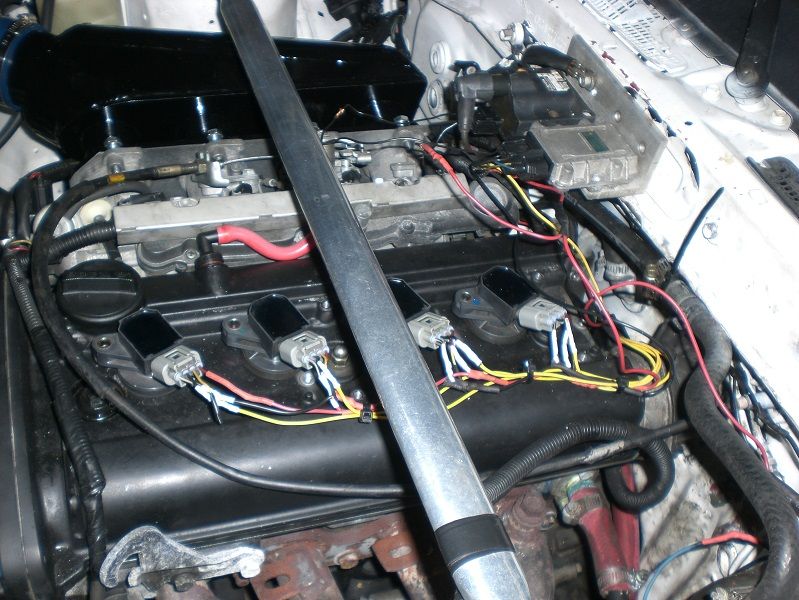
  • The next thing was the ignition was finicky and dying so I switched to the lazy man's Coil On Plug (Ignition coil and Igniter still connected). Wiring not finalized:
Image

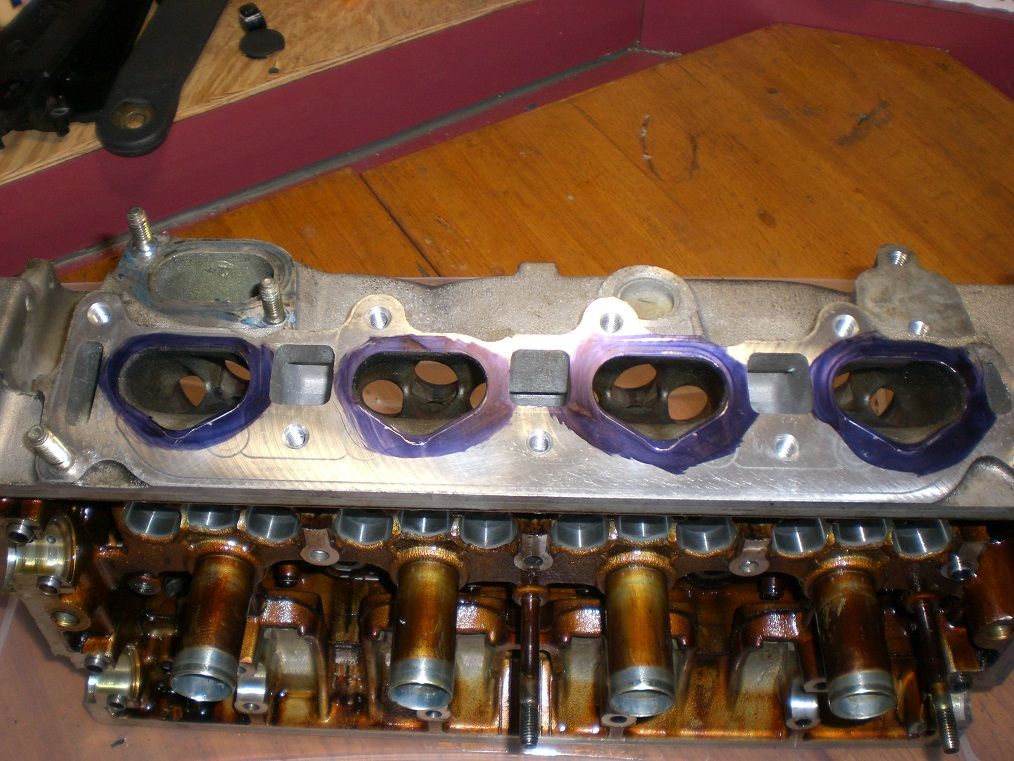
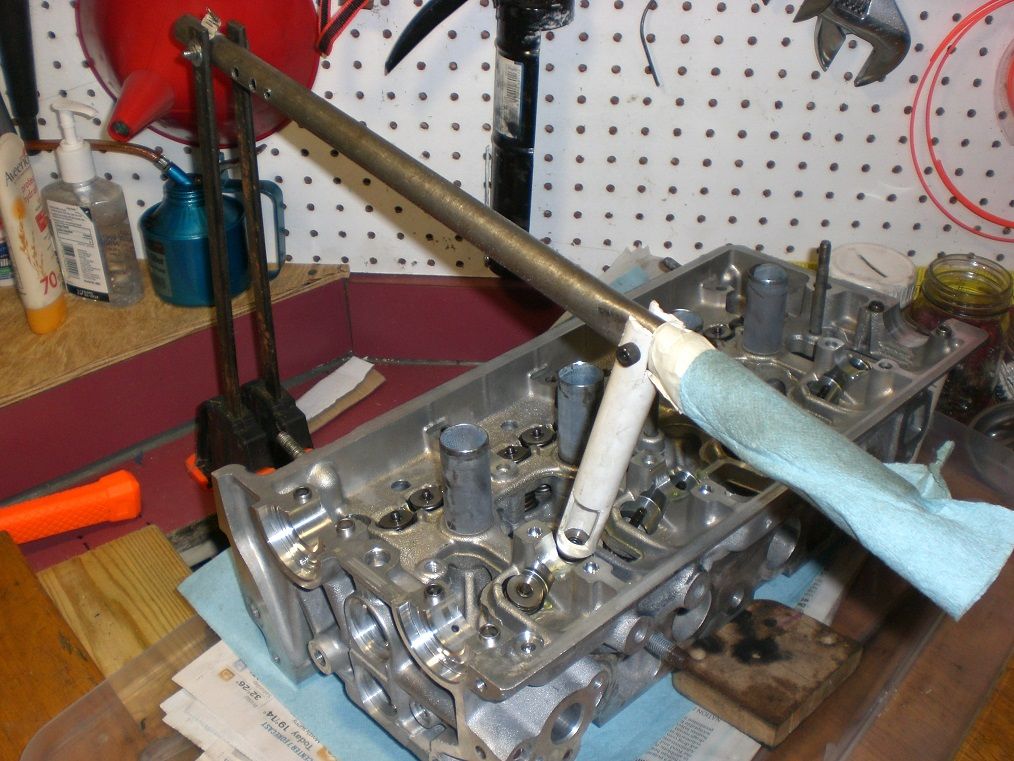
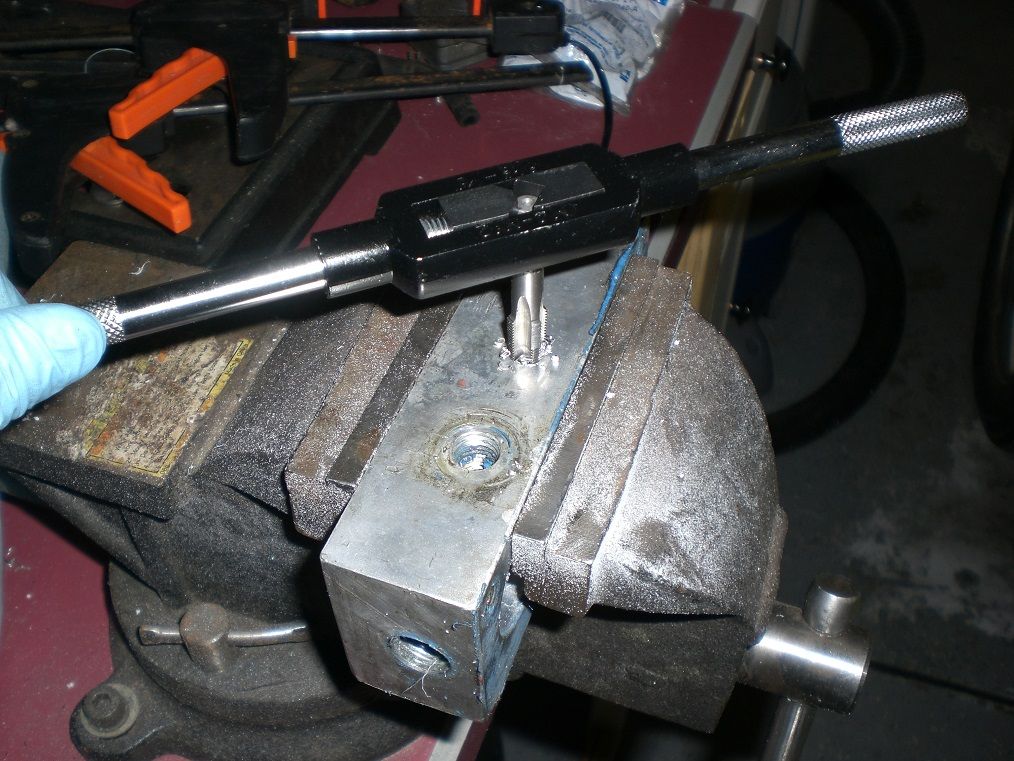
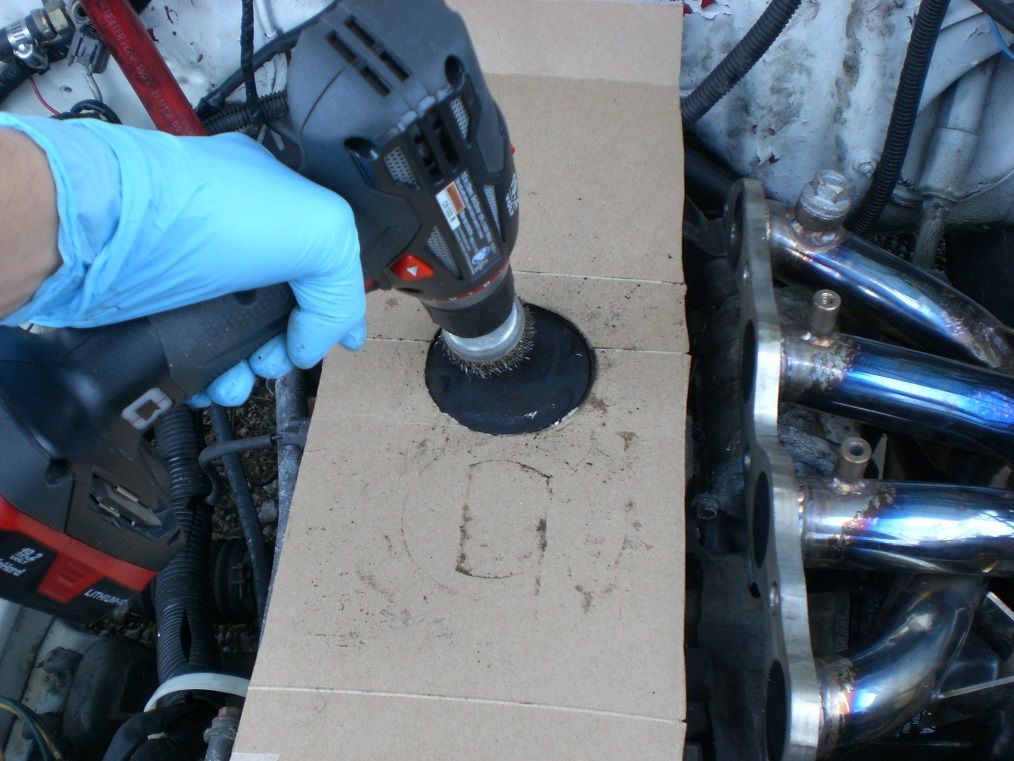
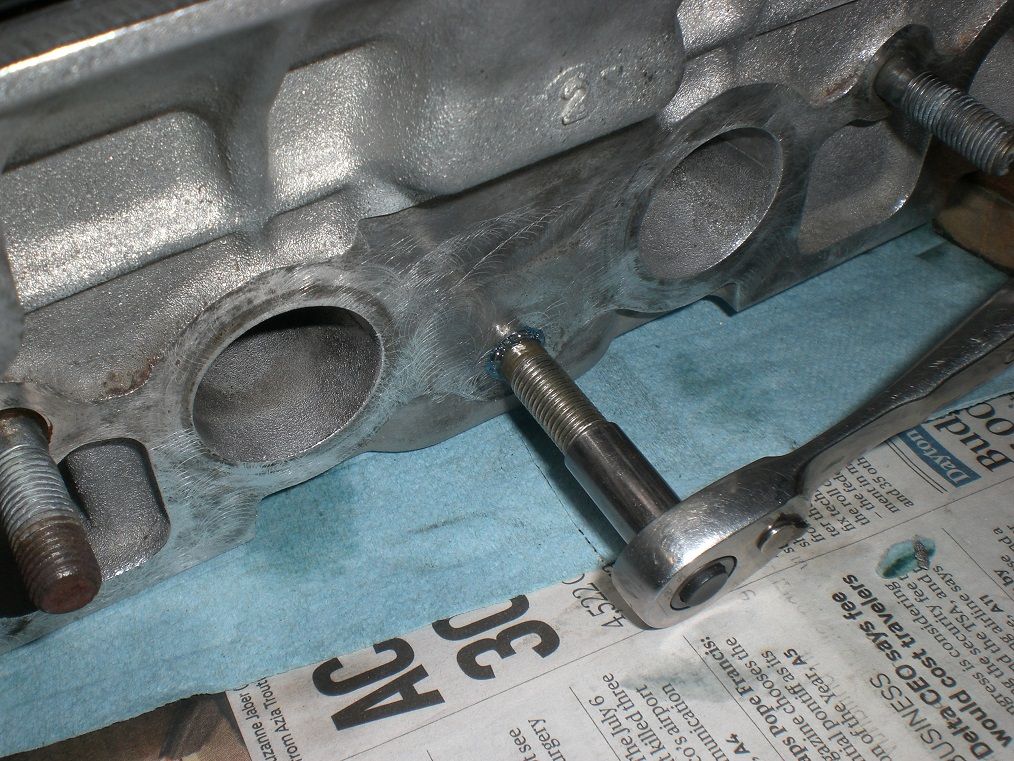
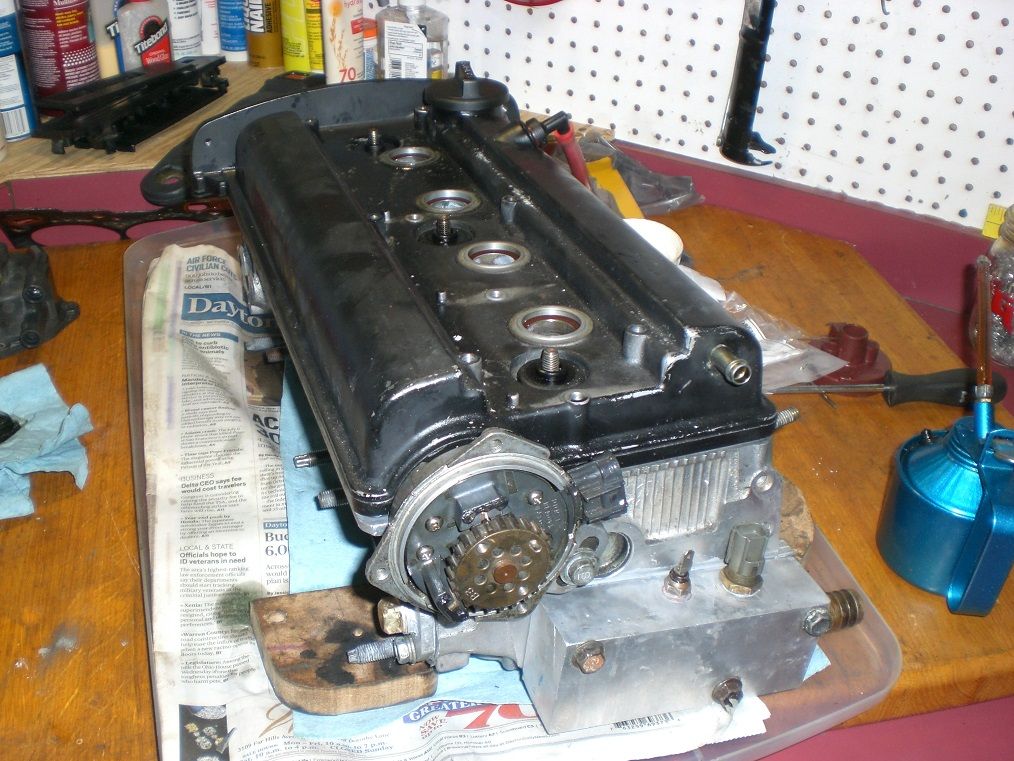
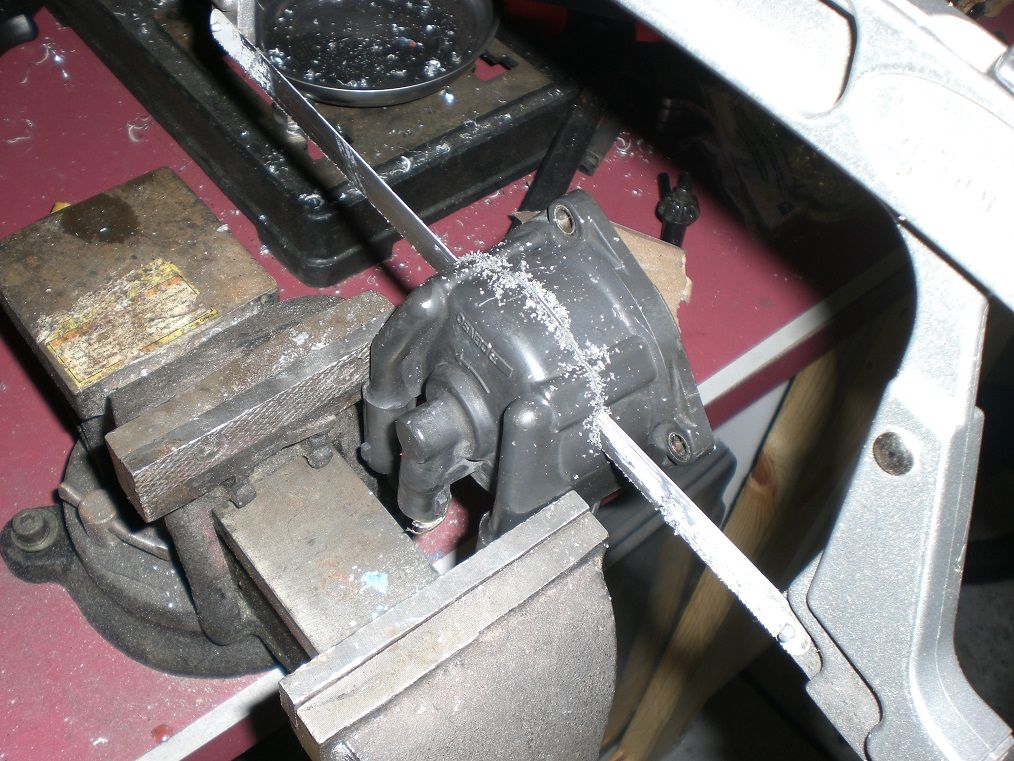
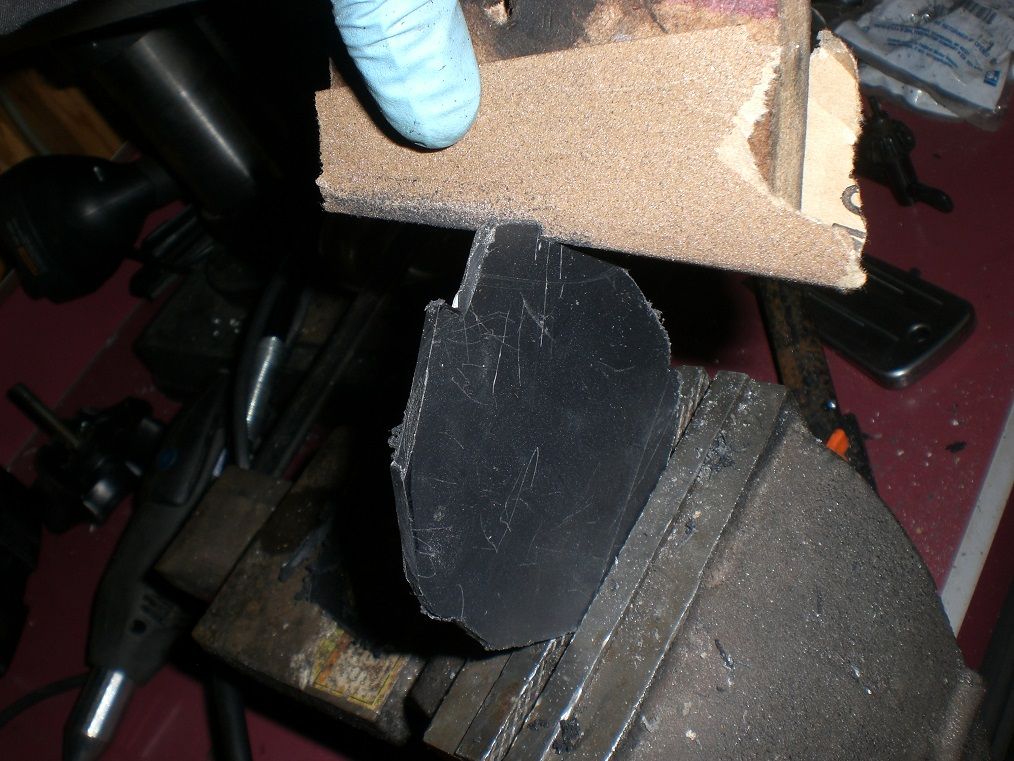
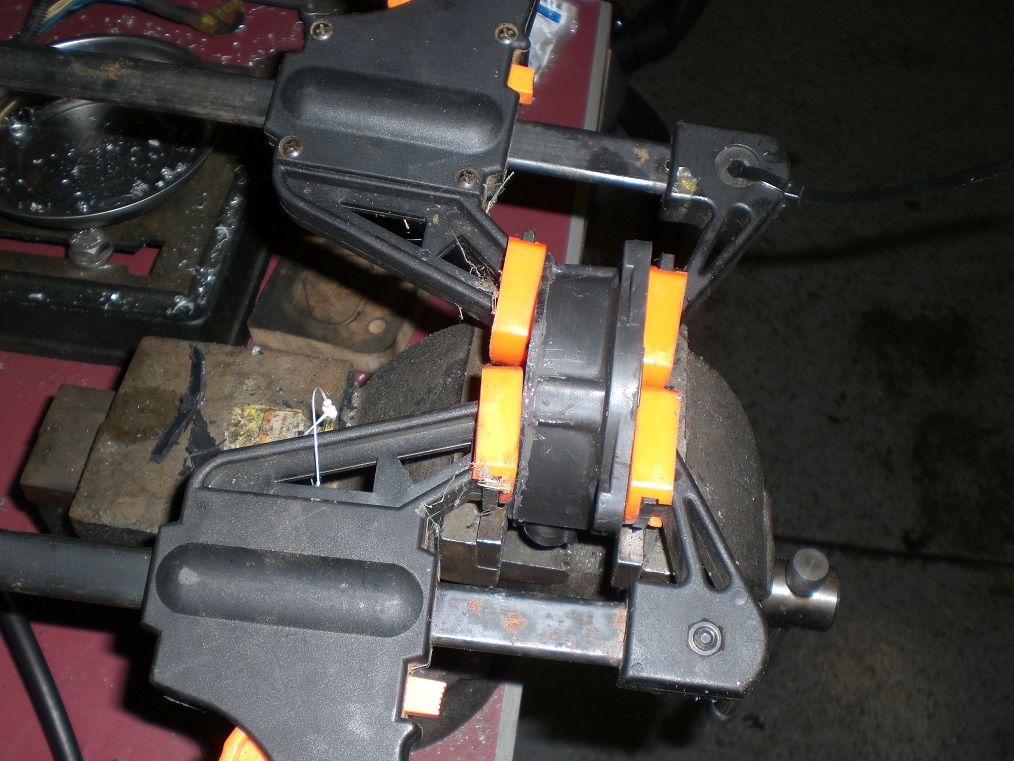
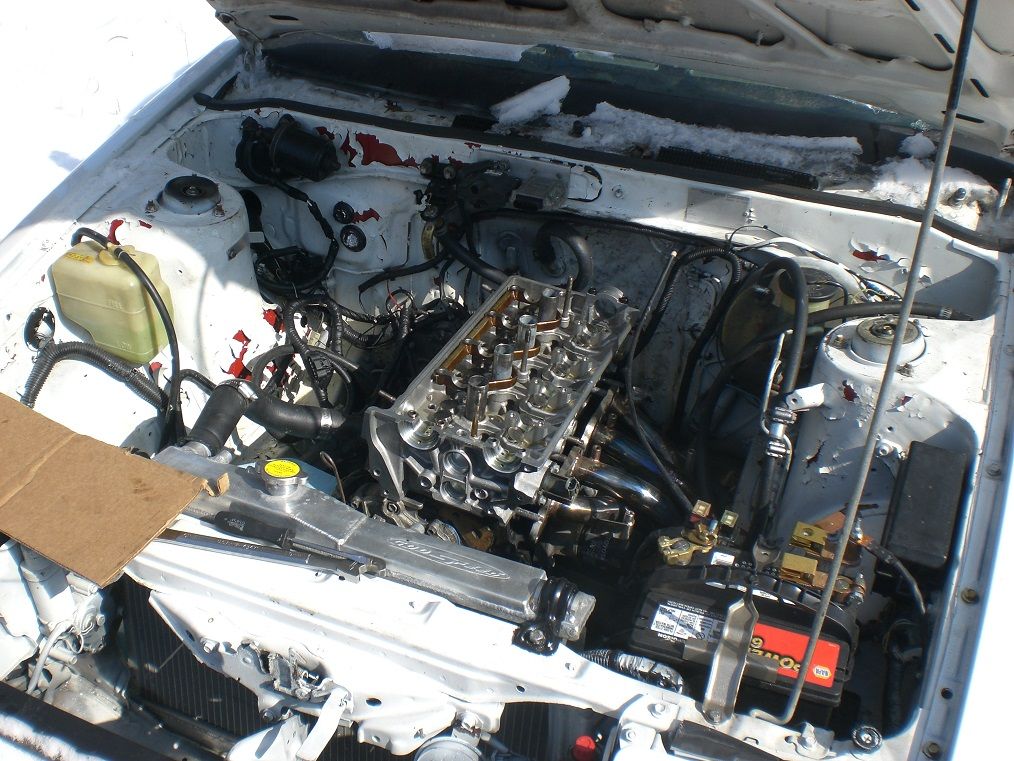
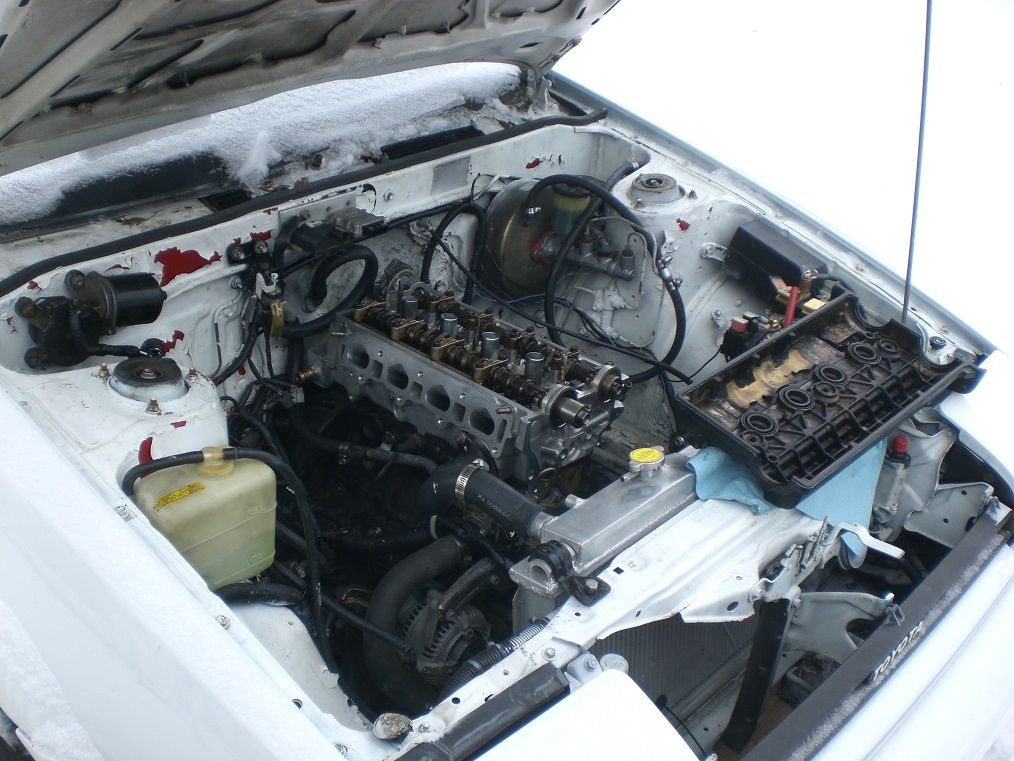
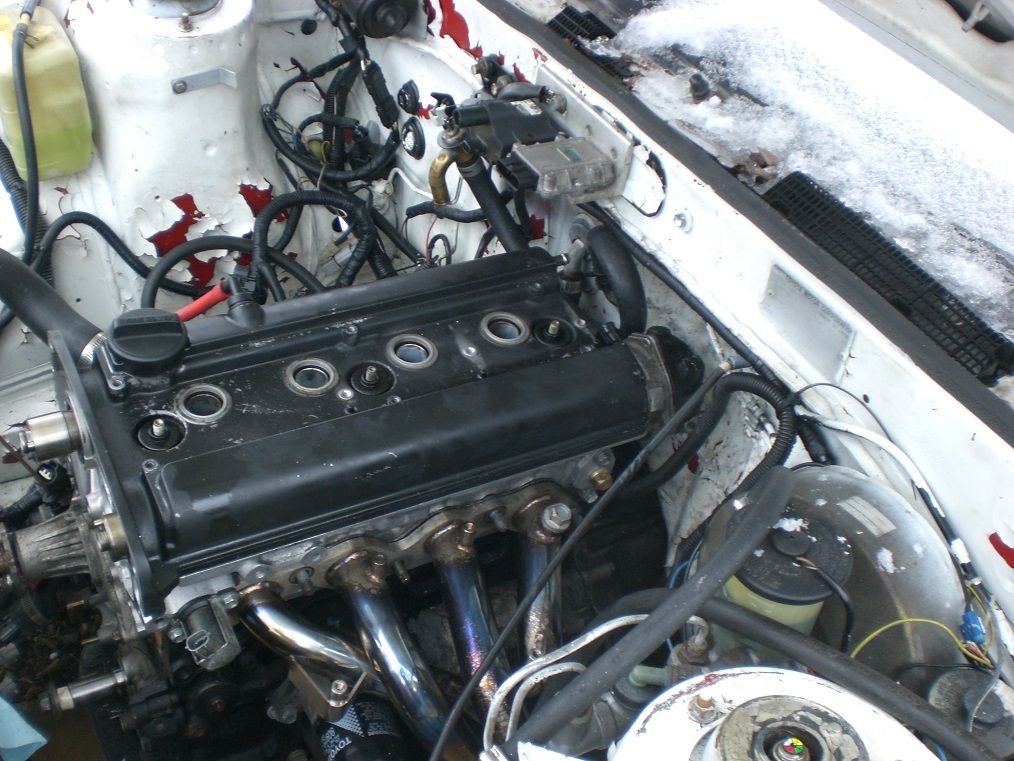
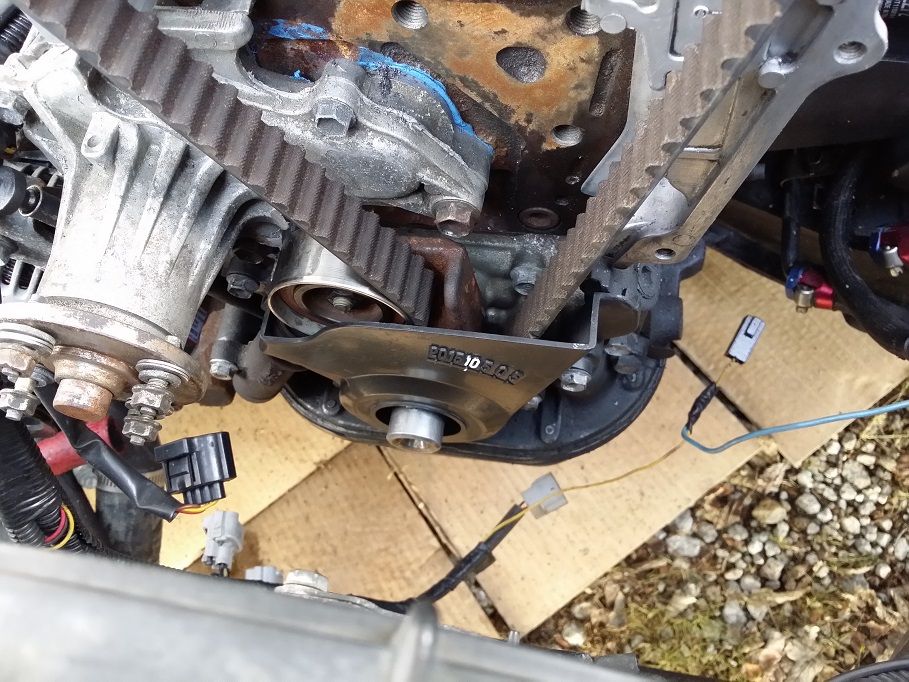
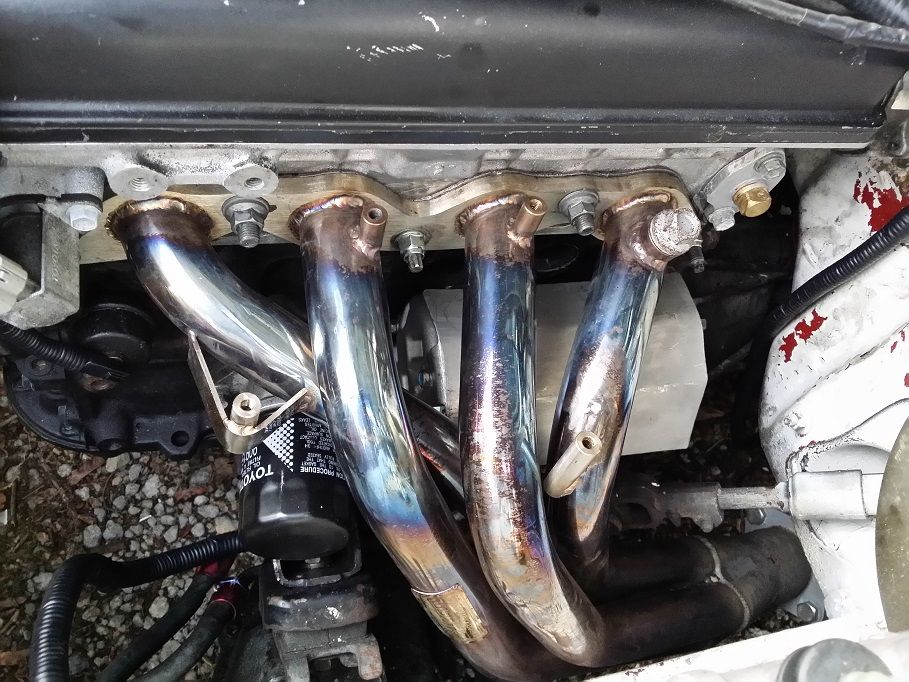
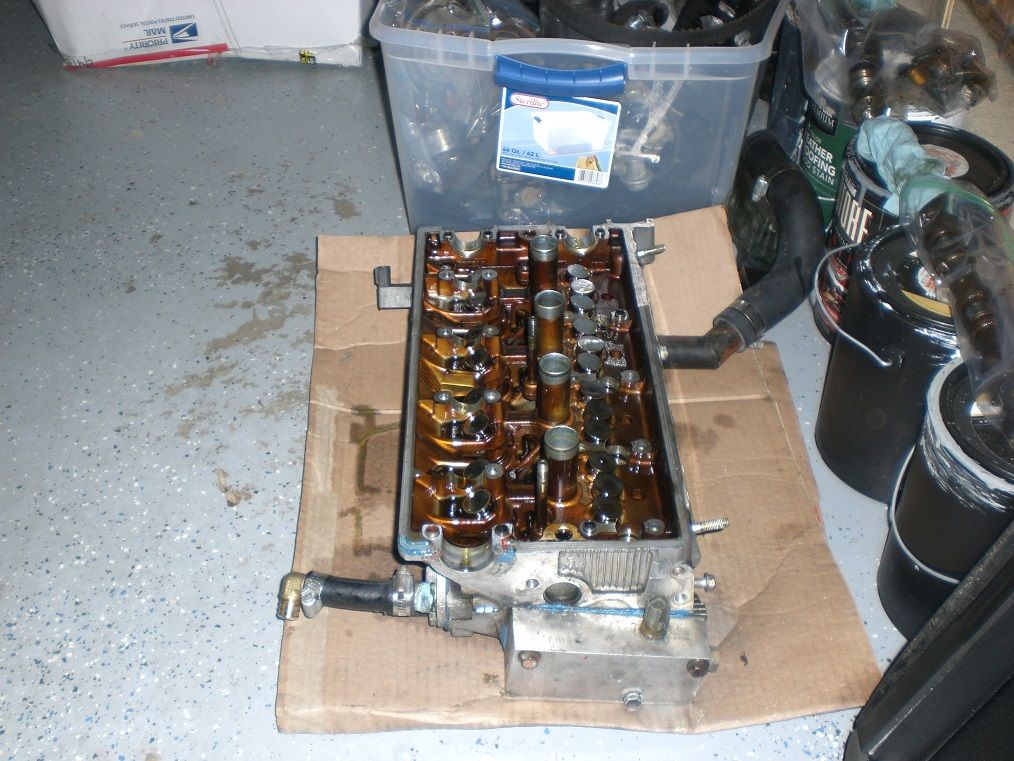
Car started up great and ran strong for a month or so. Put on an OBX 4-1 manifold. After a while, the the car got harder to start and ran rougher, finally not starting at all. After a compression test and a leakdown test I traced the problem to a leaky intake valve and a possible headgasket leak. I had to remove the cylinder head in the dead of winter, without a garage, and of course the past few days have been the coldest in 20 years. After some frozen fingers:
Image

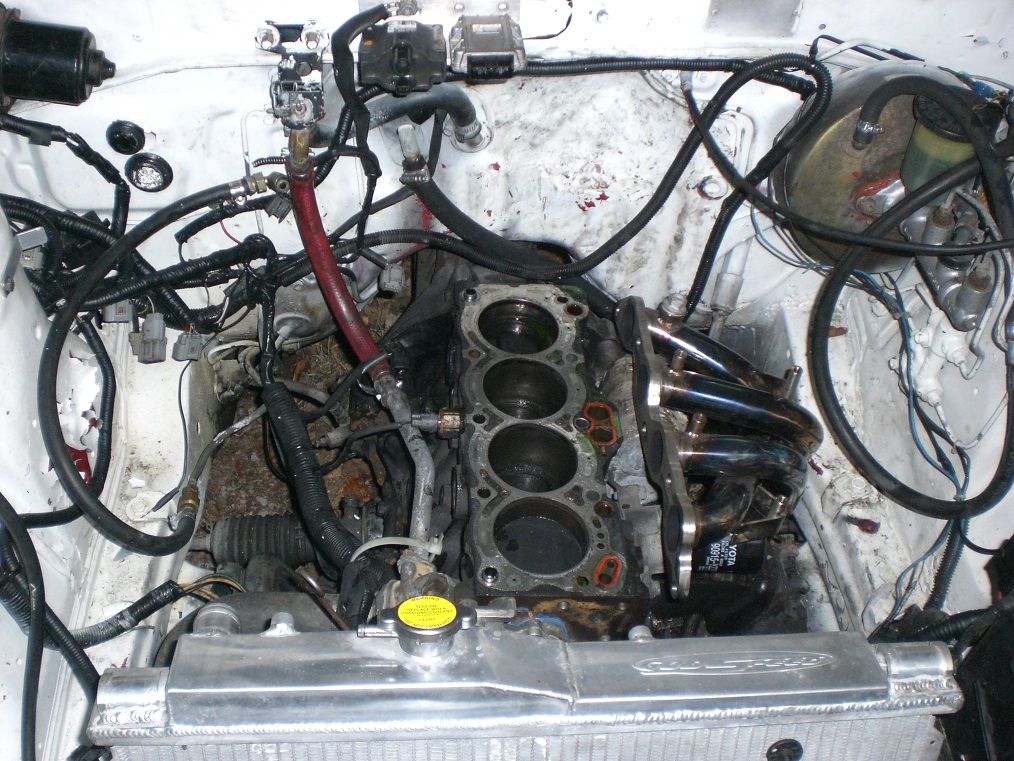
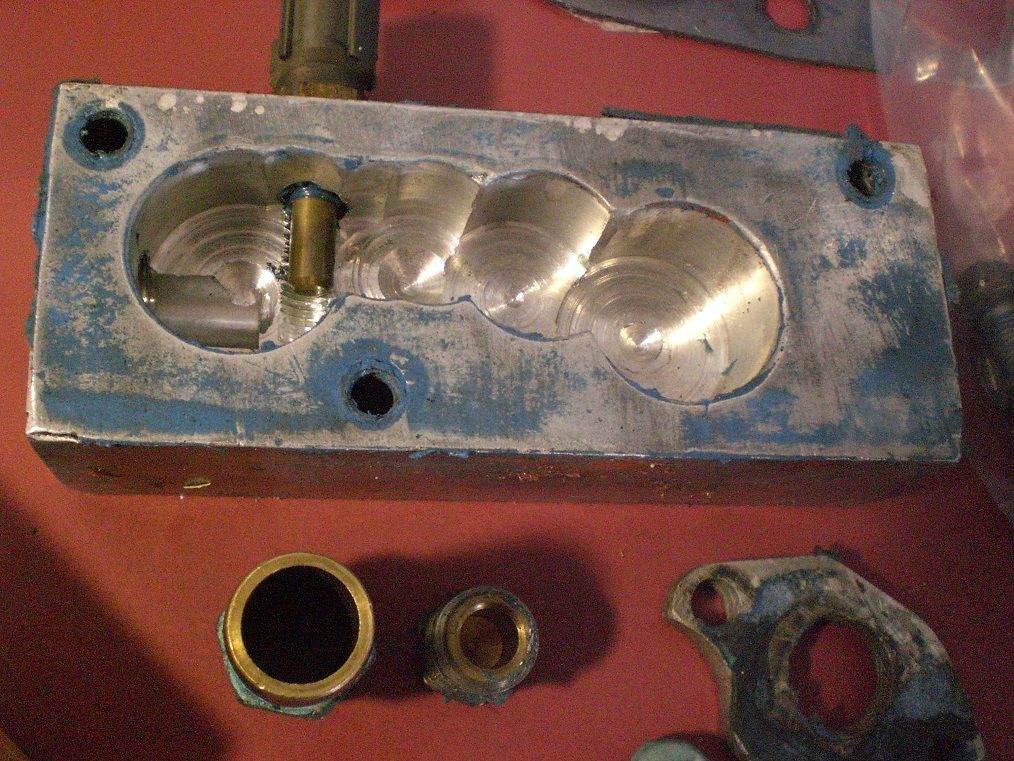
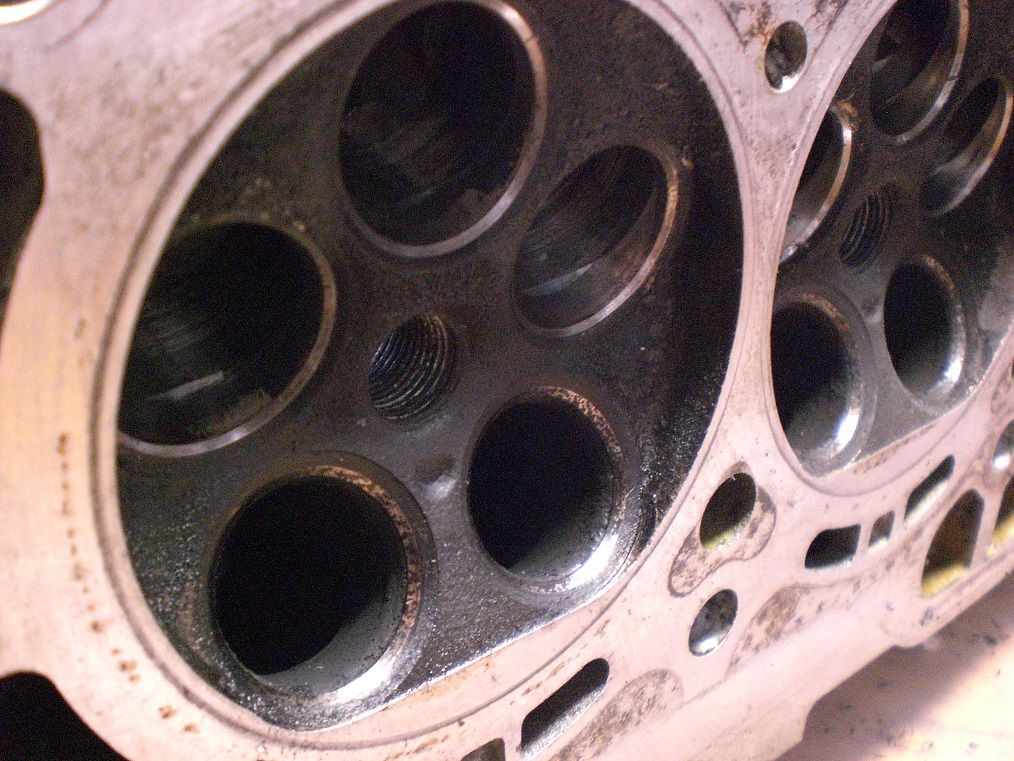
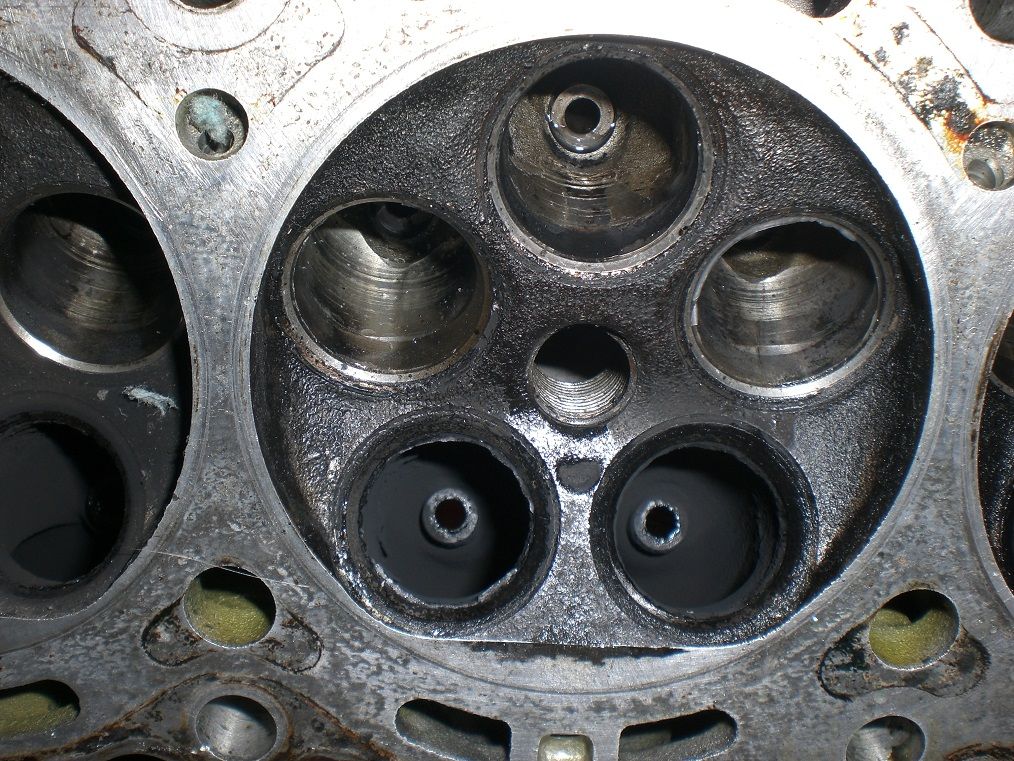
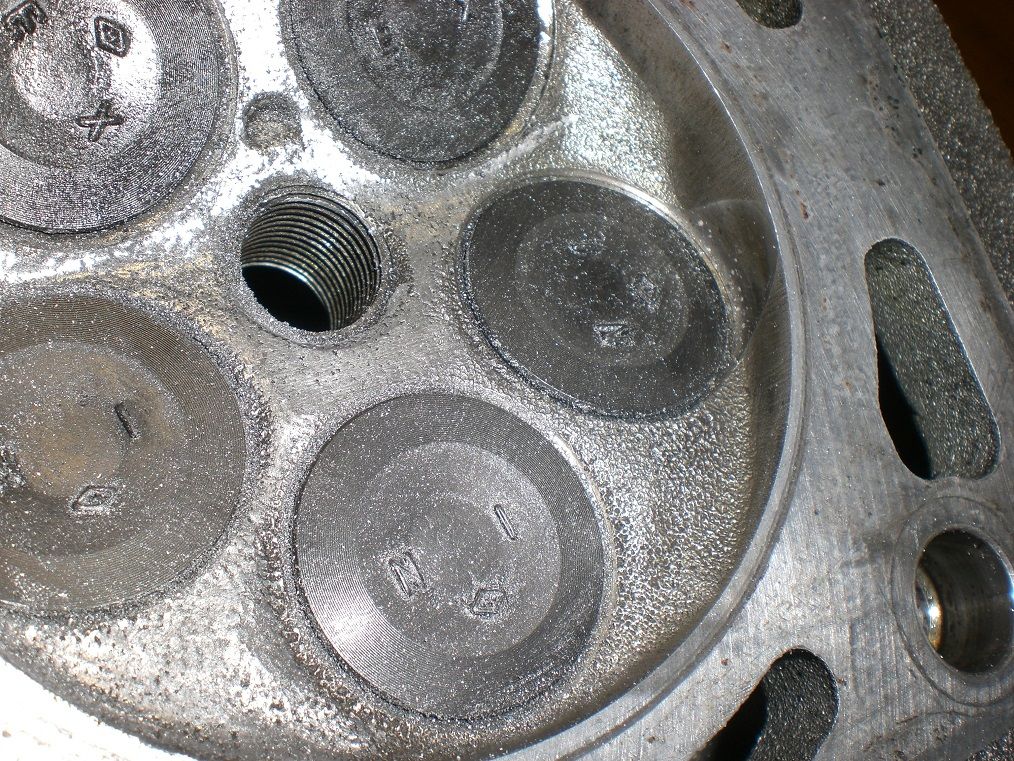
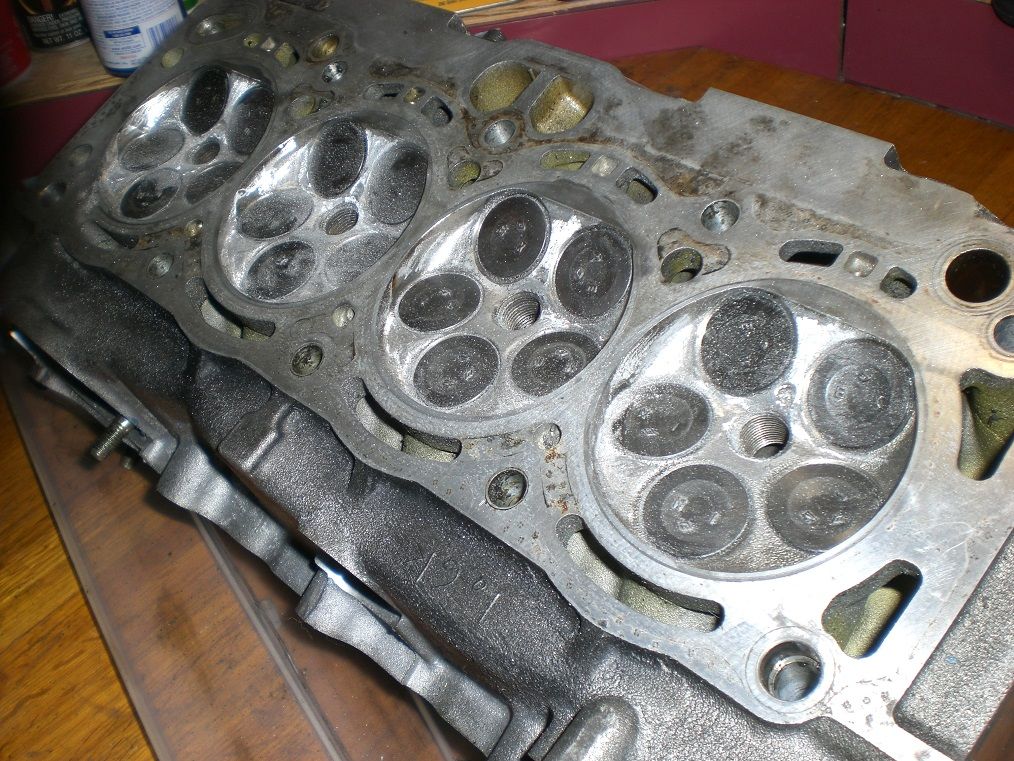
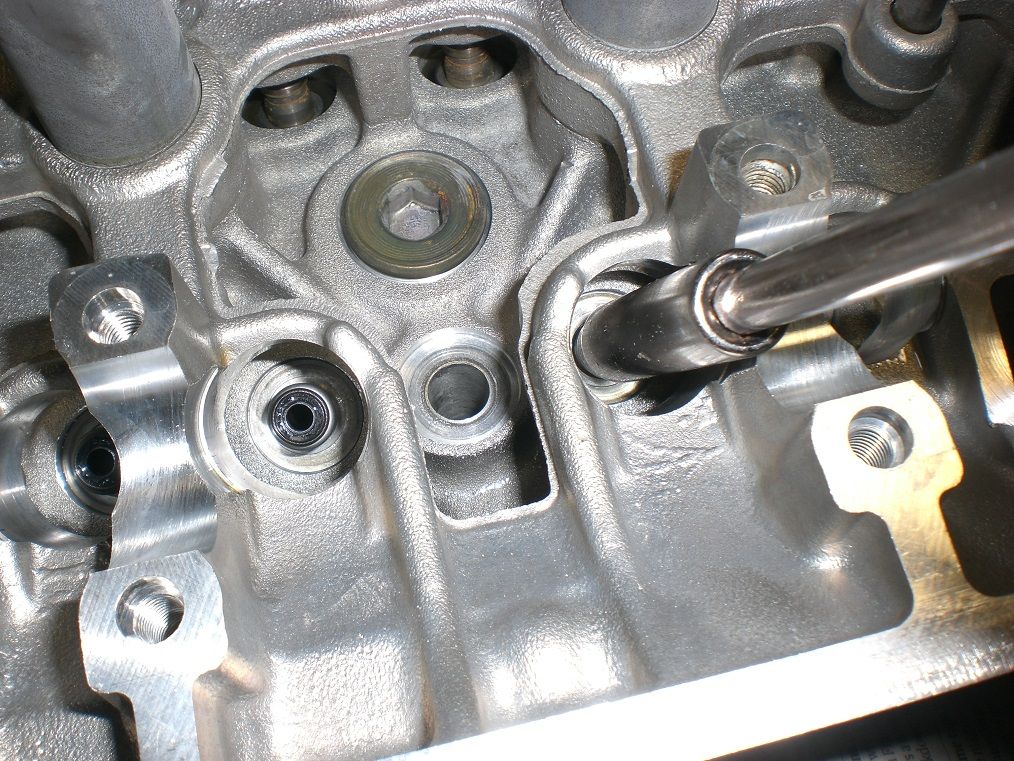
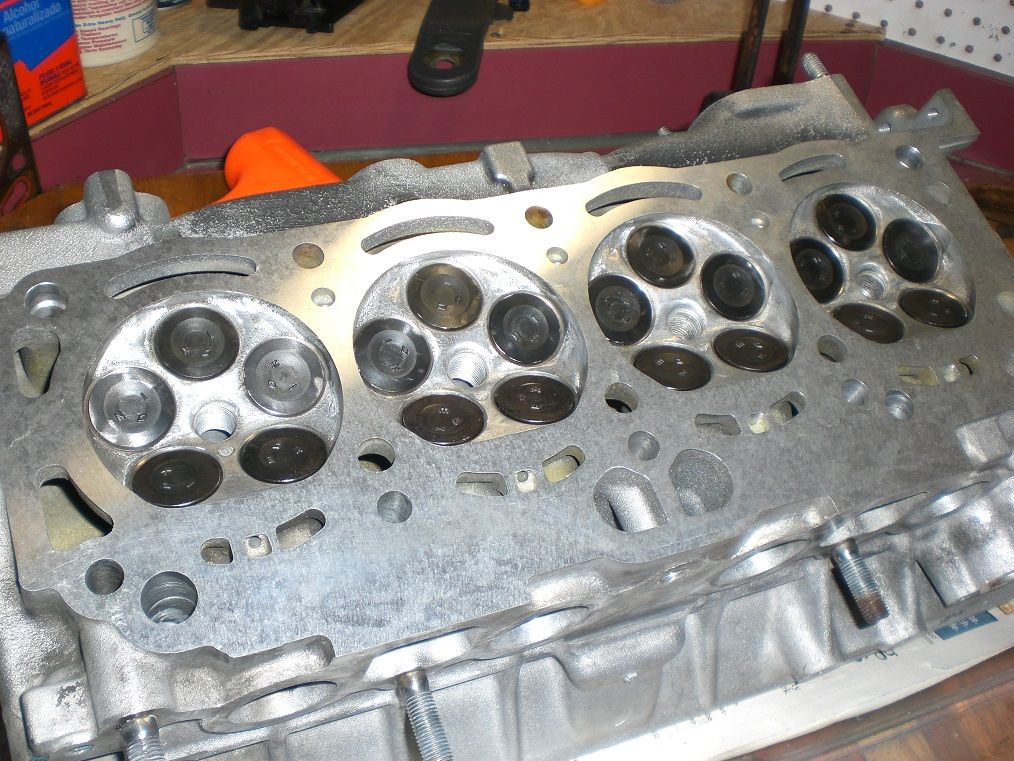
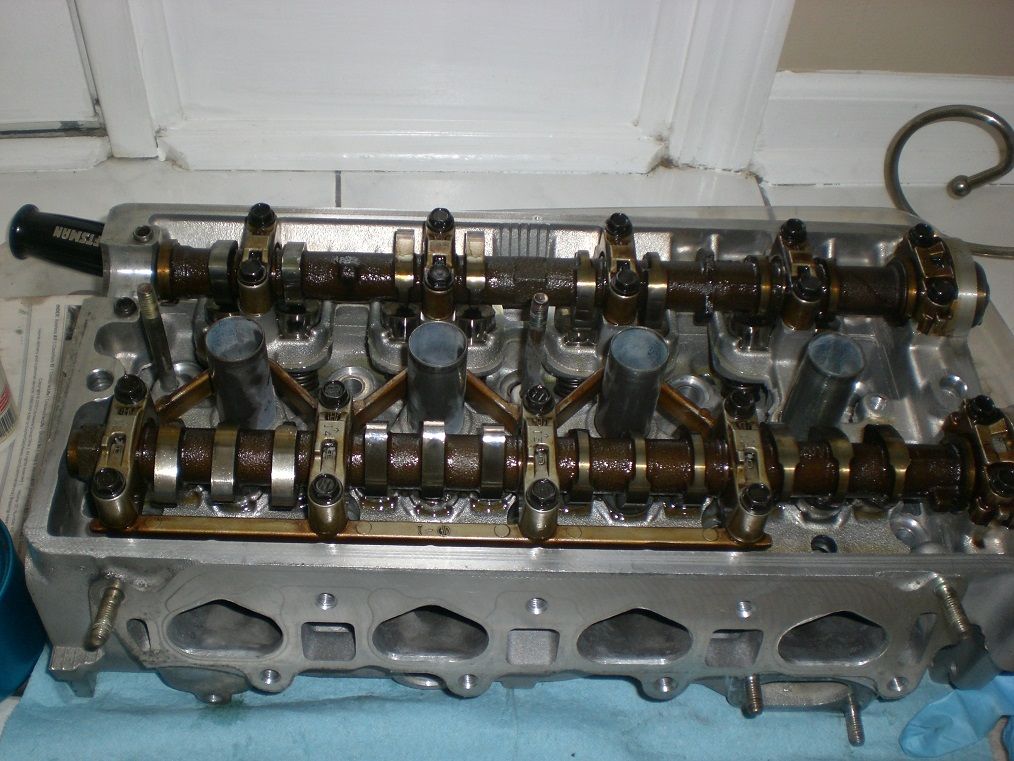
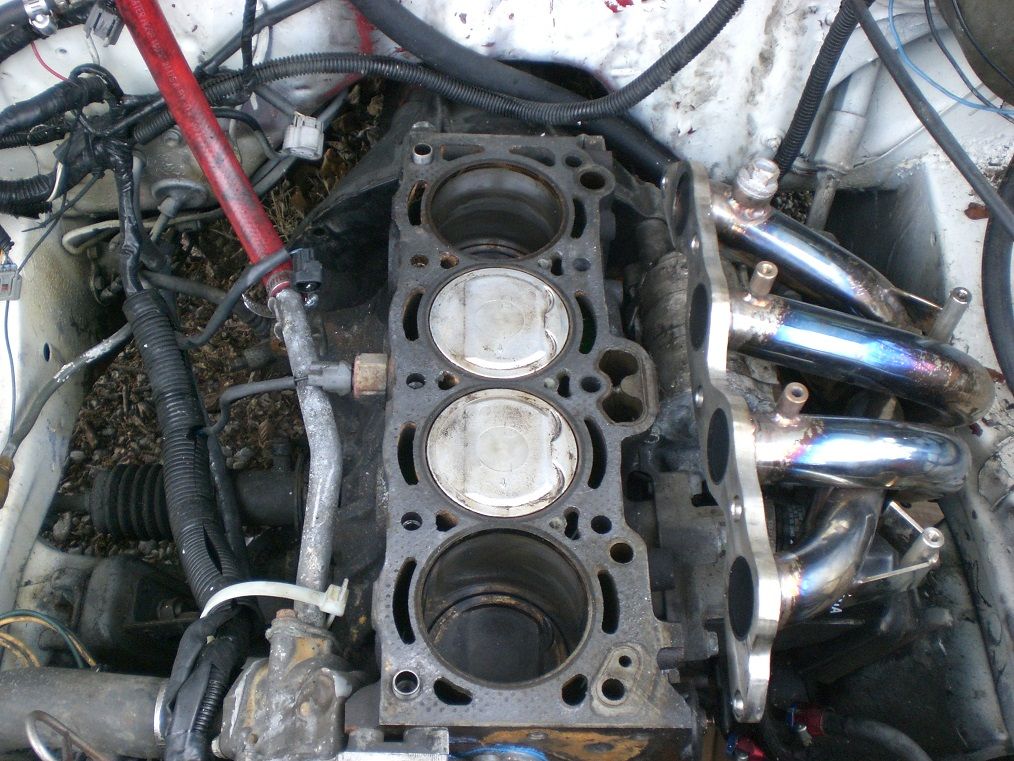
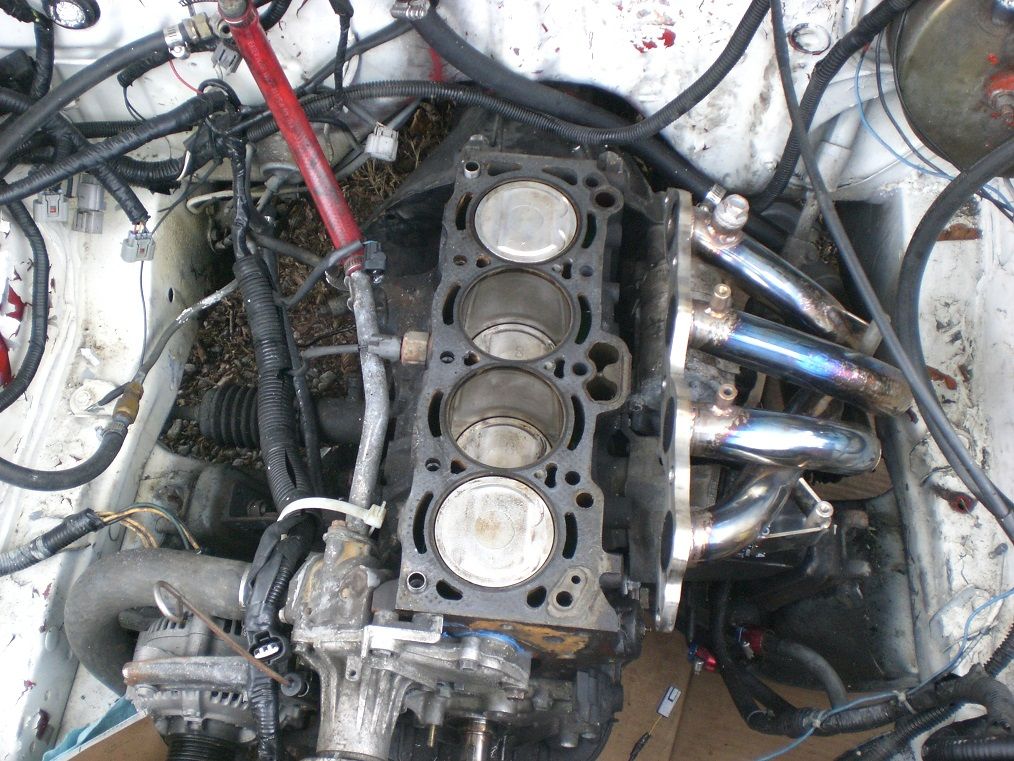
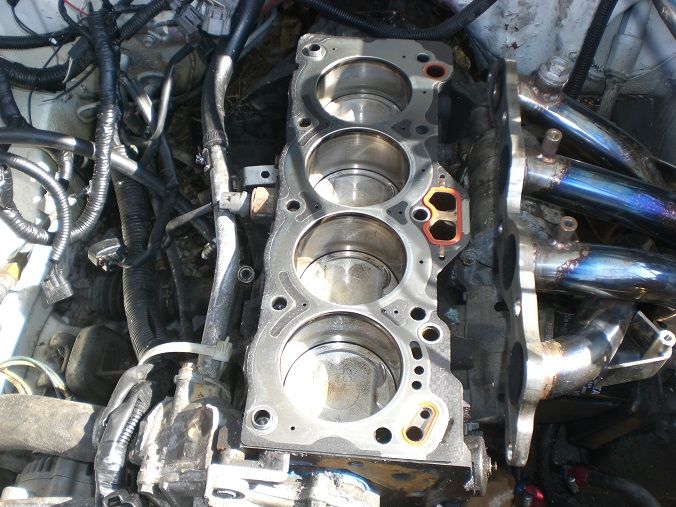
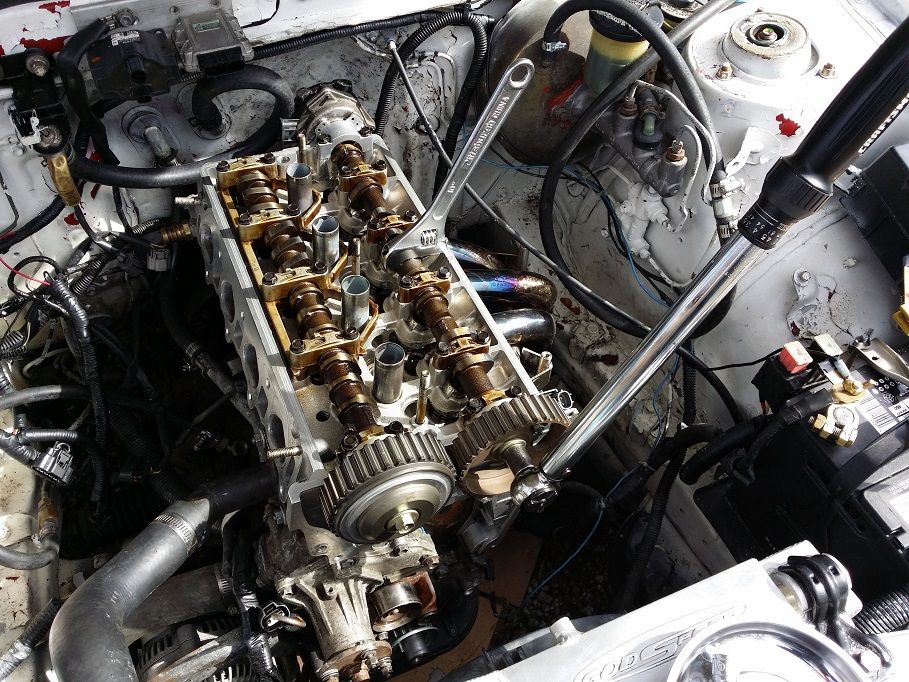
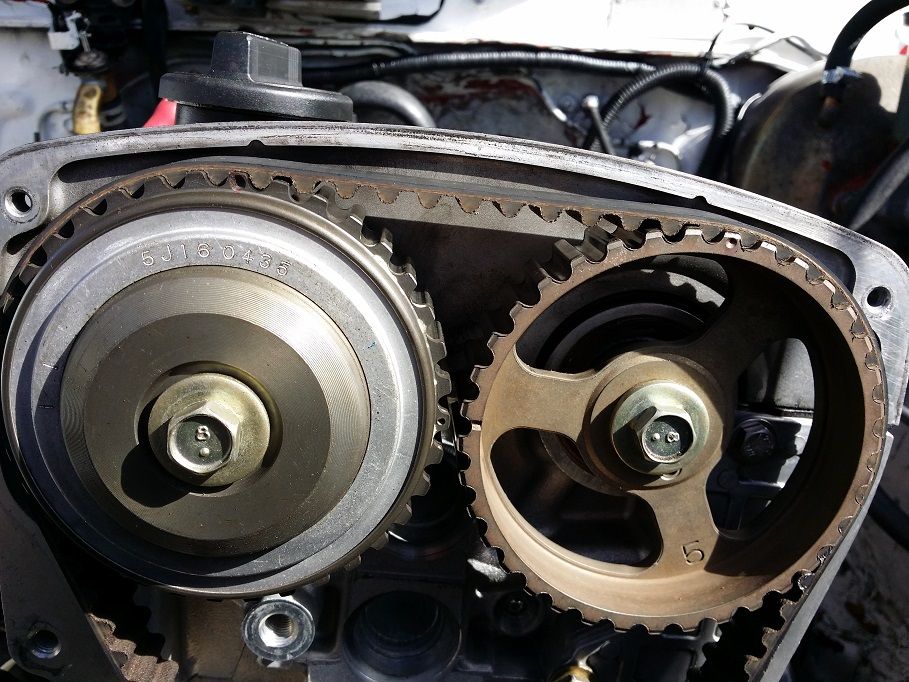
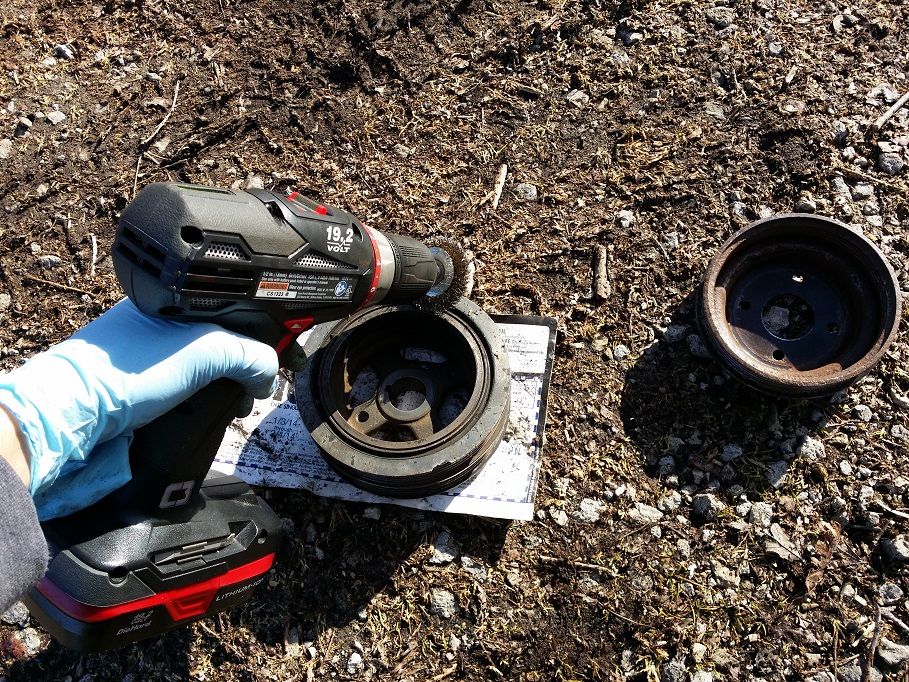
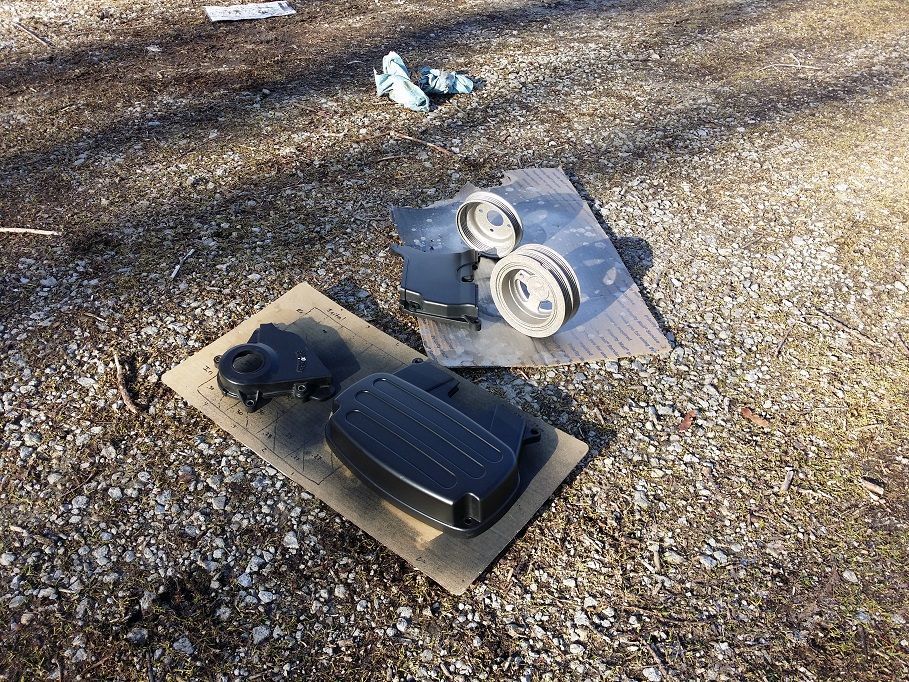
Head is off. The engine only has 50k miles, so not too much wear but some varnish. Yuck, look at all the blue sealant gunk!
Image

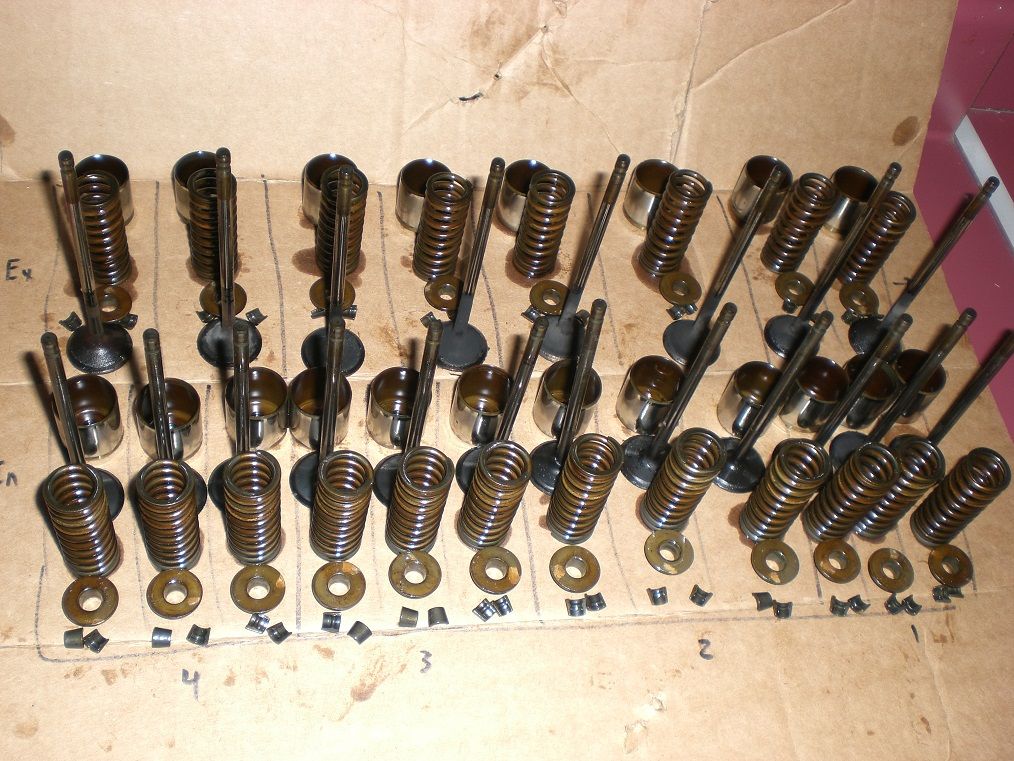
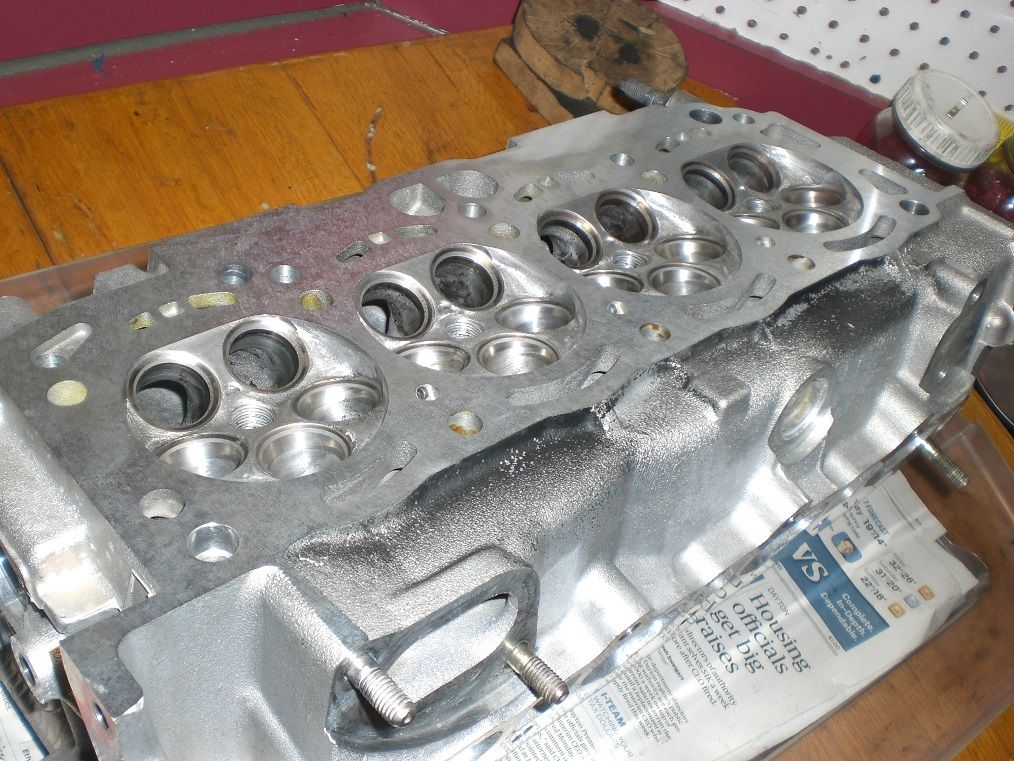
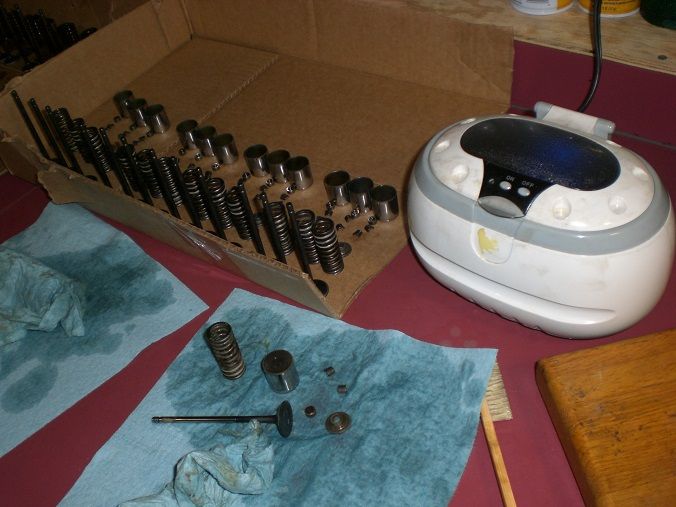
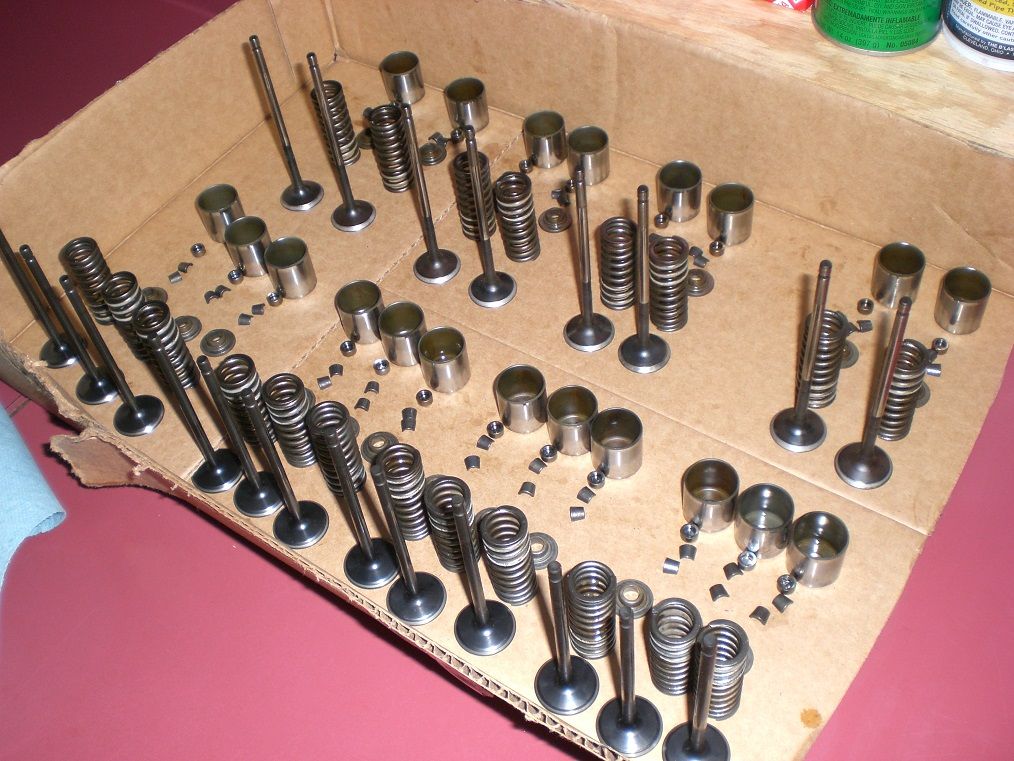
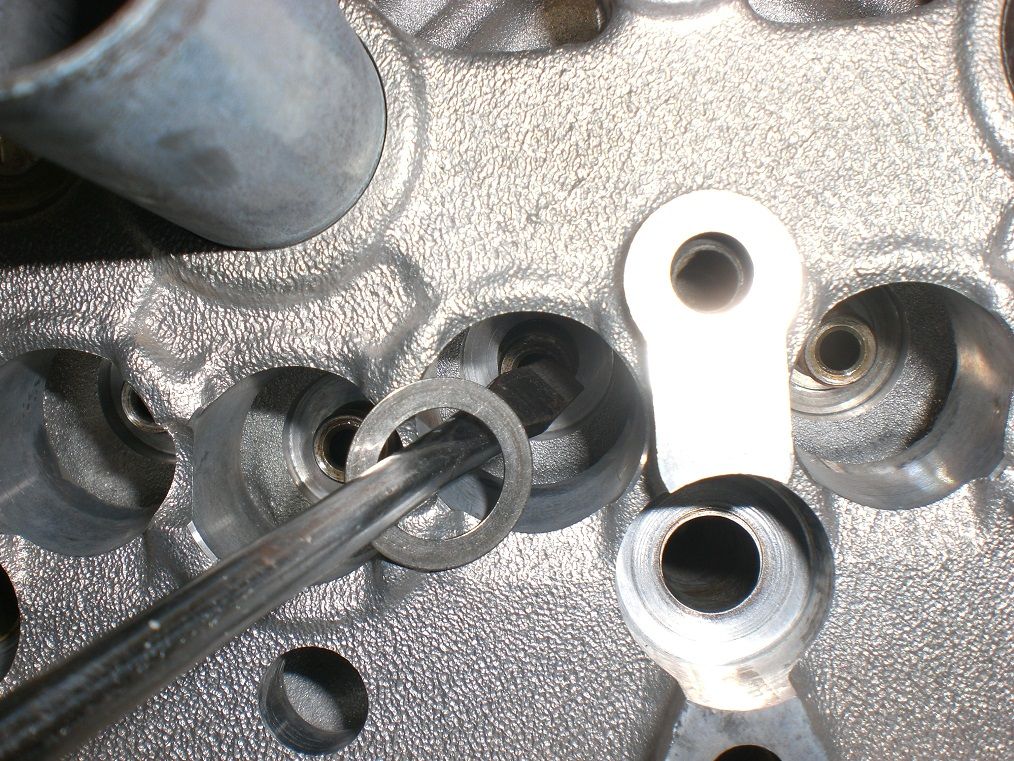
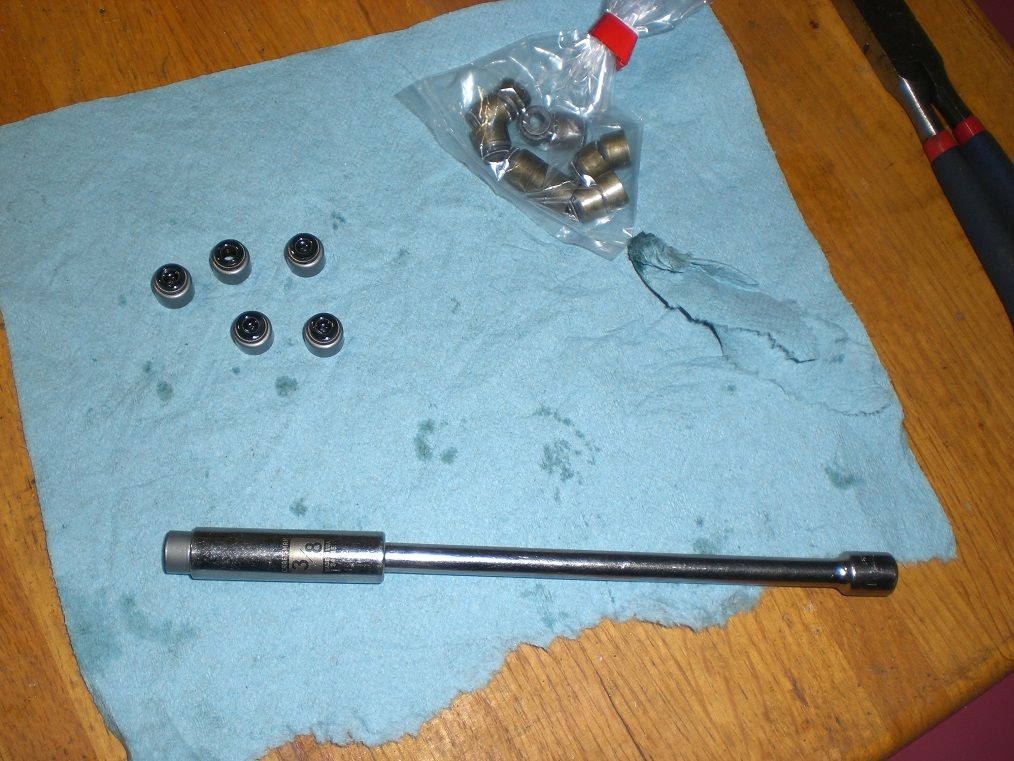
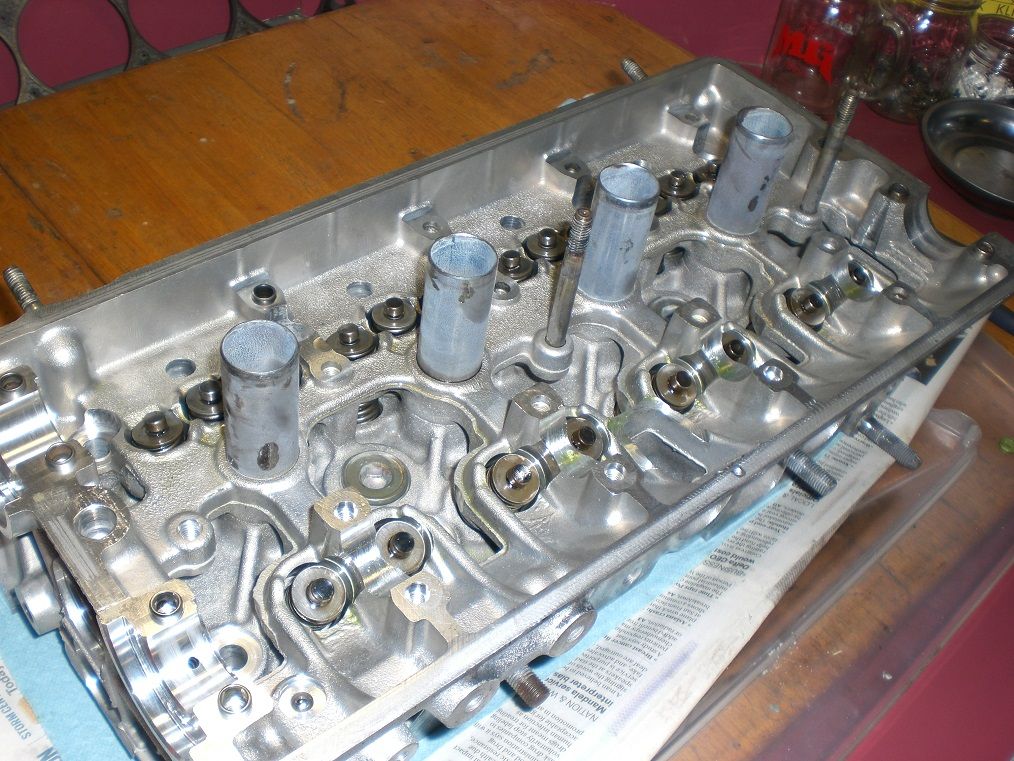
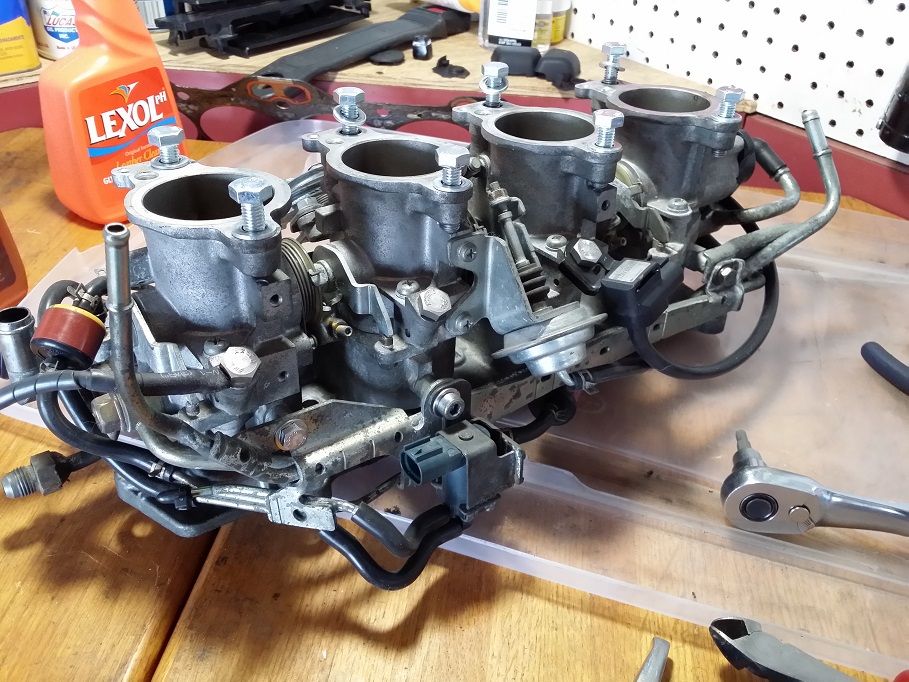
Valves out and organized. These Toyotas have soft springs, you can just do a quick whack with a socket and the retainers come out easy as pie.
Image
Last edited by riddleyo on Fri Feb 14, 2014 5:40 pm, edited 1 time in total.

User avatar
riddleyo
Club4AG Enthusiast
Posts: 106
Joined: Sun Mar 24, 2013 4:48 pm
Location: Ohio

Re: Riddleyo's 1986 GTS 20V

Postby riddleyo » Wed Jan 08, 2014 7:01 pm

Checking out the homemade coolant block from the previous owner. I might clean and port this out for smoother coolant flow. I will definitely use SamQ's RWD coolant guide to correct the coolant flow:
Image

Looking at the interesting 5 valve configuration:
Image

Before I took the valves out, I filled up the combustion chambers with water, shot compressed air in the intake, and found my leaky intake valves. I think it is just carbon build up on the seats as I don't have any bent valves or piston contact:
Image

Starting on my light porting work. First off, simple intake gasket matching with some dye. I will be utilizing a motorcycle racer's tricks, namely the infamous "Motoman" to guide my porting, along with David Vizard's techniques, but more on this later.
Image

Cleaning up combustion chambers with valves protecting the valve seats. I once read a Toyota research article explaining how polishing combustion chambers can improve torque/fuel efficiency by 1-3%. Free power! You can definitely see the casting roughness that I haven't got to yet in the lower right hand side of this image with equals more surface area which means power is lost as heat into the metal:
Image

Continuing with the rough chamber polishing:
Image

User avatar
riddleyo
Club4AG Enthusiast
Posts: 106
Joined: Sun Mar 24, 2013 4:48 pm
Location: Ohio

Re: Riddleyo's 1986 GTS 20V

Postby riddleyo » Fri Jan 10, 2014 4:07 pm

Got the head and valves back from the machine shop. Got it milled .005", valve job, and a wash down. Valves have been bead blasted. So fresh and the detergent smells like cinnamon. mmm

Image
Image

Today I used my handy dandy harbor freight ultrasonic cleaner and began a super cleaning of all the valve parts.
Image

All done. If it were't for the oil protection, these parts are so clean you could eat with them.
Image

Next up, I have to make a home made tool to properly compress the valve springs and get the keepers in...

User avatar
Grant
Club4AG Expert
Posts: 407
Joined: Wed Jan 09, 2013 8:42 pm
Location: Upstate New York

Re: Riddleyo's 1986 GTS 20V

Postby Grant » Fri Jan 10, 2014 6:38 pm

What kind of solvent did you use in the ultrasonic cleaner? I need to get one of these for small parts. The valves look brand new!
I hope I can build up the courage to do an engine rebuild someday. :P

User avatar
riddleyo
Club4AG Enthusiast
Posts: 106
Joined: Sun Mar 24, 2013 4:48 pm
Location: Ohio

Re: Riddleyo's 1986 GTS 20V

Postby riddleyo » Fri Jan 10, 2014 7:58 pm

I used dawn dish washing detergent, some simple green, and the hottest water you can get in there. It cuts through grease pretty well but it doesn't work miracles. Soda blasting and bead blasting makes old parts look like new again and the ultrasonic washing is just for extra measure.

Engine rebuilds are pretty simple and fun as long as the car isn't your daily driver. ;)

User avatar
riddleyo
Club4AG Enthusiast
Posts: 106
Joined: Sun Mar 24, 2013 4:48 pm
Location: Ohio

Re: Riddleyo's 1986 GTS 20V

Postby riddleyo » Thu Jan 23, 2014 6:49 pm

Finally recieved my OEM Toyota Blacktop 20V gasket set from Tracy at Lithia Toyota. Tracy is uber helpful just like the old Aaron that hooks up MR2 and 4AG people with the right parts! http://www.lithiatoyotaparts.com/
This engine is going to have all new seals all around... pretty much a brand new engine!
Image

Image

Can't forget these super important valve spring seats..
Image

Using a screwdriver to ensure they fall into their slot:
Image

New valve seals are super easy to install with a craftsman 3/8 socket.
Image

Bam.
Image

This is my homemade valve spring compressor. It is basically 2 harbor freight clamps secured to my workbench. Next, a steel pipe is attached to the clamps and then I cut some PVC pipe for the valve compressing end. The paper towel keeps my hands from freezing to the metal... in my garage which is currently about 0 degrees fahrenheit. It works great once you have some practice - and doubles as a killer arm workout!. But for future reference, I would use the ToyoTool at http://www.toyotool.com/PURCHASE.htm. They have a 20V specific tool that makes installation and removal super easy. My ToyoTool is for 4 valve engines and was too big for these teeny tiny valves so I had to brainstorm up this doohicky:
Image

Valves are in.
Image

All installed, shim under buckets placed...
Image

Now it is time to lube up the buckets with Lucas Assembly Lube which helps with engine break in:
Image
Last edited by riddleyo on Sat Jan 25, 2014 12:39 pm, edited 1 time in total.

User avatar
riddleyo
Club4AG Enthusiast
Posts: 106
Joined: Sun Mar 24, 2013 4:48 pm
Location: Ohio

Re: Riddleyo's 1986 GTS 20V

Postby riddleyo » Sat Jan 25, 2014 12:19 pm

Got all the lifters in. Got the cams in with the proper torque sequence and torque setting, and now time to check the clearances. Before the rebuild, the clearances were a bit on the loose side. After the valve job though, all the clearances have seemed to tighten up well within spec. Thankfully, I didn't have to buy any new valve shims which are a pain to find here in the states. Valve clearances within spec should make for a smooth and quiet engine.
Image

Looking nice and fresh. All buckets, cam journals, cam lobes lubed up with Lucas assembly lube, ready for a well lubricated first start. I can already tell this motor is going to purr...
Image

kuroki86
Club4AG Enthusiast
Posts: 114
Joined: Sun Jan 13, 2013 8:25 pm

Re: Riddleyo's 1986 GTS 20V

Postby kuroki86 » Sat Jan 25, 2014 12:32 pm

subscribed! ima be rebuilding my 20v soon so this is perfect. keep up the good work :)

User avatar
riddleyo
Club4AG Enthusiast
Posts: 106
Joined: Sun Mar 24, 2013 4:48 pm
Location: Ohio

Re: Riddleyo's 1986 GTS 20V

Postby riddleyo » Sat Feb 01, 2014 7:22 pm

Made a lot of progress today. First, I drilled and tapped my homemade aluminum coolant block for another sensor. The car's coolant gauge currently doesn't work because it wasn't connected during the engine swap. Time to fix that.
Image

Used a dremel and smoothed out the inside to help with coolant flow.
Image

Using SamQ's 20V RWD cooling guide (http://s-86.com/article_cooling_guide.php), I'm rerouting the coolant flow properly. Got my brass plug and aluminum coolant block installed.
Image

Here is the new brass heater outlet installed into the freshly NPT tapped port, sealed up with Permatex thermostat RTV sealant.
Image

Wooo, it's cold outside... Need to build a garage for the project cars...
Image

Cut up cereal box makes a shield for the engine block while I clean up the carbon from the pistons.
Image

A little acetone after the wire brush job freshens up the pistons.
Image

Rotate the crank to TDC, and you can work on the other two pistons. And use oil to clean the cylinder bores.
Image

Using some aluminum scrap, made a bracket for my coolant return pipe. Be sure not to hold metal with your hands at a drill press like I am doing - metal has a habit of catching and cutting you up in a hurry.
Image
Image

Installed. Nice and secure.
Image
Last edited by riddleyo on Sun Feb 16, 2014 1:16 pm, edited 1 time in total.

User avatar
riddleyo
Club4AG Enthusiast
Posts: 106
Joined: Sun Mar 24, 2013 4:48 pm
Location: Ohio

Re: Riddleyo's 1986 GTS 20V

Postby riddleyo » Sat Feb 01, 2014 7:42 pm

Cleaned out the heater core with some simple green and compressed air. Mmmm... savin up that sweet sweet green juice.
Image

Spent a lot of time cleaning up the heater control valve and replacing all the rotting heater hose line with fresh new black hose. The downside is, the more I work on this car, the more the engine bay paint is peeling revealing the car's original color. I don't think the previous owner prepped the engine bay properly for paint. You can also see where the previous owner used a hammer on the firewall. One day I'll fix all of this... but for now, forging ahead with the cylinder head job.
Image

Speaking of the cylinder head job, lets go back into the garage where it is warm and work on the cylinder head. Installed a OEM toyota exhaust stud with loctite.
Image

New seal on the intake VVT cam.
Image

New OEM seal for the distributor.
Image

Distributor in. Rocking some Dayton OHIO newspaper. Yes, it still exists.
Image

Die distributor cap. I got big plans for you.
Image

Cut you
Image

Look. at. what I have created!
Image

Looking good.
Image

Using a plastic engine shroud from my scrap bin, I trace out a cover.
Image

Cut you
Image

Sand you
Image

JB weld applied, clamped. Wait to dry, that is it for today.
Image
Last edited by riddleyo on Sun Feb 16, 2014 1:33 pm, edited 3 times in total.

Zakae71
Club4AG Regular
Posts: 22
Joined: Sat Oct 19, 2013 7:53 am
Location: Central ohio

Re: Riddleyo's 1986 GTS 20V

Postby Zakae71 » Sat Feb 01, 2014 9:27 pm

Nice work! Idk how you deal working on it when it's that cold!waiting till end of this month before I start working on mine. :D

User avatar
riddleyo
Club4AG Enthusiast
Posts: 106
Joined: Sun Mar 24, 2013 4:48 pm
Location: Ohio

Re: Riddleyo's 1986 GTS 20V

Postby riddleyo » Sun Feb 16, 2014 1:31 pm

Zakae71 wrote:Nice work! Idk how you deal working on it when it's that cold!waiting till end of this month before I start working on mine. :D


Thanks. The freezing cold builds character ;)
Did a little work more this weekend, but my fingers don't last long before going numb. Progress is slow.

Got my homemade distributor cap complete - cut down for clearance and to work with my Coil on Plug conversion. Instead of buying a $100 piece from SamQ, this will do the job:
Image

Put on new seals and gaskets all around the cylinder head:
Image

New OEM head gasket. Pistons are placed so that the valves won't hit them when torquing down the camshafts.
Image

Cylinder heads are kind of heavy! In place:
Image

Used some spare ARP moly lube on head bolts. Since this thing isn't running any boost, I decided not to put ARP head studs on. Going all OEM Toyota. Torqued to spec: 22ft lbs, then 90 degrees, then another 90 degrees.
Image

Camshafts are in.
Image

Distributor and cover are in with a new OEM gasket. Everything fits great. Valve cover on to keep the dust out for now while I go warm up my fingers. I should have this thing running pretty soon.
Image

User avatar
RuizXIII
Club4AG Enthusiast
Posts: 165
Joined: Wed Jan 16, 2013 7:33 pm
Location: Smell Ya Later, NJ

Re: Riddleyo's 1986 GTS 20V

Postby RuizXIII » Mon Feb 17, 2014 2:32 pm

So many good pictures and engine rebuild information!
Thanks
irony.cc

TheOxyMorin
Club4AG Enthusiast
Posts: 52
Joined: Sat Mar 02, 2013 7:00 pm

Re: Riddleyo's 1986 GTS 20V

Postby TheOxyMorin » Mon Feb 17, 2014 9:57 pm

Great build log, really enjoyed reading through, hope to see more soon!

User avatar
riddleyo
Club4AG Enthusiast
Posts: 106
Joined: Sun Mar 24, 2013 4:48 pm
Location: Ohio

Re: Riddleyo's 1986 GTS 20V

Postby riddleyo » Sun Feb 23, 2014 5:31 pm

RuizXIII wrote:So many good pictures and engine rebuild information!

TheOxyMorin wrote:Great build log, really enjoyed reading through, hope to see more soon!


Thanks! Here is a pretty tiny update... progress has been slow lately. Cam gears torqued to spec:
Image

Used a vise for the hydraulic tensioner, installed an allen wrench to hold the tensioner compressed, installed tensioner and Idler pulley. Also had to use 600 grit sandpaper + scotchbrite on the crank gear inner diameter to get it to slide smoothly onto the crank which took forever. Put on lots of high temperature anti-seize to prevent a future stuck crank gear.
Image

Timing belt installed.
Image

Turned the engine over a couple of times, and everything checks out. Here is the proper way to set up the OEM cam gears (There is a well known timing error in the blacktop factory service manual). The printed "5" goes in the 5 oclock position with the knock pin at 5 oclock on the exhaust cam.
Image

Started to wire brush my rusty pulleys.
Image

It reached 50 degrees with some sun, so I decided to paint the pulleys and timing covers. SEM Satin Black for the timing covers makes them look fresh.
Image

Lower timing cover on. Used some white paint to highlight the 10 degree mark so I can time the engine easily to factory spec.
Image

Timing covers on. Looking pretty good now.
Image

Just need to put on the intake, fuel, wire everything up, add coolant, change the oil, and start it up.

User avatar
riddleyo
Club4AG Enthusiast
Posts: 106
Joined: Sun Mar 24, 2013 4:48 pm
Location: Ohio

Re: Riddleyo's 1986 GTS 20V

Postby riddleyo » Fri May 02, 2014 8:51 pm

My recent adventure started with my curiosity about one odd wire. Then that led to a wild goose chase of bad car wiring which led me to rewiring the entire ECU and engine looms over the past couple weeks. Got rid of all the crimp and butt connectors - replaced them with solder, heat shrink, and new wire loom protectors.

Tracing every individual wire was a chore.
Image

Starting to organize the wiring.
Image

More organizing
Image

Took a break from organizing to work on the individual throttle bodies. After cleaning the entire thing, I replaced all the rotting vacuum hoses and fuel line. Relocated the MAP sensor on the bottom of the ITBs.
Image

My starter is pretty weak, so I had to find a new one that will fit. For future reference, a 16V 4age starter fits perfectly fine on the 20V blacktop motor!!! Nice, cheap, available starter with a lifetime warranty!
Image

To prevent future starter issues, I made this heat shield from scrap aluminum:
Image

Blurry, but you get the idea:
Image

Still have odds and ends here and there to fix up, but I want to have the car all finished up and running by tomorrow evening. Here is what the future holds for this car. I got me some race tires wrapped around some celica supra wheels today!
Image

User avatar
riddleyo
Club4AG Enthusiast
Posts: 106
Joined: Sun Mar 24, 2013 4:48 pm
Location: Ohio

It runs.

Postby riddleyo » Mon May 05, 2014 5:23 pm

After a cold cold winter and months of work, the car finally runs!

Youtube video: http://youtu.be/SxTovK3Tr5Y

Here is a shot of the starter installed with the heat shield. It looks like it will do a good job of reflecting heat from the header.
Image

Engine bay looks pretty rough with the peeling paint, but I don't care much at this point. Just happy that it finally starts and all the wiring is sorted out for the most part.
Image

Zakae71
Club4AG Regular
Posts: 22
Joined: Sat Oct 19, 2013 7:53 am
Location: Central ohio

Re: Riddleyo's 1986 GTS 20V

Postby Zakae71 » Mon May 05, 2014 6:48 pm

Nice work! :)

User avatar
riddleyo
Club4AG Enthusiast
Posts: 106
Joined: Sun Mar 24, 2013 4:48 pm
Location: Ohio

Re: Riddleyo's 1986 GTS 20V

Postby riddleyo » Wed Jun 04, 2014 6:11 pm

Zakae71 wrote:Nice work! :)


Thanks!

Not much of an update mechanically wise, but I ran the car hard in autocross - still on street tires until I get the car dialed in. Came in 7th out of 12th in my class - but the important thing is the car ran! My radiator fan gave out the night before the race so I rigged up a homemade fan shroud made out of a political coroplast election sign, electric fan, and thermoswitch. It actually works really well. Pics to follow...

User avatar
riddleyo
Club4AG Enthusiast
Posts: 106
Joined: Sun Mar 24, 2013 4:48 pm
Location: Ohio

Re: Riddleyo's 1986 GTS 20V

Postby riddleyo » Fri Jul 11, 2014 12:59 pm

Recent autocross picture. I've been driving it more than working on it lately. Soon I will put in a new gas tank and tune up the rear suspension.

Image

User avatar
riddleyo
Club4AG Enthusiast
Posts: 106
Joined: Sun Mar 24, 2013 4:48 pm
Location: Ohio

Mice

Postby riddleyo » Sun Jul 20, 2014 8:56 pm

My car has begun to reek of mice crap since it sits out in the countryside, so I stripped out the interior in search of mice. On top of that, the previous owner miswired the wiper and HVAC blower circuits during the engine swap, so I set out to fix those. Found several mice nests - they have been using the 28 year old jute padding as construction materials for their new apartment complex built within my HVAC ducts, rear seat, and behind interior pieces. Time to clean:
Image

A few of the apartment complexes demolished along with useless wiring jobs hidden beneath carpet
Image

While I was in there, sprayed on some black rust protection in various spots
Image

I found a nest within my blower unit, so I took it apart
Image

Cleaned up the blower motor, fan blades, and put new closed cell foam on the flapper door so I don't get 28 year old crusty foam pieces in my eye when the blower runs.
Image

Another "while I'm at it" sort of project - I am setting out to recover my dash. Here is the current state
Image

Scraping away the damage
Image

In short, my car is in a million pieces, I have several simultaneous clean and restore projects going along, and the interior smells like rustoleum spray instead of mice crap.

User avatar
riddleyo
Club4AG Enthusiast
Posts: 106
Joined: Sun Mar 24, 2013 4:48 pm
Location: Ohio

Dashboard Done

Postby riddleyo » Mon Jul 21, 2014 6:27 pm

Today I finished the DIY dashboard recover / reupholster. First, I started filling in my cracks with Great Stuff expanding foam and covered the damaged areas with closed cell foam. I used 3M Super 77 for adhesion.
Image

A shot of the driver side closed cell foam job
Image

I used landscaping fabric to aid in the transition between the old foam and new foam
Image

Next, I laid on my vinyl fabric. I got this fabric on sale from Jo Ann's Fabrics for about $20 for two yards of material. Two yards is enough to cover two dash boards, maybe three. You have to get at least two yards in order to span the entire length of the dash. Use coupons on top of sales to get the best price. This is probably the cheapest way to restore a dashboard, but the fabric isn't all that high quality. I'm not sure how it will hold up to the UV rays. Time will tell.
Image

Used Super 77 a little section at a time. Laying the fabric and getting it to lay flat was a huge challenge. I experimented with a test piece and found starting the gluing process on the right side of the instrument cluster is the best way to start. Then work your way out to each end of the dash.
Image

Working on another section
Image

Hard part complete. It isn't perfect, but I don't want to rip this off and lay on another sheet in order to achieve perfection. The curves are very difficult to lay down fabric evenly.
Image

Edges have been trimmed, and now I'm about to cut open the vents
Image

The openings actually turn out pretty nice
Image

Complete
Image

Moment of truth - the test fit. I'm pretty happy the way project turned out even though I was a bit over my head as I've never laid vinyl down. It definitely isn't perfect and I'll probably notice every flaw when I drive the car, but you can't beat a recovered dash for less than $20 in materials. This looks way better than the cracked dash I had before.
Image

shagymc
Club4AG Expert
Posts: 353
Joined: Mon Jan 14, 2013 9:43 pm

Re: Riddleyo's 1986 GTS 20V

Postby shagymc » Mon Jul 21, 2014 9:52 pm

I'm working on mine now and trying to figure out the best places for seams(I think that's how you spell it?). The curve next to the instrument panel cover is a Mother EFFer man. I'm going to lay suede or canvas over it too so it has zero stretch capability. For vinyl, you can get a heat gun and heat it up and that would help you get some much needed flex out of it however, you can't get it to hot or it'll have a smooth shine in certain spots. I dig your recovery though! Also, you could try to steam out some of the wrinkles too. If you soak some small wash clothes in water in the microwave for 5 min and then just set them on the wrinkle areas, it could shrink it a little. It won't work miracles but you'd be surprised.

User avatar
riddleyo
Club4AG Enthusiast
Posts: 106
Joined: Sun Mar 24, 2013 4:48 pm
Location: Ohio

Re: Riddleyo's 1986 GTS 20V

Postby riddleyo » Tue Jul 22, 2014 6:56 am

You aren't kidding about that curve - it is pretty darn difficult. I'm not sure how I would have covered the dash if my material had no stretch. You have a tough job ahead of you, I sense some "wrinkles" in your plan - so good luck!
Thanks for the tip for the vinyl, I'll go try that out and see if I can get that evil curve any better.

User avatar
riddleyo
Club4AG Enthusiast
Posts: 106
Joined: Sun Mar 24, 2013 4:48 pm
Location: Ohio

Re: Riddleyo's 1986 GTS 20V

Postby riddleyo » Tue Dec 23, 2014 8:35 pm

It's been a while since I updated. Here are some things that were done. All HVAC ducting cleaned. A/C evap core fins were straightened, cleaned with water, then compressed air, then some lysol.
Image

Rebuilding
Image

Next I opened up my 20V manual ECU to check all the capacitors/transistors which were all fine
Image

Then I mounted the ECU in roughly the stock location using an aluminum bracket I made since I'm missing the stock brackets.
Image

Now I'm spraying the trim piece to cover the ECU location with some SEM black (best trim spray period - never flakes off)
Image

More spraying
Image

Interior is coming together. I powerwashed then steam cleaned my carpet. I faded the color a little but now it is super clean. I still need some trim pieces and the steering wheel is temporary from one of my toyota MR2s.
Image

User avatar
riddleyo
Club4AG Enthusiast
Posts: 106
Joined: Sun Mar 24, 2013 4:48 pm
Location: Ohio

Re: Riddleyo's 1986 GTS 20V

Postby riddleyo » Tue Dec 23, 2014 8:48 pm

Over the summer I used a harbor freight soda blaster to clean my wheels. I used baking soda to strip them as it is non-toxic and washes away with water - meaning no sand in the beads. The previous owner painted them baby blue as you can see on page 1.
Image

Polished the lips and painted the centers.
Image

Mounted. These are my street tires. I have a celica-supras for my racing compunds used for autocross
Image

A while back I put a new exhaust on. My exhaust is: OBX 20V 4-1 headers -> Magnaflow Cat -> Stainless steel 2.25" pipe -> Vibrant 18" SS resonator -> Flowmaster SS delta flow muffler. It sounds pretty burbly and deep below 4k but has some rasp between 4-6k. Then 6k - 8k it sounds ridiculous. I am going to have to add another resonator or something in the future to tame the sound. No picture of everything installed.. yet.
Image
Image
Image

Next, I am taking the fuel cell the previous owner installed out and replacing it with a stock GTS fuel tank. I want my quiet fuel pump, baffles, and charcoal canister back. I pulled this fuel tank out from a GTS and the junkyard. Pretty rusty but I will fix that soon.
Image

Rusty filler neck
Image

Sandblasted the filler neck and painted it black
Image

User avatar
Grant
Club4AG Expert
Posts: 407
Joined: Wed Jan 09, 2013 8:42 pm
Location: Upstate New York

Re: Riddleyo's 1986 GTS 20V

Postby Grant » Fri Dec 26, 2014 2:19 pm

Hey nice work cleaning everything up! I'm just about to start cleaning up my gas tank as well.

Why did you paint the interior bits? Were they a different color? You should post a before/after interior when you finish. :)

User avatar
riddleyo
Club4AG Enthusiast
Posts: 106
Joined: Sun Mar 24, 2013 4:48 pm
Location: Ohio

Re: Riddleyo's 1986 GTS 20V

Postby riddleyo » Fri Dec 26, 2014 7:00 pm

Grant wrote:Hey nice work cleaning everything up! I'm just about to start cleaning up my gas tank as well.

Why did you paint the interior bits? Were they a different color? You should post a before/after interior when you finish. :)


Thanks Grant. I'm pretty jealous of your clean up job on your hatch!

Unfortunately, I don't have any before interior pictures because I ripped out all the "racing" junk as fast as I could (harness bar, sweaty harnesses). Then the mouse incident happened and I ripped out the rest of the interior in disgust before I could snap pictures. I picked up that passenger kickpanel cover over the ECU from the junkyard - it was maroon. The rest of my interior was a faded black. Here are some before pics of that kickpanel cover. I also added some closed cell foam to the back to recreate the nasty jute padding for insulation. Also hot glued the small cracks to stop them from getting bigger.

Image

Image
Last edited by riddleyo on Sun Dec 28, 2014 8:02 pm, edited 1 time in total.

-zenki-
Club4AG Enthusiast
Posts: 97
Joined: Tue Jan 22, 2013 11:22 am

Re: Riddleyo's 1986 GTS 20V

Postby -zenki- » Sat Dec 27, 2014 8:27 am

Nice job on saving another one. The PO seriously fucked up that enginebay, no paint prep whatsoever, but it's in good hands now. 8-)
FLAWLESS VICTORY
Image

InfiniteMotors
Posts: 1
Joined: Fri Jan 11, 2013 10:09 pm

Re: Riddleyo's 1986 GTS 20V

Postby InfiniteMotors » Sat Dec 27, 2014 8:52 pm

Awesome work and dedication... And out in the cold too? Makes me feel spoiled since I don't even use my garage anymore, but quite inspiring. Maybe I'll do something useful too!