From shell to DET. (September)

S13562
Club4AG Regular
Posts: 32
Joined: Mon Aug 19, 2013 12:11 pm

From shell to DET. (September)

Postby S13562 » Mon Dec 09, 2019 8:40 pm

Quick intro; my names steve and I own an 85 coupe gts. I’m a Southern California local moved to the Bay Area for a couple years then made my way back down to LA. Currently a college student working full time I spend some of my free time building my ae86. This is now my fourth project and probably my last. I’ve owned a 240sx hatch, back in high school before they became as desirable as they are now which got t boned and totaled. Then I owned a bugeye that i also sold. While up in the bay I picked up a 1uz Cressida (the second cressida i had owned), had to get rid of it shortly after coming back to LA. I didn’t have time to work on both the 86 and the Cressida so one had to go. For as long as I can remember the 86 was always my dream car. lol I just never got an opportunity to get one at a reasonable price until about 4 years ago. I sold my bugeye before moving up to the bay to focus on school a very depressing time for me as i had done tons of work to that car, but i thought it was time to move on. I was living in the valley at the time 818, when a friend of mine had began the process of parting out his coupe. I was not aware of this until it was too late and the car was parted out to just a rolling shell. Stripped of all its desired gts parts. seats were all gone door cards were gone a few bits and pieces but the it still had the rear end, I knew I had to save it, so with a small portion of the money I got from the Subaru I had once again got myself into a build knowing damn well I would have absolutely no time for it. The car was parked at my parents in Los Angeles days before I was leaving for Oakland. I would then work on the car about once a month when I would come down to visit. i spent most of my time plotting and thinking about i would be approaching the situation. I would spend hours searching for parts and having things shipped to Los Angeles so that when i would arrive i could get to work. And this is where the build begins...
My old cars :(
Image
Image
Image
Image
Image

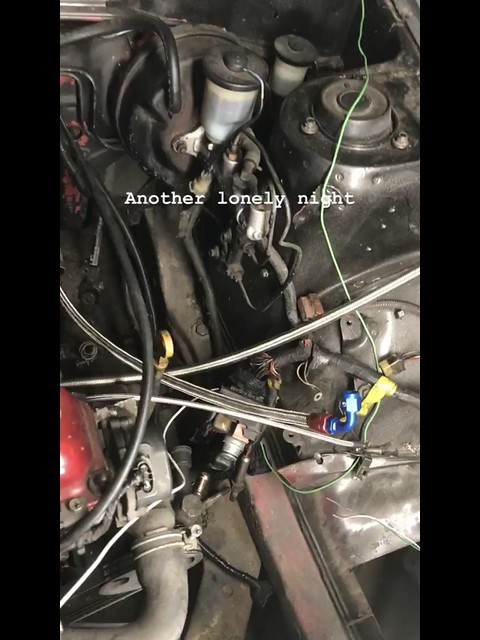
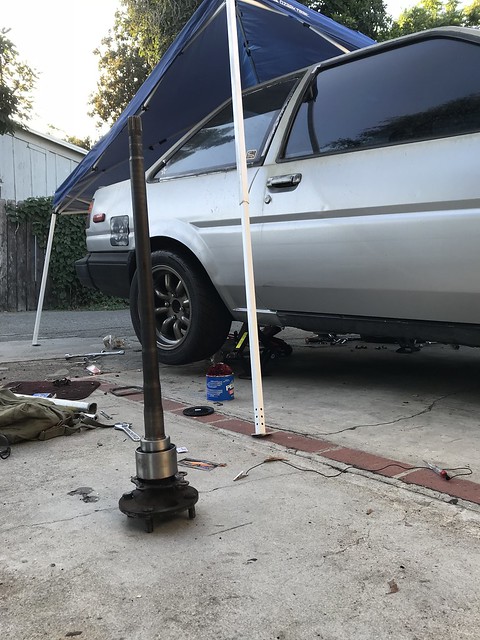
The night I brought her home, i had a friend of mine tow it home for me.
Image
Image

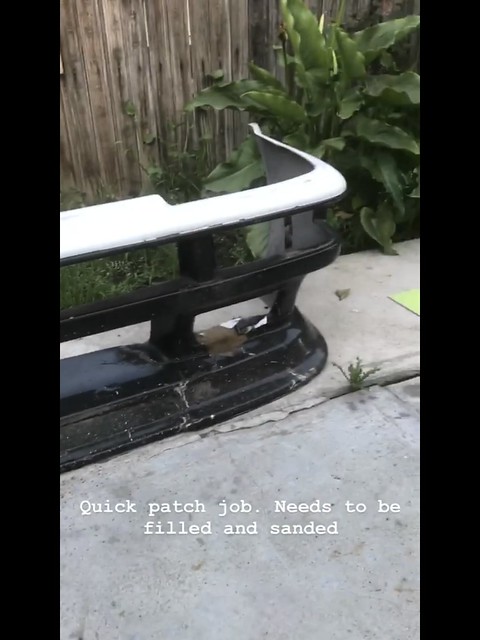
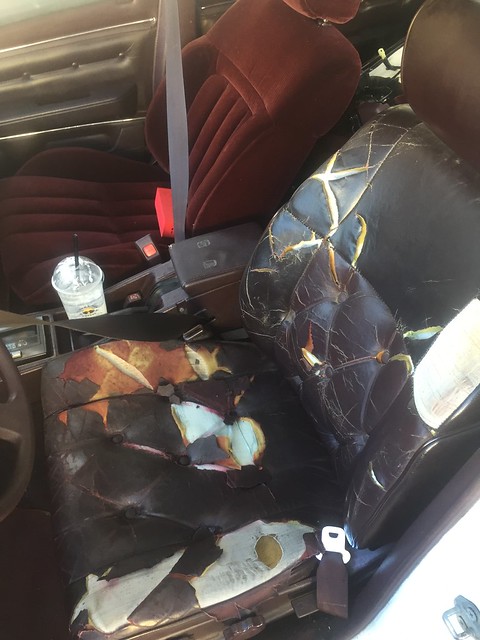
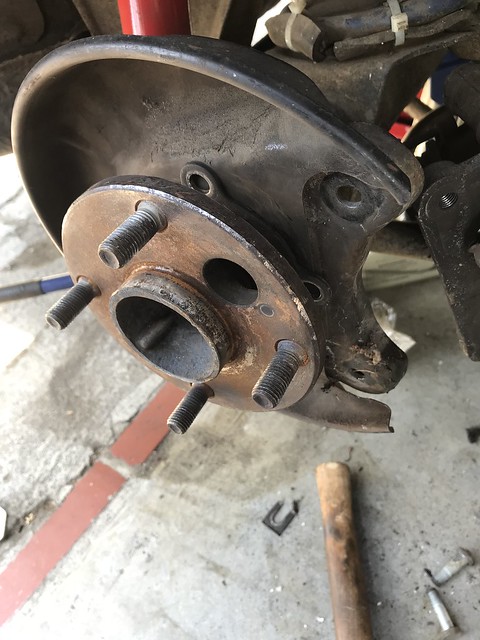
The car was in pretty rough shape. Stripped but Rolling. A blank canvas that I can take in which ever direction I wanted. i knew i wanted to keep it on a budget. with ae86 prices sky rocketing part outs were getting more common but people still want and arm and a leg. I would shop on forums and would jump on opportunities and cheap priced items and little by little the car began taking its original form.
Image

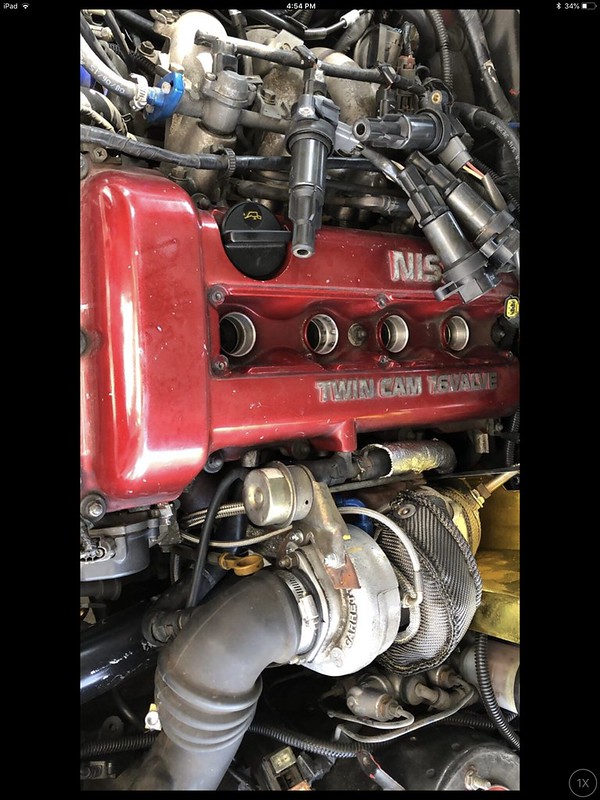
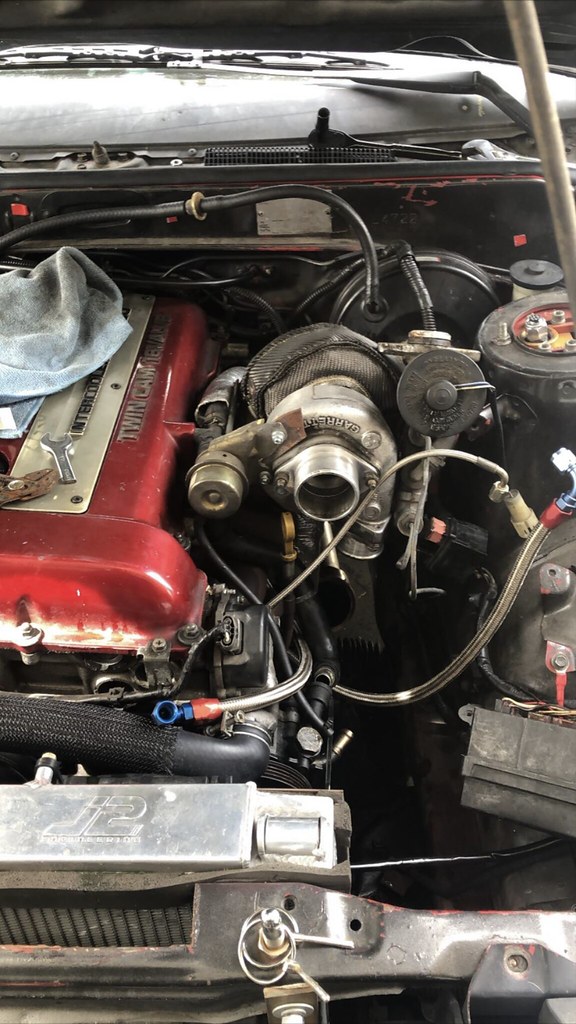
First was deciding a power plant. I wanted to go 4agze but could not find one at the time and was starting to get impatient looking for one. I was in the market for anything. 20v silvertop, `blacktop, beams, 2jz sr20. Anything! And I wanted it now but I wanted it cheap.this is where I’m going to lose most of you and that’s fine. A friend of mine had totaled his car and I volunteered to take his swap in exchange for some monies. And just like that the power plant had landed on my lap and it was time to start the build

Image

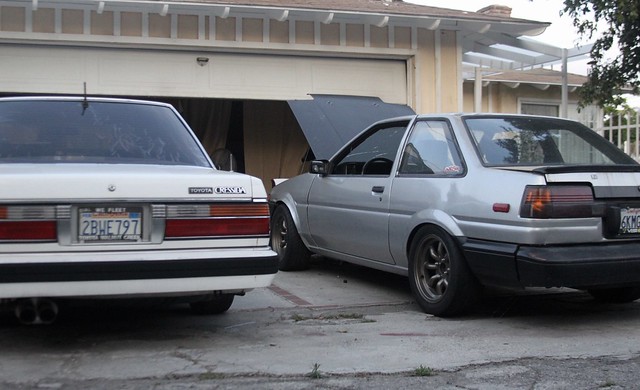
I couldn’t stand looking at the car. And I tend to do things backwards in life so instead of dealing with getting it up and running I decided to wrap it so it wouldn’t be such an eye sore.
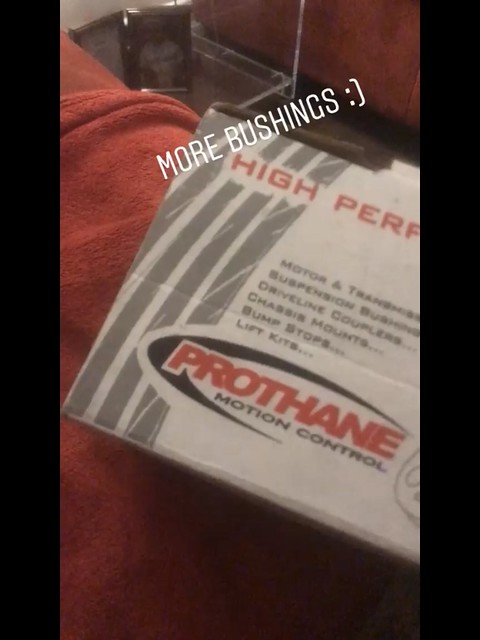
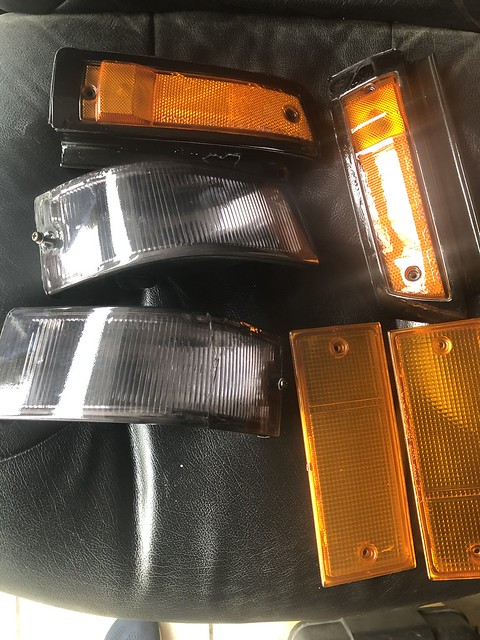
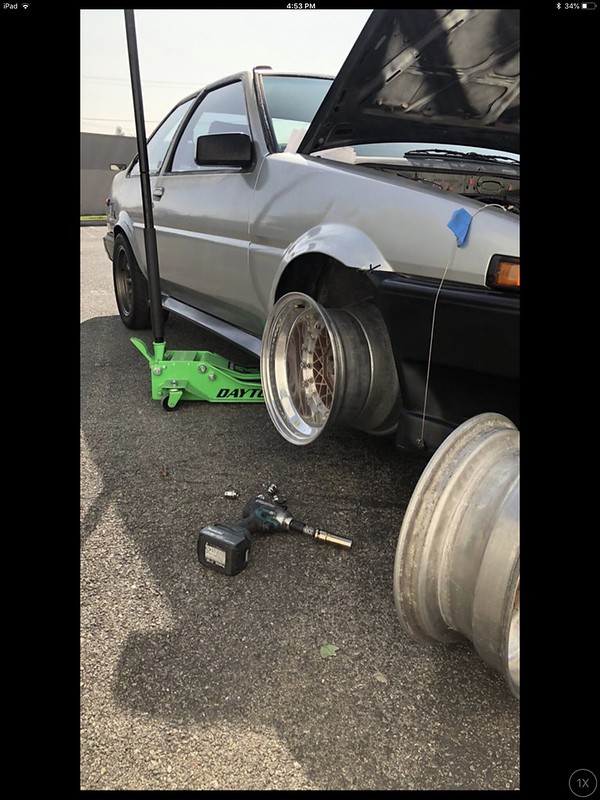
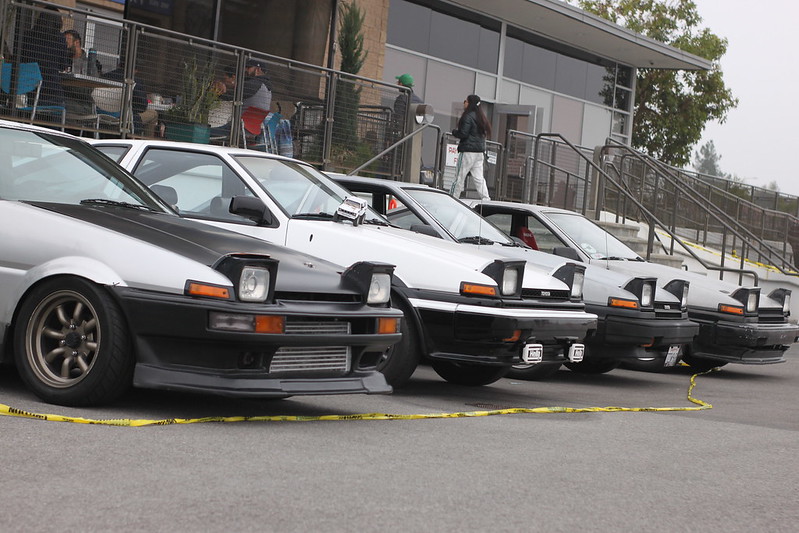
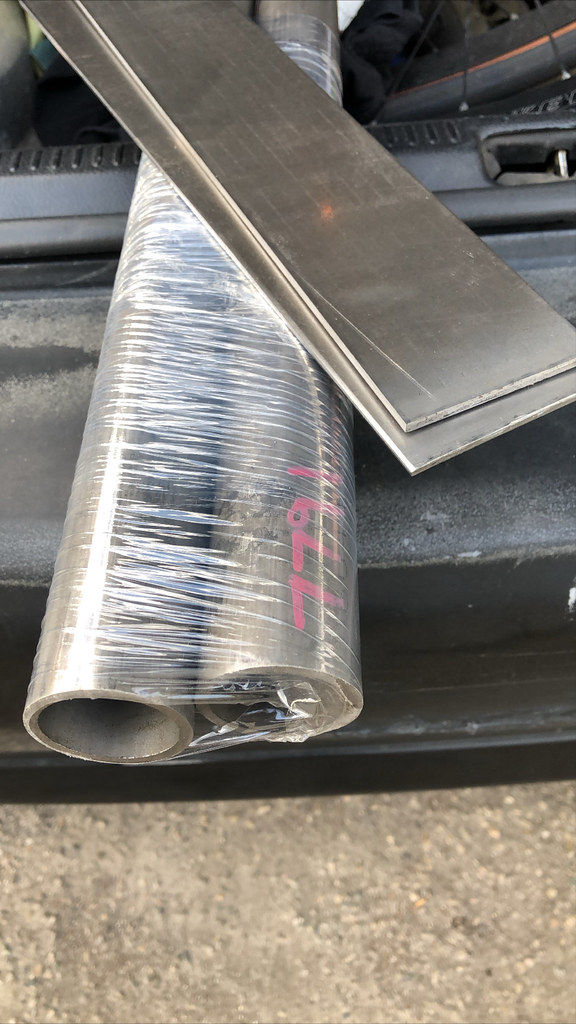
First upgrade were some celica supras and some wrap

Image
Image

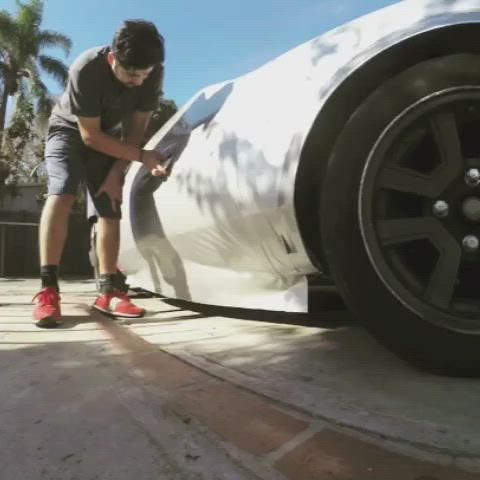
Veryquickly learned that vinyl does not hide any imperfections. also its much easier having another set of hands. laying down the vinyl is easy i had no prior experience and its somewhat forgiving. for the vinyle i used Avery as i had read very good reviews and a local shop in LA called Mclogans had it in stock. The price is about $40-50 to do the hood i ended paying about $240 for the vinyl and was very wasteful with it. The vinyl had air buble release thus making it easy to install. Tools need are a felt squeegee and a heat gun.

Image
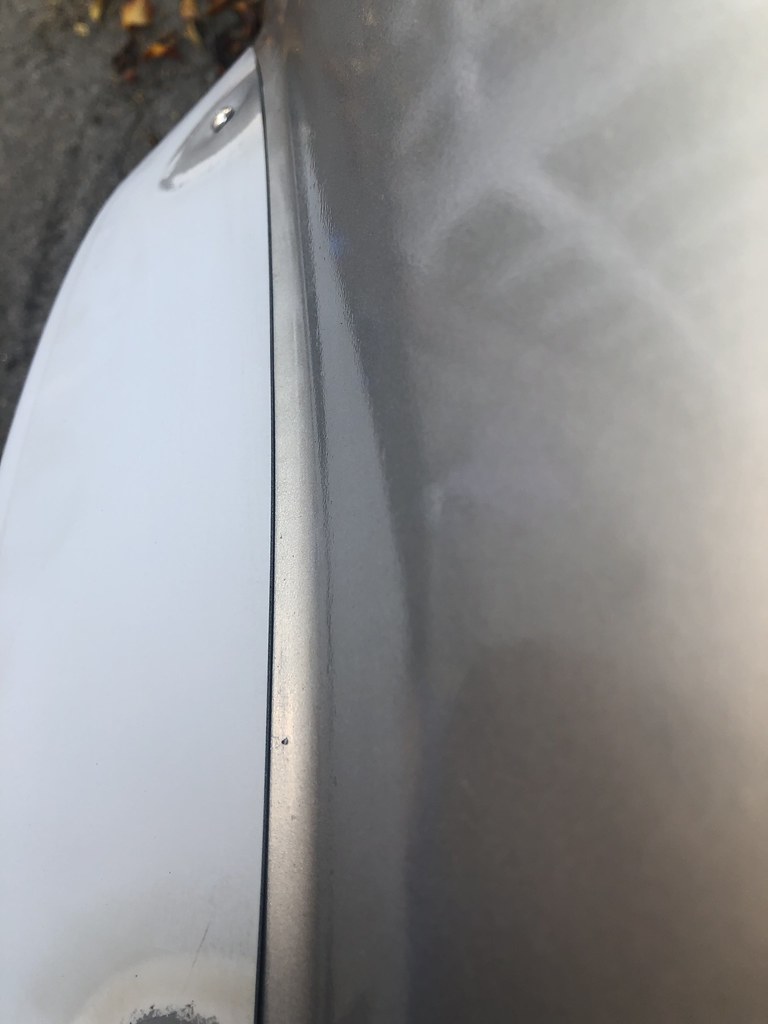
Yes I should’ve done some prep..... fml. the car was flat black so you couldnt see many imperfections but once the gloos silver laid on things started popping out. If i had to redue it i would have sanded it down and rattle canned the old paint to seal it, then apply the vinyl. Of course newer cars dont need to worry about this as their paint is newer and holding up, im just saying you probably dont want to apply it to your chalky paint
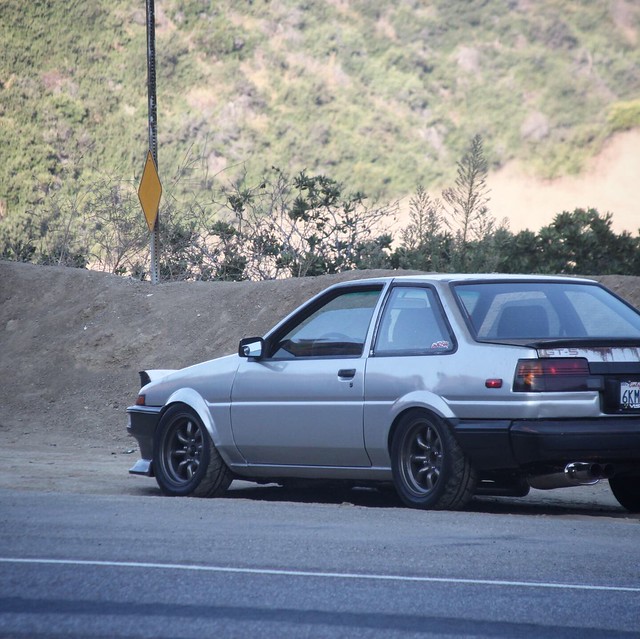
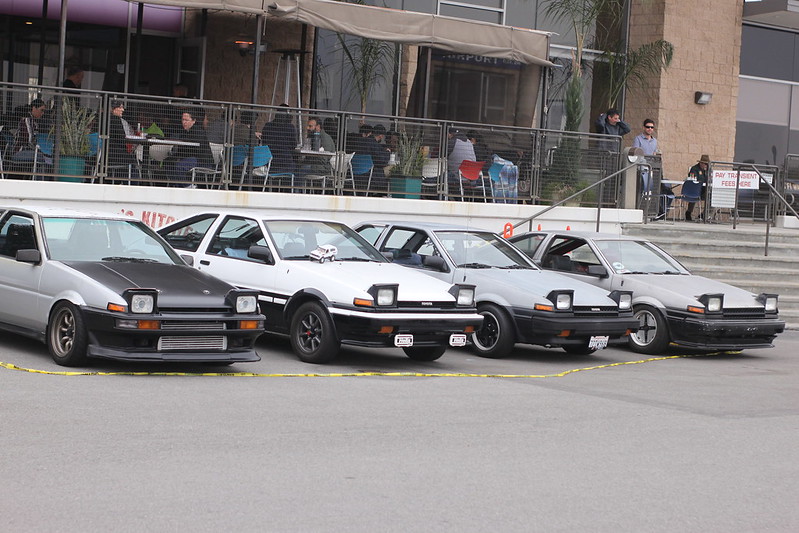
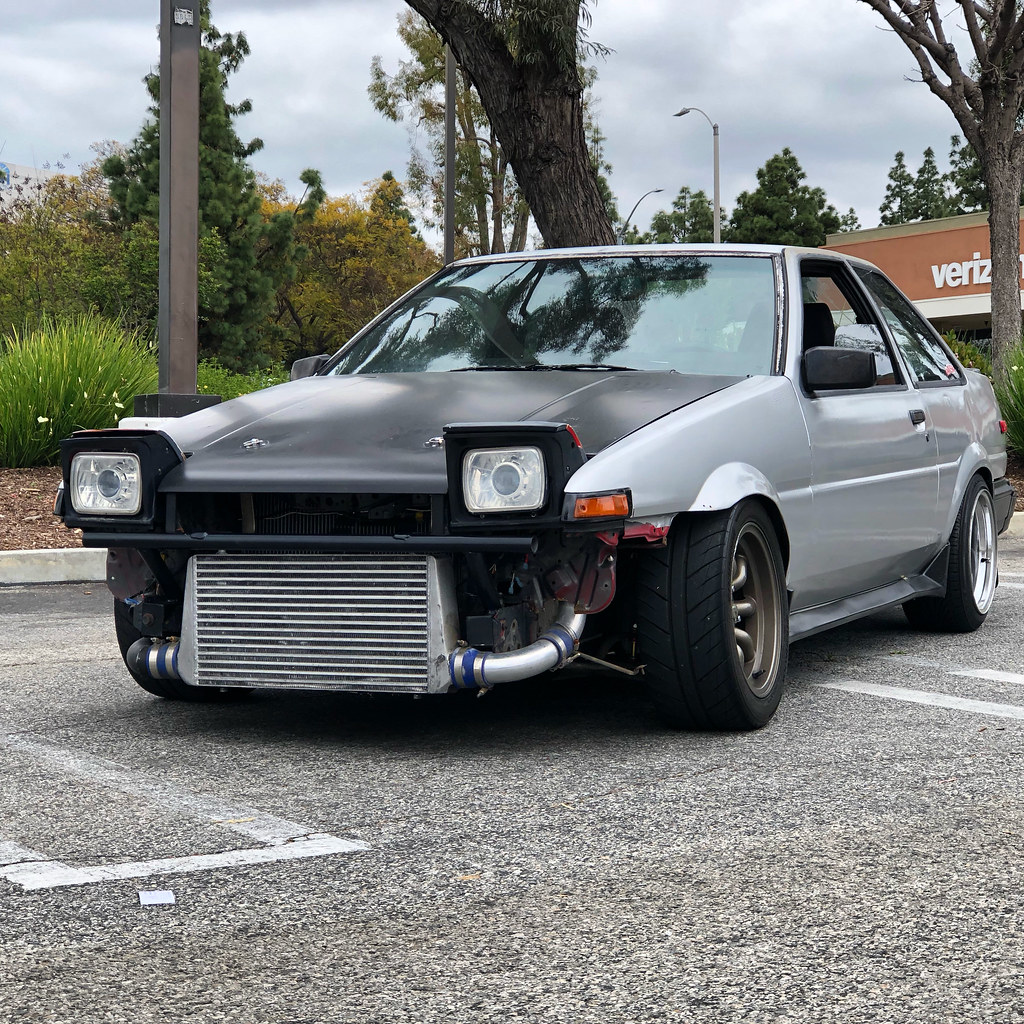
Looks a bit better at least. all one color. Something to keep me motivated

sprayed the wheels with some gun metal to stay busy. would definitely recommend duplicolor wheel coating if your looking for something quick and inexpensive. sanded them down to scuff them up then did a thin coat of primer then paint. i used 1 Can of duplicolor.
Image

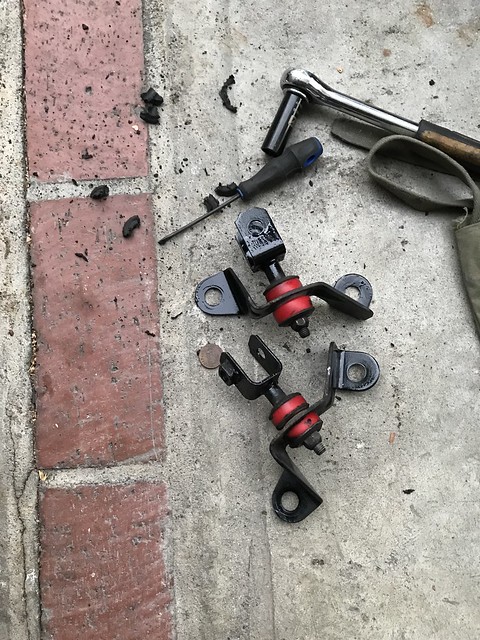
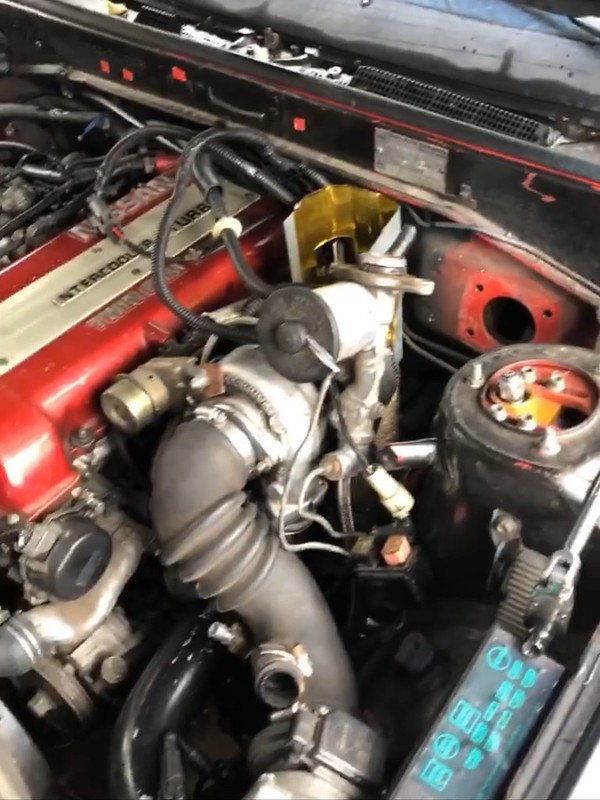
and here we are!!! sr20det ae86. sr86. again this swap happened to fall on my lap while searching for a swap. It came off of my buddies s13 that had just been swapped days prior to it being dropped off the bed of a tow truck while being transported from the shop to his house. He had no choice but to give up on his project that was totaled from the fall and i was able to get a sweet deal. I jumped on the opportunity and days later i had it in my car. I removed the radiator support because I found it would be the easiest way to get the engine in by myself and let me just say. getting the motor in has been the easiest thing Ive had to do to this car.pushed it right in no struggling. i bought motor mounts and tran mounts off an ebay user named dr concept and at first i was very skeptical but they bolted right in and everything lined up.

Image
Last edited by S13562 on Thu Sep 03, 2020 10:38 am, edited 11 times in total.
instagram: ate_six_trueno

S13562
Club4AG Regular
Posts: 32
Joined: Mon Aug 19, 2013 12:11 pm

Re: From shell to riches

Postby S13562 » Mon Dec 09, 2019 11:21 pm

VVV.......CLICK ME IM A SHORT VIDEO.......VVV
ImageUntitled by mxms, on Flickr


I did massive amount of research having to learn both the corolla and the sr20det wiring. I was dreading the wiring as i didn't want to cook my ecu or have the whole car go up in flames. so the car sat for months as i had to teach myself the vehicles electrical circuits. After weeks of reading trying to understand both sides of the wiring, i finally stepped up to the challenge. I did the bare minimum to get the car cranking. I got spark, fuel and the car was running on its own with a few switches, fuses and relays. I ran into a few issues but was able to get most of it sorted out.
I tried running the stock bottom mount turbo set up but clearance was really tight(do able... just tight) with the steering shaft so i had to go top mount which required some fabrication to the turbo( clocking it)
steel braided lines.
a downpipe
motor mounts
Image
I will specify wiring, and any fab work as well as tips and tricks for anyone interested in going the ae86 sr20det route. I am passing down all the info i took from about 6 other forums and will try my best to put it all into this thread.(later in the thread)
Took care of some supporting mods but neglected the fuel tank that was filthy. being on a time crunch heading back up to the bay i slapped in a walbro 255 anyways which ended up getting clogged ( also was running on E) and it burnt out. so I had to do this job twice!!!!!! second time around i cleaned out the tank that was a bit rusty and had some type of build up in it. Lesson learned!
Image
t1automotives manufactures the pumps for walbro. second time around the pump was much more quieter.Yay.

Removed the dash and did a quick patch and flock job.
came out really good for my first time
Image

Image

Image

Image

i got side mirrors and was finally able to take the car out for its first spin around the neighborhood. Unregistered, uninsured, unsure if it would leave me stranded, I took some hot laps around the neighborhood. The car felt SKETCH!! in both a good way and a bad way. the car had sat not running for years prior to me owning it. it went through two owners and did not see the road for about 8 years id say. brakes were noisy, bearing were noisy, there were all types clunking noises from bad bushing to blown rear suspension. There was no way i was going to be taking that thing out again without addressing some if not all of those issues. Again i got a small taste and was motivated to keep going. unfortunately it was time to head back up to the bay area ( shutout the bay area <3)
I realized that the car was going to need more than just engine supporting mods it would need suspension and brakes to deal with the added HP. so the car would sit again until next time......
This would be the last time the car would look like this. It would be receiving a face lift. Id call it stage 2.
Image
instagram: ate_six_trueno

sirdeuce
Club4AG Pro
Posts: 849
Joined: Mon Jan 14, 2013 9:47 pm
Location: Sierra Nevada foothills

Re: From shell to riches

Postby sirdeuce » Tue Dec 10, 2019 5:08 pm

And you put on a dash mat that'll flock up the flocking. Other than that a big thumbs up!
One shot, one kill.

S13562
Club4AG Regular
Posts: 32
Joined: Mon Aug 19, 2013 12:11 pm

Re: From shell to riches

Postby S13562 » Tue Dec 10, 2019 6:15 pm

PART 2. or PHASE 2. or STAGE 2?
order parts!! I didnt know where to start or what to order first. The Bay areas cost of living is very expensive for those of you who dont know, I was tried buying parts every paycheck. I made a check list and started making my way down the list. Some things i needed more than other and some things that couldve waited (aero *cough)
i couldnt stand the front bumper, the front mount did not allow for the front bumper to mount up correctly without me chopping it all up. I knew i wasnt going to keep the stock front so i didnt want to cut it up to just temporally fit it . Instead i would sell it and get an aftermarket one. A beat up front bumper popped up around my neighborhood so i copped it. It was beat. zip tied together , missing chunks. But it was CHEAP AND it was fiberglass, therefor repairable. Picked it up for pennies and got to work.
i ziptied it together the best i could and started patching it up back into shape. reinforced it with a couple of layers of fiberglass Slapped on some body filler then paint and looked decent. %100 better.

Image

for the fiber glass i used sheets of the strand chopped fiberglass. Its is fiber glass random with random strands and not the woven type. only because the bumper itself looked to have used the same material.
First i washed the bumper a day prior to make sure i had a clean surface then let it dry until the next day as i wasnt sure if it was porous and if water would get trapped in there.
I then sanded down the the areas that would be patched
WEAR A FACE MASK!!!! ALSO USE GLOVES AND A LONG SLEEVE. SMALL FIBERS GET ON YOU AND YOU WILL FIND YOURSELF ITCHING FOR THE NEXT COUPLE OF DAYS.
I used masking tape on the outside of the bumper as a template, but also to mask the glass from oozing out to the front of the bumper.
dabbed on a thin layer of resin, let it tack up almost dry. added more resin, then laid a thin layer of fiber to the inside of the bumper applying another thin layer of resin. The first thin layer covered a larger area, i let it dry/ tack up for a couple of hours adding two more layers, these with the fiberglass. each one smaller than the last focusing more around the cracked/broken areas
Image

zip ties holding the two pieces together i later just ripped them after the resin dried

Image

after i removed the tape from the front

Image

Image

ripped the zipties off. just left with a few holes to patch

Image

I wasnt in the market for either a seat nor some wheels. But i had to pick both up before someone else did. Im on a budget but i wont sleep on any good deal.
the seat was a legit sparco pro 2000 that popped up on craigslist at the same time i had just logged on and 30 min later i picked it up dirt cheap for $80. it was in a shop car that saw little seat time.

Image

now that i got that out of the way it was back to my normal scheduling. I scored the Wheels and a bucket up in the bay and couldn't wait to drive back home. My buddy had a front mount intercooler and piping he wasnt using just laying around and ended up donating to the cause(shout out mannY) i used some paint stripper and got rid of the rattle can job.

Image

brake lines were brittle and some bushing were gone. literally gone. 30 years of wear took its toll on them, so steel braided brake lines were ordered as well as some bushing.
Also ordered front and rear suspension,
projectors that i retro fitted into the headlight housing.
and kouki bumper lights.
Phase 2 was on and pop'n

Image

Image

this is what was left of the OE bushings. most of them looked like this, no wonder the car felt so sketch and sloppy. CHANGE YOUR BUSHINGS PEOPLE!!!
30 year old bushing fell apart by taking my fingers to them.
I picked up some prothane bushings did the rears and worked my way to the front.

Image

Image

Image

Ordered some KYB rears and front inserts after reading some mixed reviews. I figured It would be some time before i can really drive/ track the car so i would daily it for a bit with the kyb to get a feel for things. I am still looking into a set of coilovers but these will do for now.

Image

I wired up the bumper lights but i still might switch around their functions, as i dont really like the jdm spec blinkers function. i used some male/ female connector so id be able to switch some things around in the future. As of now i am using the clear corners as daytime running lights along with the inside lights. The middle part of the lights is being used as the blinkers. Wiring was really easy but like i said i wanted to change the functions around.

Image

I ditched the whole oem manifold idea. anyone whos familiar with this swap will know that its JDM spec engine so they dont have to worry about the steering shaft on the RHD. so there is little room there. i wanted to make the turbo easier to access as ill still have to build a downpipe around the steering shaft and having it sit up top would allow for a bit more space to maneuver around it and get the best flow. With doing so i will now have to build a manifold, buy one specifically for the ae86 sr20 swap or buy a top mount manifold and hope it fits in the corolla. I also had to buy steel braided lines which are longer as i wouldnt be able to use the original lines for a top mount application.
Cleaned, prepped and installed the lines as i waited to see what top mount I would be going with.
The turbo will also need to be clocked from its original position.
clocking the turbo is when you spin the turbine and or housing to accommodate the manifold and inlet position, usually done by loosening up some bolts and turning it clock or counter clockwise.
*** it is very important that the turbine housing coolant line faces straight down for plumbing purposes to get the coolant flowing in the right direction.***
being an original t25 turbo the wastegate is bolted to the turbo which does not allow you to adjust it once it has been clocked.
I had to ghetto rig a bracket adapting the original bracket to the original bolts location. pretty ghetto but very practical and functional. i didnt even bother to clean up any of the edges once it was cut.
Last edited by S13562 on Wed Dec 11, 2019 10:19 am, edited 5 times in total.
instagram: ate_six_trueno

S13562
Club4AG Regular
Posts: 32
Joined: Mon Aug 19, 2013 12:11 pm

Re: From shell to riches

Postby S13562 » Tue Dec 10, 2019 6:17 pm

sirdeuce wrote:And you put on a dash mat that'll flock up the flocking. Other than that a big thumbs up!


i tried selling it and no one wanted it *shrugs* ha theyre both holding up still
instagram: ate_six_trueno

sirdeuce
Club4AG Pro
Posts: 849
Joined: Mon Jan 14, 2013 9:47 pm
Location: Sierra Nevada foothills

Re: From shell to riches

Postby sirdeuce » Tue Dec 10, 2019 8:43 pm

In the fiberglass repairs, did you feather the base part, at least to a 10 to 1 scarf? Not many people know to do that, but it makes the repair so much stronger. Composite repairs can be a pain. Masking tape and rubber gloves will be great friends. Oil and grease your worst enemies.

That flocking looks nice, but you can't put anything on if, it just rubs off. At least it still looks better than cracks after the flocking is gone.
Keep going! It's a journey worth taking!
One shot, one kill.

S13562
Club4AG Regular
Posts: 32
Joined: Mon Aug 19, 2013 12:11 pm

Re: From shell to riches

Postby S13562 » Wed Dec 11, 2019 9:49 am

sirdeuce wrote:In the fiberglass repairs, did you feather the base part, at least to a 10 to 1 scarf? Not many people know to do that, but it makes the repair so much stronger. Composite repairs can be a pain. Masking tape and rubber gloves will be great friends. Oil and grease your worst enemies.

That flocking looks nice, but you can't put anything on if, it just rubs off. At least it still looks better than cracks after the flocking is gone.
Keep going! It's a journey worth taking!


im no expert with fiberglass but i did read some forums and used some of the tips. i also watched a few basic tutorials.
Not sure on the terminology but i painted on some resin in the area i would be working on and let it tack up and dry a bit. then added another layer of resin with a sheet of fibers let that soak up and dry for a couple of hours went back repeated the steps focusing more in the smaller reapair area. when it was all said and done it seamed pretty sturdy. i even banged on it with a hammer, i figured it did unbond or crack it was already on my work bench and id just patch it up again/ lol.
i must have gone through about 10 pairs of gloves!! i cannot imagine getting this on your skin!
I was a bit surprised that the tape held up and it didnt react to the resin. i had the plastic cup i was using melt on me luckily i caught it or else things would have got messy

haa damn i might just remove the cover then. its been on for a while now and hasnt damaged the flock YET. so maybe i wont even let it get to that point then.
Thanks
instagram: ate_six_trueno

sirdeuce
Club4AG Pro
Posts: 849
Joined: Mon Jan 14, 2013 9:47 pm
Location: Sierra Nevada foothills

Re: From shell to riches

Postby sirdeuce » Wed Dec 11, 2019 1:01 pm

I'm terrible about things like commenting on composite repairs, for the uninitiated getting the part back into shape is the goal. Don't mean to be an ass about it.
One shot, one kill.

S13562
Club4AG Regular
Posts: 32
Joined: Mon Aug 19, 2013 12:11 pm

Re: From shell to riches

Postby S13562 » Wed Dec 11, 2019 3:47 pm

sirdeuce wrote:I'm terrible about things like commenting on composite repairs, for the uninitiated getting the part back into shape is the goal. Don't mean to be an ass about it.

no offense was taken bro. didnt think you came off like an ass at all.
instagram: ate_six_trueno

S13562
Club4AG Regular
Posts: 32
Joined: Mon Aug 19, 2013 12:11 pm

Re: From shell to riches

Postby S13562 » Sat Dec 14, 2019 9:05 am

I picked up the wheels from a shop in San Francisco i would have never thought id be picking up another car. I met up with Matt who was selling the wheels to find out he was also an AE86 owner. He ownwed a grey 20v coupe on some wide works and impulse auto flares. This has been one of my favorite looking cars since. What shouldve been a quick exchange of cash for the wheels turned into a couple of hours of talking about cars, his ae86 and the bay area. Matt had a small collection of cars (like all of us) but the one that stood out to me the most was his white Cressida that was identical to the one i once owned. it was sitting outside under a tree covered with tree sap and dirt, it had been neglected for a while it seemed. He mentioned it was supposed to be a track car at some point, (thus the 1uz V8 in it) as tags were outdated for 9 years. He popped the hood to a very clean 1uz swap Then offered to turn it on. He grabbed a battery and it kicked right over and sounded like heaven to my ears.
The very next day i found myself driving back to his shop this time was to pick up my now 1uz swapped cressida. I think he saw something in me and how excited i got to see his Cressida that he wanted me to continue its legacy. either way i was now picking up a project in the bay area that would keep me busy for a while.

Image

The car had sat for a while. not sure how often it was moved but tags were out of date 9 years.
The day i took it home i drove the car about 5 blocks and while pumping gas i noticed a coolant leak. FML what did i get myself into. it looked one of the hoses had gotten brittle and cracked and coolant was pissing out of the hose.
I parked the car ran to an auto shop picked up some hoses and clamps and a couple hours later i was on my way again.
not 5 min into my drive i see the car OVER HEATING!!!!! FML!!!!
i thought forsure engine was f**CKed! i popped the hood and couldnt see anything obvious. I had forgot the cressida had pissed out a whole bunch of coolant (DUMB ME) but luckily i was right accross the street from 99 cent store. It took about 5 water bottles to fill her back up
and she would now make her way over the bay bridge into oakland in one piece
Cleaned up the windshield and was ready to go after about a 5 hour hiccup
Image

I got registration and tags up to date after about three trips to the dmv, a few hours learning about californias laws and jumping through some hoops. Finally the car was registered and insured in a couple of months which then became my daily.

Image

car received some small upgrades such as an exhuast, suspension,SEATS, radio and speakers and a steering wheel just to make it a comfy bit stylish daily.
before
Image
after
Image
digital dash(drool)
Image
Image
Image
Image
Image
instagram: ate_six_trueno

S13562
Club4AG Regular
Posts: 32
Joined: Mon Aug 19, 2013 12:11 pm

Re: From shell to riches

Postby S13562 » Sat Dec 14, 2019 9:18 am

Getting back on track it was time to finish installing the rest of the parts I had ordered.

headlights i retrofitted. Temporary brackets to hold up the front mount( until i get a bash bar) lights in and wired. manifold, turbo and turbo lines connected.
front bumper was sanded, primmed and painted

Image

Image

Image

Image

Image

Image

this turned into a whole weekend project. I took about 4 visits to my fabricators shop cutting, tacking, fitting, repeat as the car was not drivable but at last got it to fit:)

Image
instagram: ate_six_trueno

S13562
Club4AG Regular
Posts: 32
Joined: Mon Aug 19, 2013 12:11 pm

Re: From shell to riches (DEC update)

Postby S13562 » Wed Dec 18, 2019 8:42 pm

first time doing bearing with this type of rear end.
shout out to oreilys for their tool loaners. spent an hour trying to get the rear axles out on my own until i decided to stop being lazy and drive over to grab an axelpuller which is just a slide hammer. I got it off in 5 min. the first side took me a couple of hours but the next side was much quicker nothing much too it.
Image

Image

Image

Image

I do recommend getting the bearings pressed in. Took them to a shop and they chaeged me $10 each side.

Image

before front coilovers

Image
instagram: ate_six_trueno

S13562
Club4AG Regular
Posts: 32
Joined: Mon Aug 19, 2013 12:11 pm

Re: From shell to riches (DEC update)

Postby S13562 » Thu Dec 19, 2019 10:01 pm

here she is!..
I got the front coilovers installed and took her out for the first time since some small upgrades. car feel a lot smoother and much more responsive.
very happy with the way it feels.
i am thinking about upgrading to rx7 front calipers. has anyone ran them with the stock booster or would that need to be swapped out to. Im worried about fitment as the turbo has things tight on that side.

Image

Image
instagram: ate_six_trueno

aukword1
Club4AG Expert
Posts: 485
Joined: Fri Dec 06, 2013 6:03 pm

Re: From shell to DET. (DECEMBER UPDATE)

Postby aukword1 » Fri Dec 20, 2019 7:43 am

looks good man! Also, regarding the brake booster you will be fine running it with the rx7 calipers. I run the stock booster still with the biggest wilwood kit that T3 makes just fine.

S13562
Club4AG Regular
Posts: 32
Joined: Mon Aug 19, 2013 12:11 pm

Re: From shell to DET. (DECEMBER UPDATE)

Postby S13562 » Fri Dec 20, 2019 10:20 am

aukword1 wrote:looks good man! Also, regarding the brake booster you will be fine running it with the rx7 calipers. I run the stock booster still with the biggest wilwood kit that T3 makes just fine.


Thanks! this build thread makes it look easy but its been along time coming.
Good to hear. ive been looking into that wilwood. what wheels are you running and what specs>???
instagram: ate_six_trueno

S13562
Club4AG Regular
Posts: 32
Joined: Mon Aug 19, 2013 12:11 pm

Re: From shell to DET. (DECEMBER UPDATE)

Postby S13562 » Thu Jan 09, 2020 8:52 pm

First drive out on the highway, made it to long beach.! I checked out a small cars and coffee type meet out in Long beach. Junipero beach Shore shifters, last sunday of every month. I really just needed an excuse to go to the beach, this was now the corollas furthest trip.I had fine tuned some things in the wiring, suspension and interior. I installed most of the dash parts and got everything bolted in. I was a bit nervous but a couple miles down the hwy i got curious and finally was able to open up the engine. WOT felt great, I thought what sketchier way to see if the cars going to hold up. Made it in one piece!
Image

Hoonigan meet a couple of weeeks ago. Was a bit nervous since my wipers are not wired in yet, i cruised for a bit. Here are some of my favs

Image
Image
Image

im a sucker for FC if anyone wants to trade lmk.

Image

A hatch and a cressida
Image

glad i came across these. they still look a bit period correct i think.

Image

still dealing with the small things but were getting there.

Image

Image

Cleaned up the front end, sanded and cleared the lenses. I smoked the corners since im running them as day time running lights. Not really noticable when theyre lit but diffuses the light just enough. Perfect amount of smoke tint, using it on my is300 tails and they also look great. will post pics later.
before
Image

Image

That drip
Image

Image

Image
instagram: ate_six_trueno

User avatar
Jayrdee
Club4AG Expert
Posts: 367
Joined: Tue Mar 21, 2017 8:25 am
Location: Lexington KY

Re: From shell to riches (DEC update)

Postby Jayrdee » Fri Jan 10, 2020 9:39 am

S13562 wrote:here she is!..
Image

Image


DUDE! NICE!

Just read the build thread from start to finish. Love it!
[I have no idea what I'm doing]
_____________________
instagram: @dacobjurbin

S13562
Club4AG Regular
Posts: 32
Joined: Mon Aug 19, 2013 12:11 pm

Re: From shell to DET. (FEBRUARY UPDATE) pics tonight!

Postby S13562 » Mon Mar 02, 2020 11:02 am

February was a bit slow as far as getting anything done on the corolla. I started school again and told myself I will only focus on the car 1 day out of the week. The cars been holding up very well and i have been enjoying it 3-4 times a week. I adjusted my coilovers and added some spacers inside of the strut housing and got rid of some play which was causing noise from the strut sitting loose in there. Ive played with the adjustable dampening a bit and im really liking the firmer feel. Id recommend KYB adjustable struts front and rear for daily/ semi aggressive driving. The car hasnt been out on the track but i do get around to some back roads and do not have any complaints about this setup. The setup is camero rears agx( 743019 KYB) with trd blues and mr2 agx (765015 KYB) with t3 springs and adjustable perches. You cannot beat the price of this setup and the car feels very well balanced.

Image

refitted and made some adjustments to the down pipe. i had hammered in the last one due to fitment issues and me being inpatient. I installed it anyways and the car was rattling from the downpipe hitting the body. This fixed the issue.
do it right or do it twice... I got it rewrapped and slapped it back in

Image

Everything was fine this month until about a couple of weeks ago while out driving I lost the brake booster. The peddle had gotten really stiff on me and it felt as if the car was shut off. Great! luckily i was pulling up to a red light and was traveling at lower speeds.
I headed to the junk yard the following week and snagged one out of a tercel.
SR20det/ 20v/ beams/ any other swap people! yes it is drop in and more compact however its a bit wider than stock. My car is a puzzle that has been pieced together working around existing fitment issues. keep this in mind if you trying to go this route. Removing the stock booster was fast and easy but reinstalling the now wider booster required me to also removing the downpipe to get it bolted on. You will have to adjust the brake light switch, i just removed a 14mm nut and that did the trick. Luckily the downpipe cleared and the brake peddle feels 10x better now.

Image

Image

Image


I've been shopping around for new/used wheels for sometime now. buddy of mine had some 15s that i will be rebuilding and widening soon. cleaned them up to get an idea of what they'll be looking like.
these are flipped. 15x6.5 cleaned them up to get an idea on fittment. Looking to rebuild with about the same amount of lip, which should leave me with 15x10. still decided on color and finish

Image

Image


Image


getting quotes on parts/rebuild love20bee gave me a taste of what it can look like.. DRool* they had some celica supras they were building and those things looked tits!

Image


Image


ive been watching youtube videos of people using tablets as race displays/ dash displays and was able to piece one together and wire it up. i was originally interested in using a raspberry pi or an arduino but to be honest i know nothing about writing code or programming. I tried watching a few tutorials but decided to go another route. here it is mounted and wired in.
Glare is a bit visable from the picture. I will be installing an anti glare screen protector which should help out a bit

Image


Image


Finally replaced the spark plugs i assume the old ones were probably never changed but who knows. I went a step colder and shes purring now...

Image


got together with some ae86 owners last Sunday of the month of January at the el monte airport. originallly a VW meet, AE86 were allowed access Anyone recognize any of these?


Image


Image


Image
instagram: ate_six_trueno

S13562
Club4AG Regular
Posts: 32
Joined: Mon Aug 19, 2013 12:11 pm

Re: From shell to DET. (FEBRUARY UPDATE) pics up!!

Postby S13562 » Thu Mar 05, 2020 10:57 am

Here we are today.
I have no idea what sides skirts these are and apparently i have them backwards. i have the passenger side on the drivers side and drivers on passenger but they looked to have fit better this way.

I will be posting more pictures this weekend of some loose ends, interior and other random things that still need to be worked out

also follow my Instagram. ate_six_trueno for the behind the scenes stuff

Image

Image

Image

Image

Image
instagram: ate_six_trueno

S13562
Club4AG Regular
Posts: 32
Joined: Mon Aug 19, 2013 12:11 pm

Re: From shell to DET. (MARCH MADNESS)

Postby S13562 » Tue Apr 21, 2020 11:03 am

MARCH MADNESSSS.
The ae86 has been driving like a dream. Ive started to daily it and its really enjoyable with less traffic out on the road due to COVID19. Fortunate to still be working during these times, but i was able to take a week off and just chill. I took the time to knock out some small details on the corolla.
I had been driving around with no radio, using a UE BOOM portable speaker, so I decided it was finally time to install a radio. nothing fancy just bigger than stock speakers up front and in the rear. I ended up using the stock wiring. It was cut up from previous owner but after a couple of hours with a voltmeter i had labeled everything and wired it in. I took advantage of having some of the panels off and installed some sound deadening. I did the rear deck where the speakers mount. behind the rear panels as well as the doors. i tried not to go over board just added a few strips as ive read its plenty. The sound barrier made a huge difference in the tin can.

I picked up a rear deck panel which had seen better days. the plastics were still in good shape just really faded. I sprayed it with fabric and plastic paint almost looks brand new. Also made a rear /seat panel to cover up the rear seat to trunk opening as I am not planing on running rear seats.

[url=https://flic.kr/p/2iT563d]Image

[url=https://flic.kr/p/2iT55Tf]Image

Ive been re routing wiring in the engine bay trying to clean it up a bit. I got rid of the coolant temp sensor that was located on the coolant hose and replaced the whole hose with a much neater looking one. Srt-4 hose was the perfect solution for a SR20det to ae86 radiator.
replaced turbo manifold gasket.

[url=https://flic.kr/p/2iT3wdr]Image

[url=https://flic.kr/p/2iSZERG]Image

[url=https://flic.kr/p/2iSZF26]Image


I installed a JEGS adjustable fan temperature switch Part Number: 555-52125. which will kick my fans on at the desired temperature i choose. The fans are no longer running at all times and are working perfectly fine

March and April California received a few storms which had reminded me that my windshield wipers did not work. I had to make a harness and wired them up fairly easy.
looks like I have both Zenki and Kouki plugs for whatever reason..

[url=https://flic.kr/p/2iT3w98]Image

[url=https://flic.kr/p/2iT55Tk]Image

four blue wires.

[url=https://flic.kr/p/2iT3wcV]Image
picked up some new wheels.... 15x9 with some rubber bands that just love to spin.... not sure why i picked these up as im currently rebuilding some but ohwell.

[url=https://flic.kr/p/2iSZEWm]Image


With the front mount intercooler in the way i had to get rid of the front bumper support and currently had no type of support up front. I was doing some hard driving on some back roads adjusting dampening on the car but the front end was feeling loose/ sloppy. Possibly because there is nothing linking the front rails together as the oem bumper support would. I might be in my head but it was feeling sloppy, not as rigged as it can be. I finally decided to build some type of support assuming that linking the front rails might help tighten things up. will also help me sleep better at night knowing that there is at least some type of support/ protection up front. I picked up some 1.5 in tubing measured/ fabbed up some brackets and made a bash bar that will support the fmic, bumper and headlights. mounted it in as well as a front strut bar and together i can definitely feel a difference.

[url=https://flic.kr/p/2iT5621]Image

[url=https://flic.kr/p/2iT3w7e]Image

[url=https://flic.kr/p/2iT3we8]Image

[url=https://flic.kr/p/2iT3w7K]Image

[url=https://flic.kr/p/2iT3w4U]Image

[url=https://flic.kr/p/2iT3w5k]Image

[url=https://flic.kr/p/2iT3w1N]Image

[url=https://flic.kr/p/2iT561V]Image

[url=https://flic.kr/p/2iSZEWM]Image

[url=https://flic.kr/p/2iSZEK4]Image


4 pot fc calipers came in the mail. I just need to order adapters now.

[url=https://flic.kr/p/2iSZENf]Image


as soon as the wheels get built the car will be heading in for either new paint or new wrap. hopefully by mid year.
instagram: ate_six_trueno

S13562
Club4AG Regular
Posts: 32
Joined: Mon Aug 19, 2013 12:11 pm

Re: From shell to DET. (MAY DAYS)!!!

Postby S13562 » Mon Jun 08, 2020 9:40 am

The month of May had been slow. Been searching paint brands and colors for the 86. I Still haven't decided on a color, or whether I want single stage or BC/CC or a rewrap. The Car was originally red so im leaning towards that direction but The thought of just removing the wrap..... -_____- Yea maybe the silver isnt that bad for now..... I Havent tried removing any of it but im already assuming it going to be a pain.....

Been enjoying the 86 as a daily, Car feels great, Cleaned up some of the interior wiring, had to turn the boost down due a a faulty boost gauge so playing it safe for now. I Havent wanted to start on install of the brakes because Ive been enjoying the car too much. I Know as soon as i start the install im going to be opening a whole new can of worms. School has also taken much of my time so i put a pause on the car and parked it for a couple of weeks.
Meanwhile the mazda 4 pots were sitting in the garage. I washed them, sanded and cleaned them ( took me about a week since "I wasnt supposed to be working on my car". couple hours a week to unwind from school work aint going to hurt no one but my GPA). Prepping them getting them ready for paint.

Image.


The following week a few coats of primer and paint went on.

Image


Image

Image


The brakes sat in the garage newly painted for another week or two before I finally decided to install them.

Image


difference in size. mini cooper brakes have to be redrilled to bolt on to the hub. drilled them myself using old disc as a template

Image

driver side went on first. completely bolted it up and realized these disc were passenger side. disc are directional you can tell from the direction of the grooves. ended up just switching hubs from the passenger side


Image

here they are reinstalled :) fit like a glove. Had to install the ssr unpront because rewinds did not fit. now it was time to do the passenger side.....

Image


Just as I figured... whatever can go wrong will go wrong..... driver side went right on really straight forward. Passenger side however, was the can of worms I wasnt trying to open. The spindle appears to be bent and the brake caliper was not lining up. I am really hoping it just this, I was able to track down a front strut housing and spindle which appears to be in good shape. Now comes the cutting/ welding and swapping the struts, coilover sleeves and camber plates then getting ready for the re install. I would like to get the car back on the road this week.

Image

A bit hard to tell from this picture but the spindle is bent. the bottom of the rx7 caliper would rub against the disc since they are significantly bigger. once again i removed the driver side hub and test fitted it on the passenger side just to verify it wasn't the hub. I stared at it for an hour, had a beer, then stared at it a bit longer until i finally admitted to myself that it had a bent spindle and that i would need to track a new used one down.. I tracked one down now it was time to recut, remeasure and reweld.
the right side shows the bent one. left side is new one cut

Image

all that was left was to reweld

Image


Finally it was time to reinstall, bolted everything back up and everything lined up. YAY!

Image

Took it out for a test drive and car felt amazing. The brakes feel great definitely a noticeable upgrade/ night and day feel.
currently running the stock ae86 master cylinder with a tercel booster and some wagner brake pads. I can vouch for this set up

But.......
Again something was up after the install. During the drive there was noise coming from driver side, not too noticeable at first. FML... After a 30 mile trip to long beach the following day the noise got louder. It was definitely the bearing. It would get louder with speed and you can feel a slight vibration.
The noise was not there before swapping all the parts, it turns out that i used the hub/ bearing from the new/used parts I bought which were shot and not the existing hub/ bearing which were semi new. Swapped out the whole hub then it was party time!
instagram: ate_six_trueno

S13562
Club4AG Regular
Posts: 32
Joined: Mon Aug 19, 2013 12:11 pm

Re: From shell to DET. (MARCH MADNESS)W/pics

Postby S13562 » Thu Jun 25, 2020 8:55 am

Looking to get my hands on another pair of ssr dori dori if anyone has a pair for sale.
the corollas current set up. installed is300 wheel studs as they are a bit longer than the corolla, I will be running a 5mm spacer hopefully they can clear the bronze wheels so i can run the matching pair, hopefully 5mm will be enough.

Image

will need to install a visor as a glare protector for the tablet dash. I added a matte clear protector to help with the glare.
The cockpit has been cleaned up a bit. still need to mount some of my gauges, radios hiden in the glove compartment.

Image

front bumper needs to be re aligned a bit, just been llazy to do so.

Image

Image

the engine bay still needs to be cleaned up a bit. need to remove and tuck some wiring. I will be installing a catch can and an over flow tank.
Im currently running no BOV as the car was running rich due to the air being vented out to the atmosphere instead of being recirculated. I have the BOV and piping just need to be welded together.
I would also like to wire up the headlight motors as they have never worked since owning the car.
A new clutch master cylinder will need to be installed as mine started to leak. The leak has went away somehow but issue needs to be addressed.
looking to install a radiator shroud and a hood latch as I would like to get rid of the hood pins, or possibly go flush mounts.
will be changing out the tie rods next as they are feeling very sloppy.


Image

Overall the corollas has been coming together, I will be updating the forum much more as i just got a new camera.
Every small upgrade has made a huge difference. It feels good looking back to when it was just a shell; an endless project that had no light at the end of the tunnel.
I now get to jump in the drivers seat and drive thru that tunnel. All the busted knuckles, Curse words, body aches and money spent has been worthwhile. Not to mention the new people Ive met that have helped along the way <3
instagram: ate_six_trueno

S13562
Club4AG Regular
Posts: 32
Joined: Mon Aug 19, 2013 12:11 pm

Re: From shell to DET. (MARCH MADNESS)W/pics

Postby S13562 » Wed Jul 01, 2020 8:25 am

Have not been under the hood at all lately, instead been behind wheel. I got the wheels fitted and was able to get them to fit and clear the mazda brakes. Wheels would not clear by about 2mm or less? I ended up installing is300 wheel studs which are a tad bit longer and a 5mm spacer and clearance issue was solved.

Image

Image

Image

small learning curve with the new brake setup. The braking response is definitely more aggressive, less effort and great feedback. Definitely caught myself breaking too early and swapping out the 195 for 225 got rid of the understeer. I would eventually like to run a 225 or 205 on a 15x9 or 15x10 so will be playing with over fenders or flares pretty soon.
instagram: ate_six_trueno

S13562
Club4AG Regular
Posts: 32
Joined: Mon Aug 19, 2013 12:11 pm

Re: From shell to DET. (JULY)

Postby S13562 » Mon Jul 27, 2020 10:27 am

Ordered a master cylinder a few months ago with the intent to swap out the brake booster and master cylinder at the same time when the booster had gone out. I had received the brake booster first and wanted to have the car back on the road, so instead i went ahead and only installed the brake booster as I still had to wait for the master to arrive. The master sat in the trunk for a couple of months and I would top off the reservoir every couple of months as it had a leak. It wasnt until the leak had stained one of my shoes that i decided to quit being lazy and finally get the master installed. It would have been much easier to replace both booster and master at the same time but once again I had to get under the steering column to swap things out. Fairly easy to swap, two 12mm bolts and some cotter pins. Will need to bleed the lines still, need to convenience someone to come over for a beer and lend a hand but works for now...

Image

Image


Been dealing with steering slop since first having the car back on the road. The steering has been feeling loose, a bit of slack when turning left and right yet the wheel will remain straight. Id lift up the car and that when you can notice how bad it was. It was very noticeable at hwy speeds, the car would get caught on the grooves of the road and would lose control for a split second. The Inner tie rods were shot looked to have been the originals still. outers were still holding up but decided to replace them both while I was there. Had to order parts twice as they kept sending wrong ones, i think parts may have even been swapped out as the part number was right but not the actual part.
...no more slack :)

Image
you can kind of see how shot out the inners are.....(right side)


Image


Reinstalling the bov this week. A bit Nervous to check the turbo turbine wheel for play, im hoping that not running one for a few weeks didn't damage the turbine/bearings. I will be redirecting and not venting it out to atmosphere which is why i needed to move its location in the first place

Image


Image


also purchased a boost gauge and boost controller that will be installed later this week.
instagram: ate_six_trueno

Toy86
Club4AG Enthusiast
Posts: 63
Joined: Mon Jan 14, 2013 10:19 pm
Location: Tucson, AZ

Re: From shell to DET. (JULY)

Postby Toy86 » Tue Jul 28, 2020 3:03 pm

Wow! Great build. I haven't read a build like this in a long time on here. Keep up the great work, looking forward to more modes that you do on your coupe!

S13562
Club4AG Regular
Posts: 32
Joined: Mon Aug 19, 2013 12:11 pm

Re: From shell to DET. (AUGUST)

Postby S13562 » Tue Aug 04, 2020 1:57 pm

Stripped the carpet out this weekend and gave it a good wash.
also checked out a cars and coffee right down the street from my house on Sunday morning hosted by jdmcarboy. Really good turnout cool people, nice whips and most importantly coffee. I started removing my carpet on saturday then had to install the seats while the carpet was drying. Sunday morning checked out the meet grabbed my coffee came home to reinstall the carpet. very satisfied on how much cleaner the interior looked. Ive tried to vacuum it plenty of times but it would not pick up alot of the dirt/ sand. I was considering buying new carpet but may hold off for a while after this weekend. I got a ton of video on Sunday but did not take any picture myself. Stole this off one of the photographers there. :) his link is below the picture if youd like to check out more pics. I was 1/4 corollas there.

Image[/url]DSC09840 by Kirby Valladares, on Flickr

Image[/url]DSC09831 by Kirby Valladares, on Flickr

Image[/url]DSC09828 by Kirby Valladares, on Flickr
instagram: ate_six_trueno

jinx
Club4AG Expert
Posts: 334
Joined: Fri Jan 11, 2013 10:20 pm

Re: From shell to DET. (AUGUST)

Postby jinx » Tue Aug 18, 2020 5:10 pm

kudos... hella cool thread. Straight to the business ;)
Did you get the tablet dash working ?
Where you get your aluminum wheel widening and custom work done ?

S13562
Club4AG Regular
Posts: 32
Joined: Mon Aug 19, 2013 12:11 pm

Re: From shell to DET. (AUGUST)

Postby S13562 » Wed Aug 19, 2020 10:53 am

jinx wrote:kudos... hella cool thread. Straight to the business ;)
Did you get the tablet dash working ?
Where you get your aluminum wheel widening and custom work done ?

Yes tablet dash is working and functioning! im using an android tablet and nissan has an obd1 reader used with an app called nissan datascan. Pretty much reads the ecu and its sensors. everythings functioning except MPH and i believe its because 1 of two things
1. im using the ae86 cable to the back of the cluster which reads the MPH to the cluster. I had to remove the oem sensor from the sr20det trans inorder to connect the ae86 cable.
2. i had snipped some wires and dont believe i ever reconnected them.

Are you talking about the fender flares...???
fender flares that ill be posting this week are hand rolled steel/ sheet metal. ive just installed them and will be posting picture tis week if that what your talking about. I installed them myself.
stay tuned for the pics.
instagram: ate_six_trueno

S13562
Club4AG Regular
Posts: 32
Joined: Mon Aug 19, 2013 12:11 pm

Re: From shell to DET. (AUGUST)

Postby S13562 » Thu Aug 20, 2020 2:00 pm

Hand shaped fender flares are finally being installed. mocked them up and fitment looked great. Im planning on welding them in and prepping the car for paint. A bit similar to the jdm style flares made of plastic/ fiberglass that a tone of 240sxand 240z run but the quality on these are definitely 100x better. I could just install and paint but ill be tacking them in and molding them flush. Test fit the front marked and cut them.
very satisfied overall. Ill post picture when rears are installed too.
Here they are

Image

Image
Image
instagram: ate_six_trueno

S13562
Club4AG Regular
Posts: 32
Joined: Mon Aug 19, 2013 12:11 pm

Re: From shell to DET. (AUGUST)

Postby S13562 » Fri Aug 21, 2020 6:29 am

test fit making sure everything lined up then marked the locations ill be cutting and drilling the holes for now.
The hole area looks a bit beat up as i hammered down the pre drilled holes so they sit a bit more flush.
Image


fitment is spot on.
Image

Image

Now to remove and get the panels and fenders prepped to tack these on. Still need to cut fenders and rear panels poor 86 the small face lift will be worth it.
The drivers side rear was cut an inch short, its not very noticeable but i will be repairing it this weekend. for reference lets just say this one was chopped a bit higher towards the fuel door. I measured once as i was racing sundown, i thought everything had lined up.. i believe i didn't catch it at the time or may have cut on the wrong side of the tape.
Image
instagram: ate_six_trueno